Hey, lovely bloom! Thanks for wandering into my little paper flower garden. 🌸
Today, I’m going to show you how to make a giant paper daisy that can completely transform a space with just one flower.
As you can see in the photos, the largest daisy measures about 60–65 cm (24–26 inches) across, and the overall height can be adjusted up to about 190 cm (75 inches).
Because of its size, you might think a giant flower like this would be difficult or complicated to make.
But don’t worry. 🌼
With my free step-by-step video tutorial and instructions, even complete beginners can make one.
You don’t need to be an experienced paper flower artist — just follow along, one step at a time.
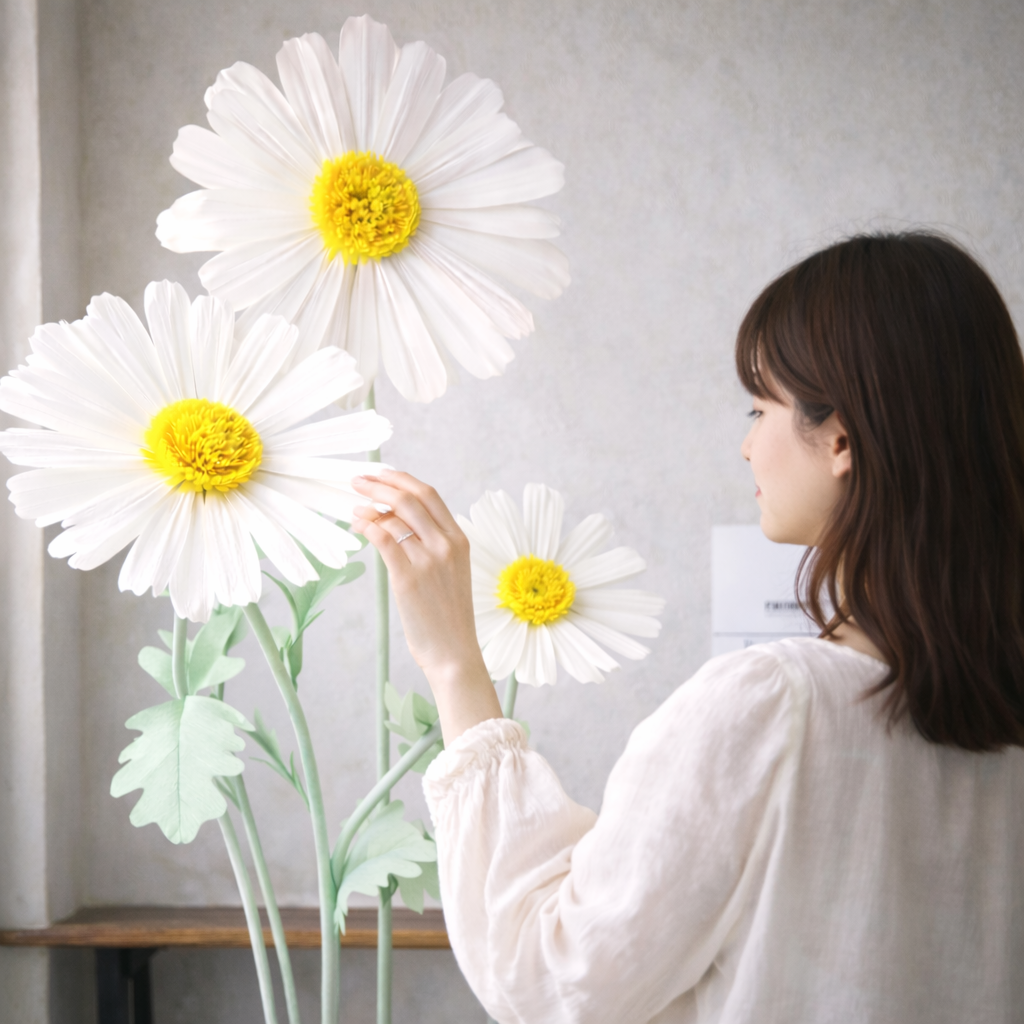
Giant Daisy Project Details
Difficulty: ★★★☆☆
Time Required: About 4–5 hours
Finished Quantity: 3 Giant Daisy Flowers
For beginners, it’s much easier to work on each part separately rather than trying to complete the flower and stem all at once.
I recommend dividing the process into four parts: the flower heads, leaves, stems, and bases.
This makes the project much easier to manage and helps the whole process feel less overwhelming, especially if it’s your first time making giant paper flowers
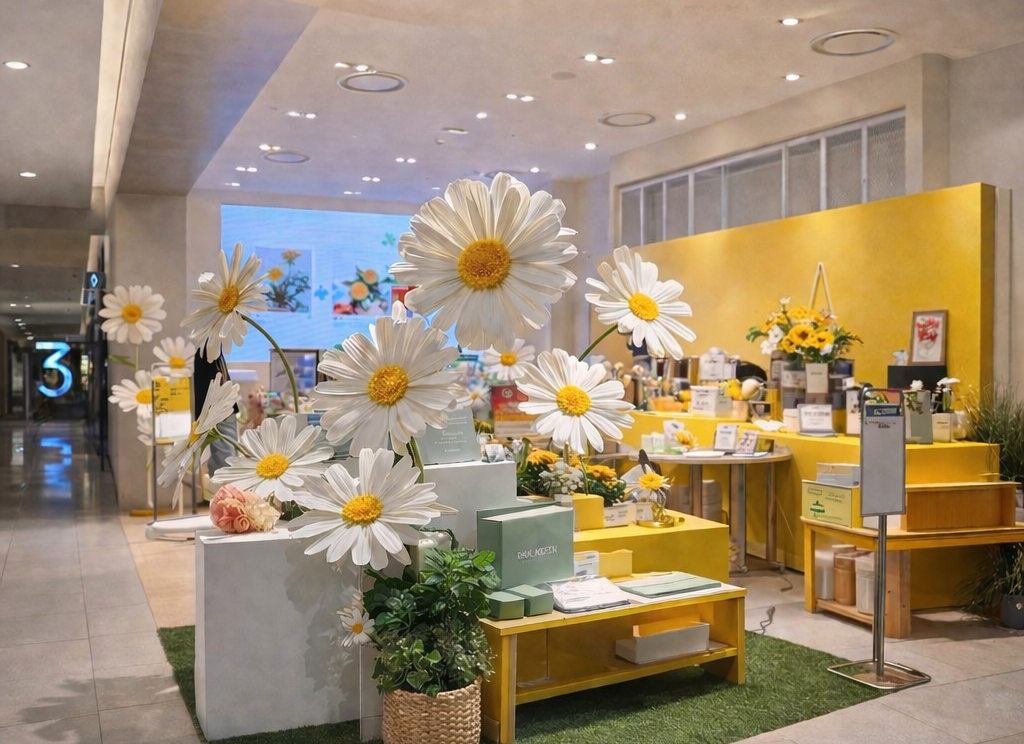
Here is the giant daisy arrangement we’re making today. 🌼
This piece features three daisies in different sizes, arranged at different heights to create a more dimensional and natural look.
The combination of white petals and bright yellow centers gives the flowers a fresh, cheerful atmosphere, making them perfect for a wide variety of spaces.
You can use them for cafés, studios, shops, event venues, exhibitions, weddings, photo zones, and many other decorative settings.
Materials and Structure
For the giant daisy petals, I use two sheets of 90 gsm Italian crepe paper, bonded together with double-sided tape.
This technique helps preserve the soft and delicate look of daisy petals while giving them extra strength and stability.
For the leaves, I use a slightly heavier 140–180 gsm crepe paper, so they can hold their shape more firmly than the petals.
For the stems, I use flexible tubing.
Because the stems can be bent and shaped, you can easily adjust the height and angle of each flower. I then wrap the tubing with crepe paper to give the stems a more natural finish.
Finished Flower Sizes
The finished flower diameters are approximately:
- Large Daisy: 60–65 cm (24–26 in)
- Medium Daisy: 55–60 cm (22–24 in)
- Small Daisy: 45–50 cm (18–20 in)
Since the stems are made with flexible tubing, the flowers can be displayed lower or taller depending on how you bend them.
This makes the arrangement especially useful when you want to customize the height and overall composition to suit different spaces.
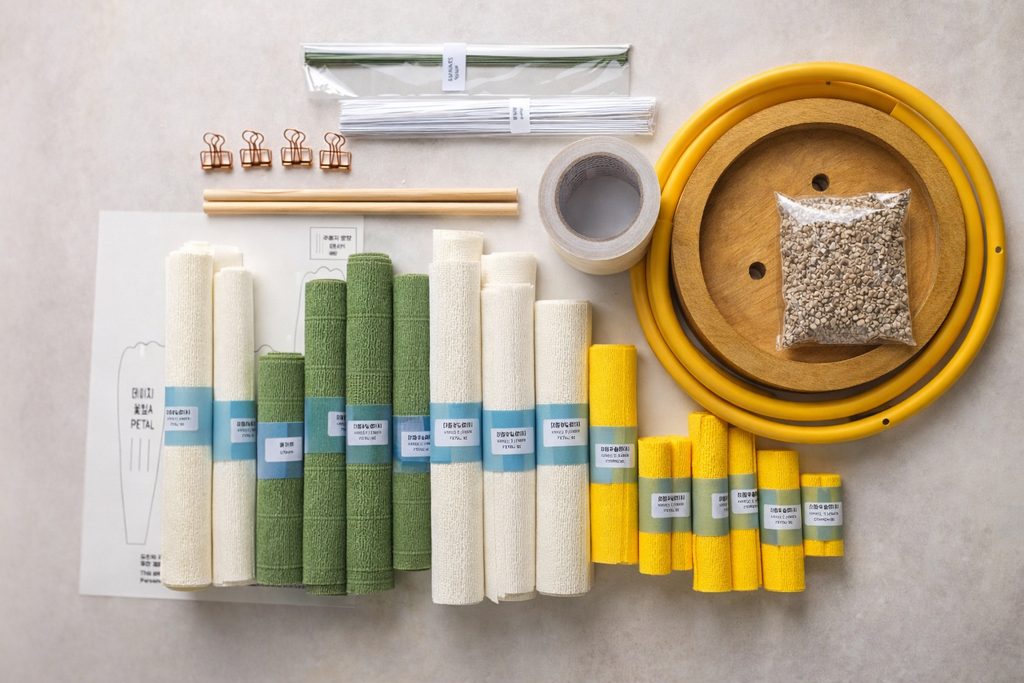
Materials
-Petal and leaf templates
-90 gsm white crepe paper
-140 gsm green crepe paper
-90 gsm yellow crepe paper
-Double-sided tape
-Hot glue gun
-Scissors
-Binder clips
-23-gauge white floral wire
-18-gauge green floral wire
-8 mm wooden dowel
-Flexible pipe
-Gravel
-Base
How to Make the Center of a Giant Daisy
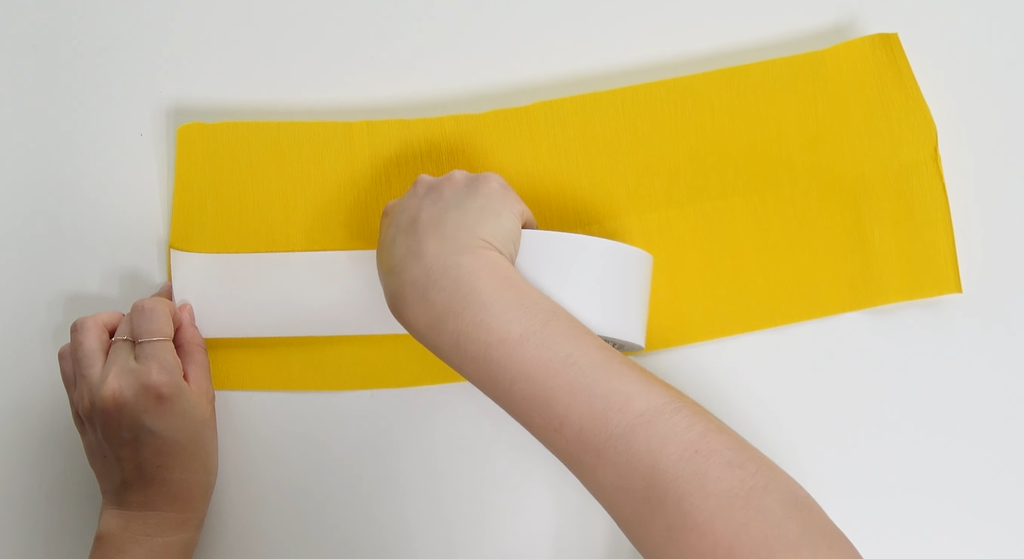
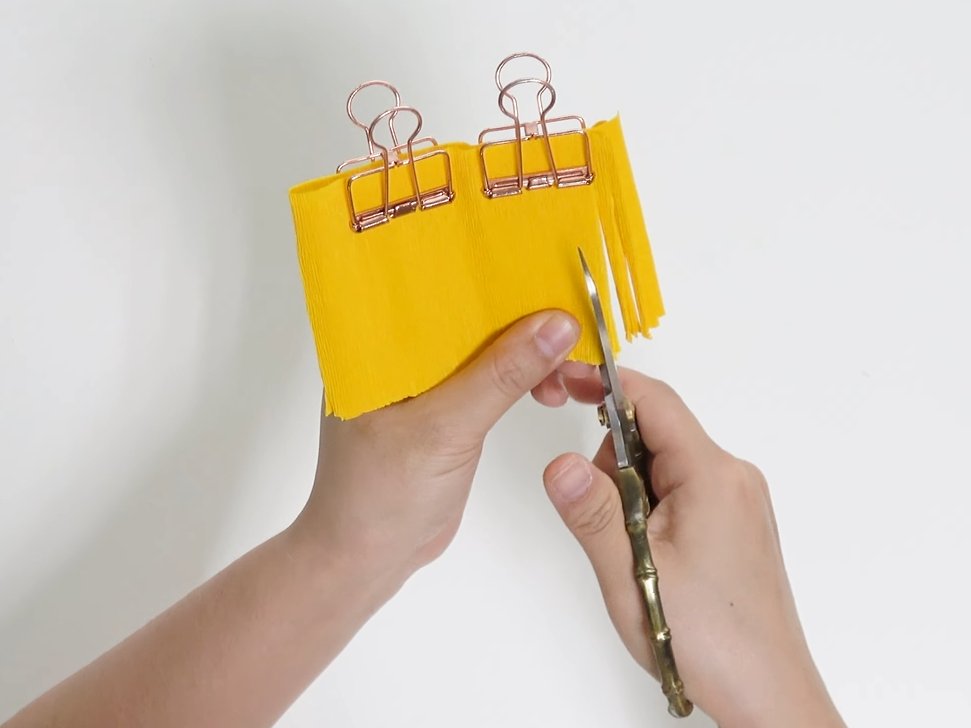
Step 1
Attach double-sided tape to the yellow crepe paper for the daisy center, then fold the paper over and press it firmly together.
Next, cut the folded paper into thin fringes about 2–3 mm wide.
Be careful not to cut all the way through—leave the bottom edge connected.
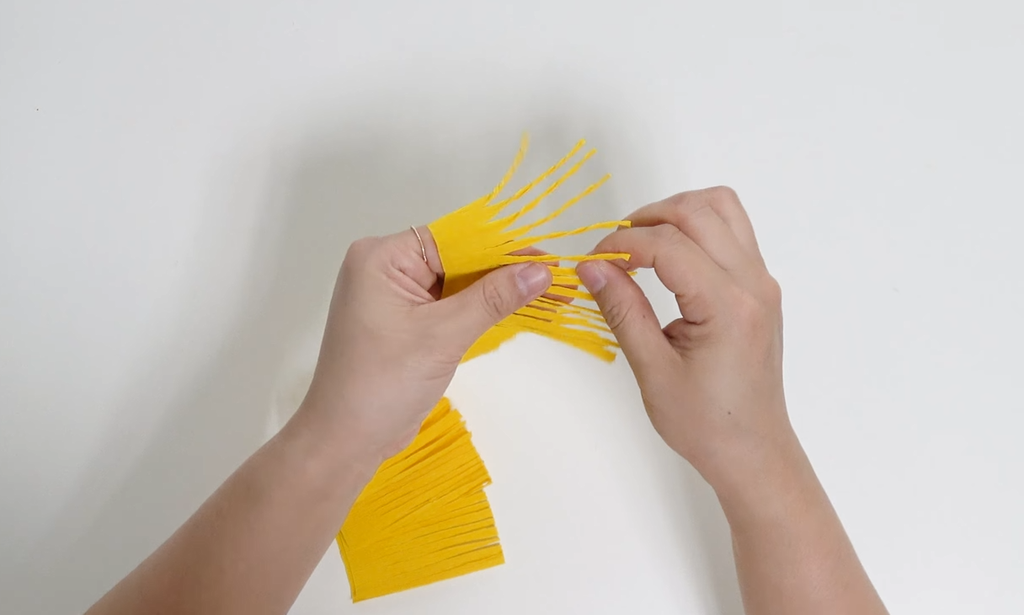
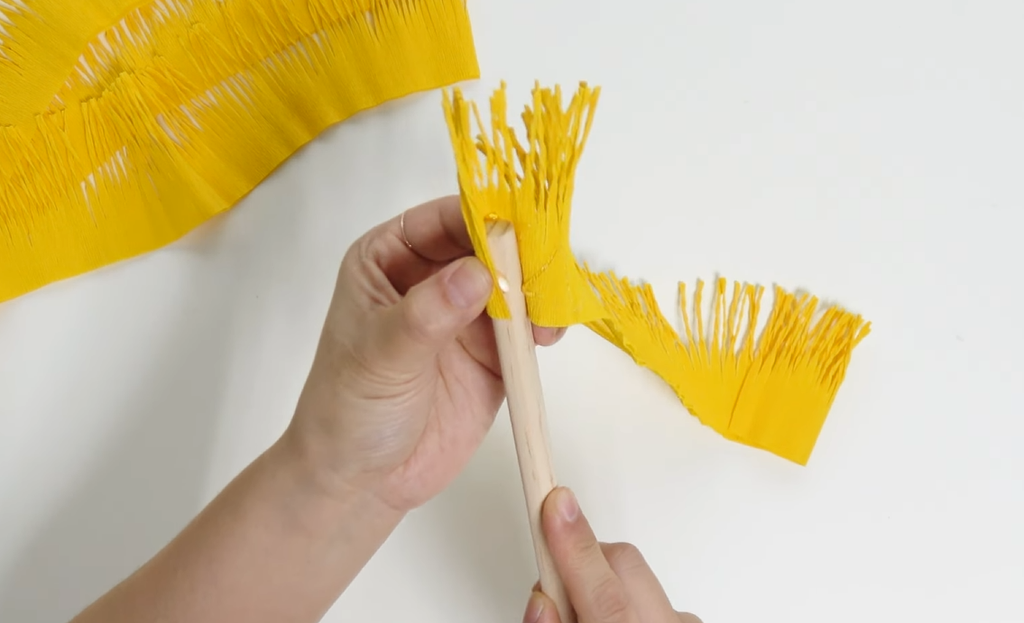
Step 2
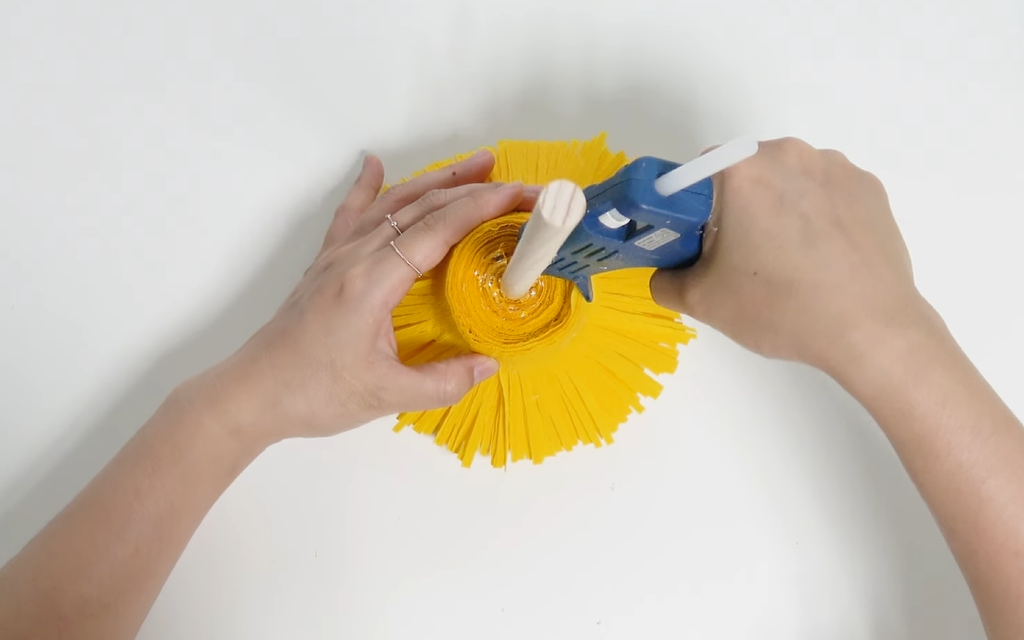
Twist each of the thin fringe strands gently with your fingers.
Next, wrap the prepared fringe around a wooden stick, securing it in place little by little with a hot glue gun.
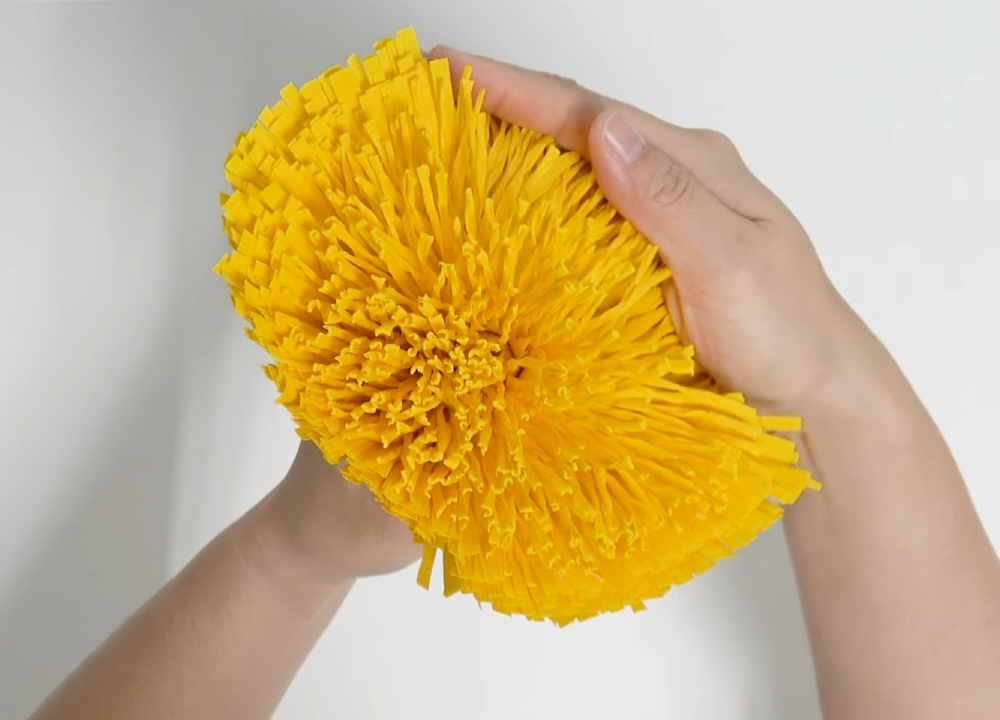
Step 3
Once all the fringe has been attached, gently spread and fluff it out with your palms to shape the daisy center.
Then apply a generous amount of hot glue to the bottom of the center to secure everything firmly in place.
How to Make Giant Daisy Petals
Step 4
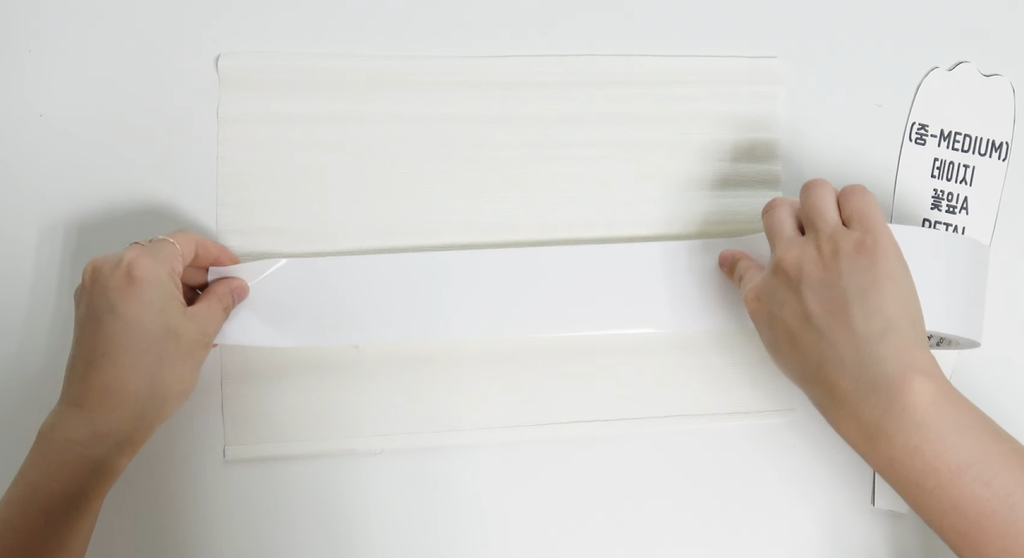
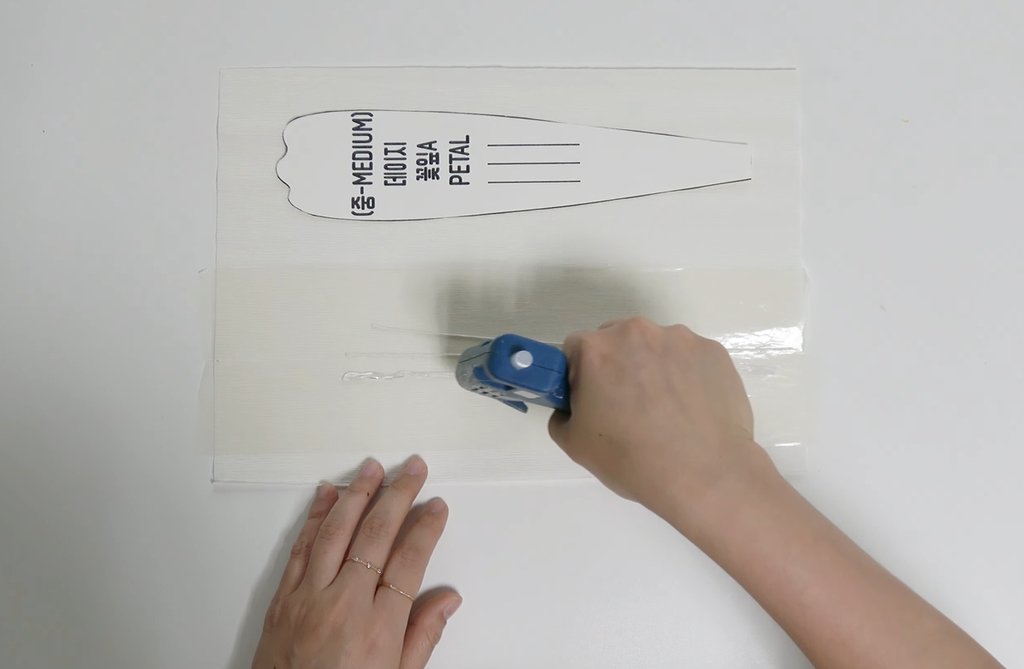
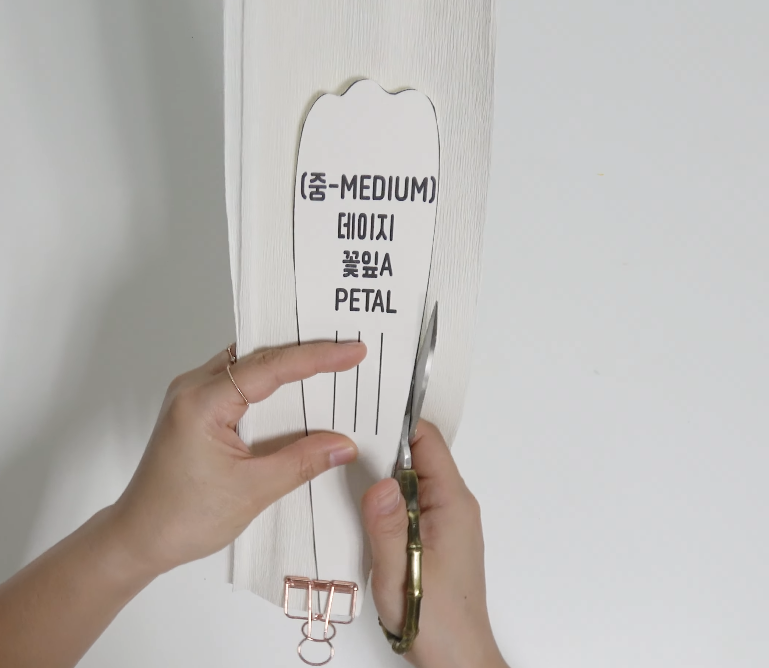
Apply double-sided tape to one half of the white crepe paper for Petal A.
Next, place three strands of white 23-gauge floral wire on top of the double-sided tape, then secure them firmly with hot glue.
Step 5
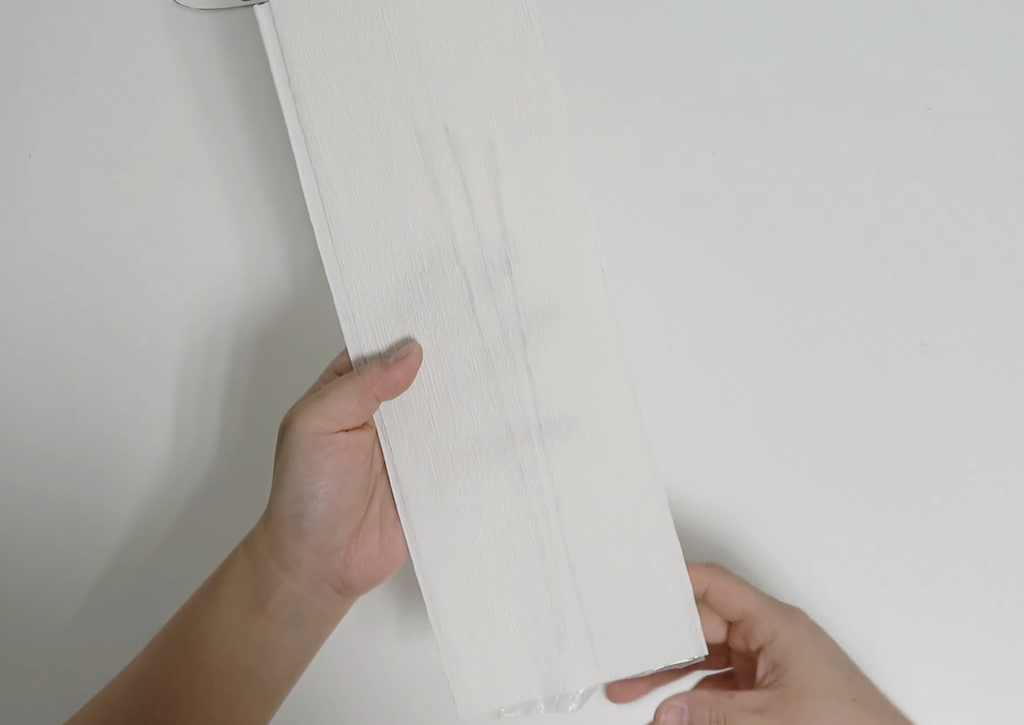
Fold the remaining half of the white crepe paper over and press it firmly into place.
Next, align the grain direction of the crepe paper with the petal template, then cut out the petal shape.
Step 6
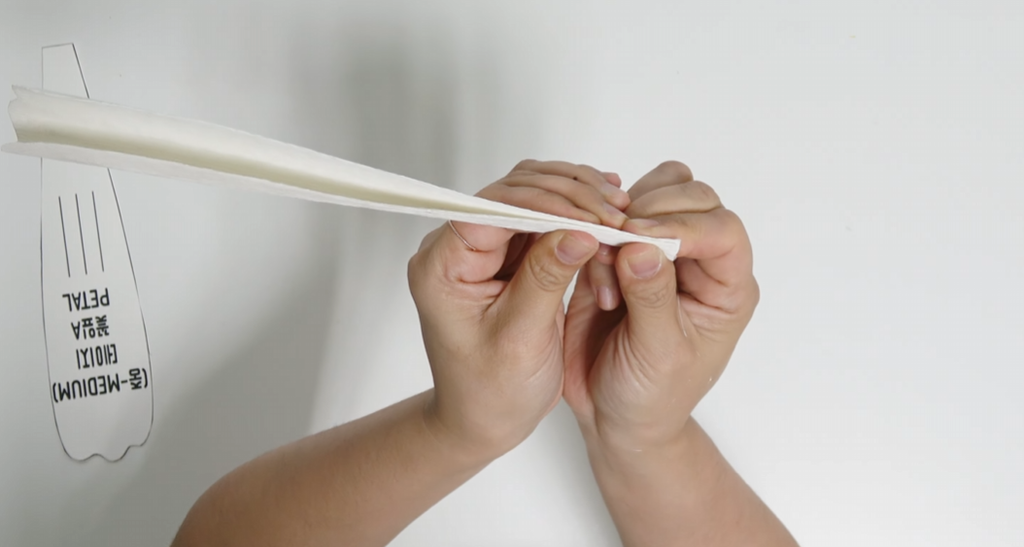
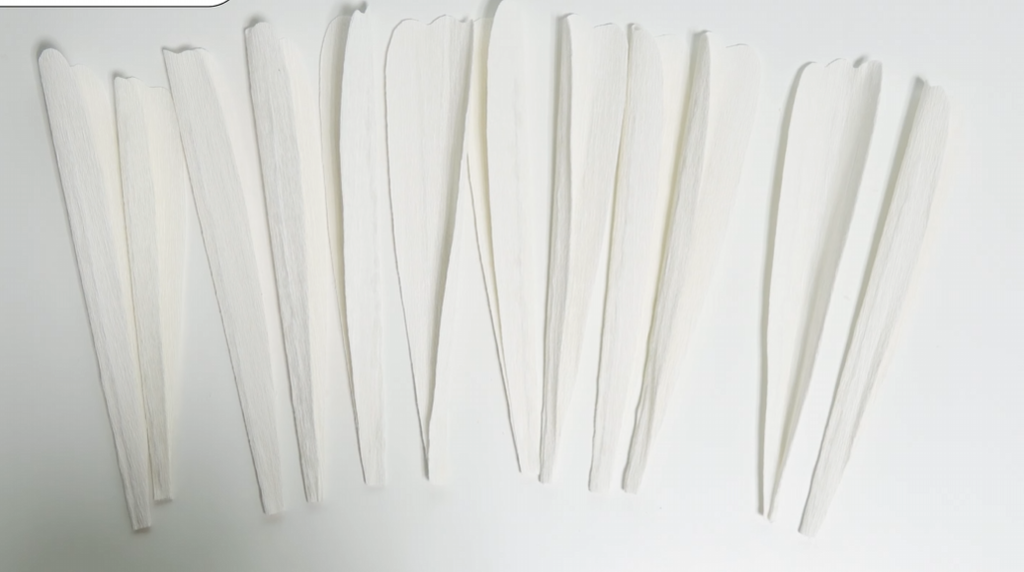
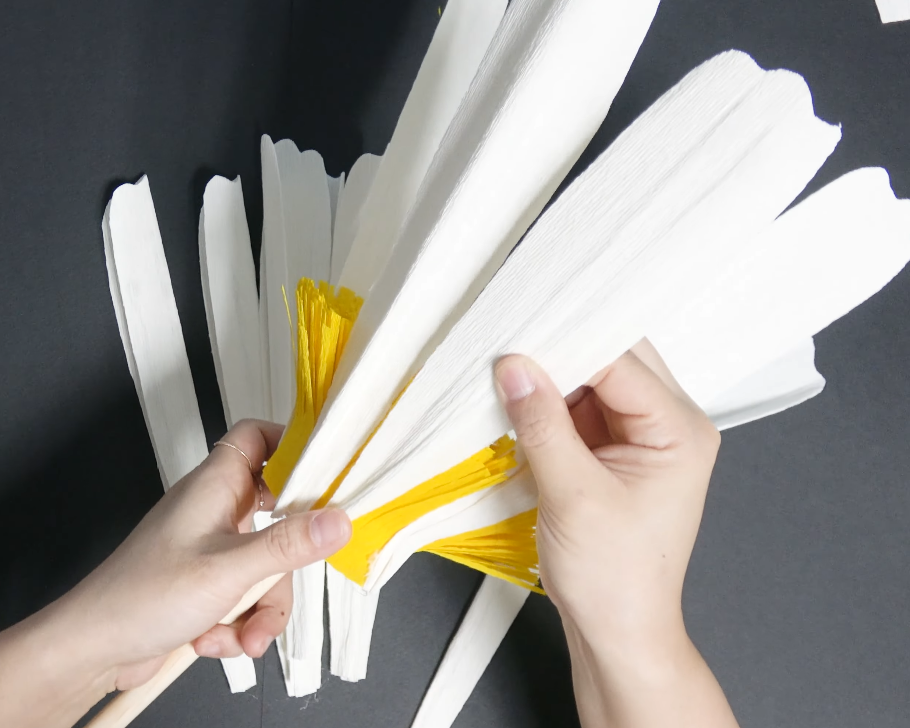
Apply hot glue only to the bottom of the petal, then pinch and gather the base together to secure the shape.
Repeat the same process until you have 12 petals in total.
Step 7
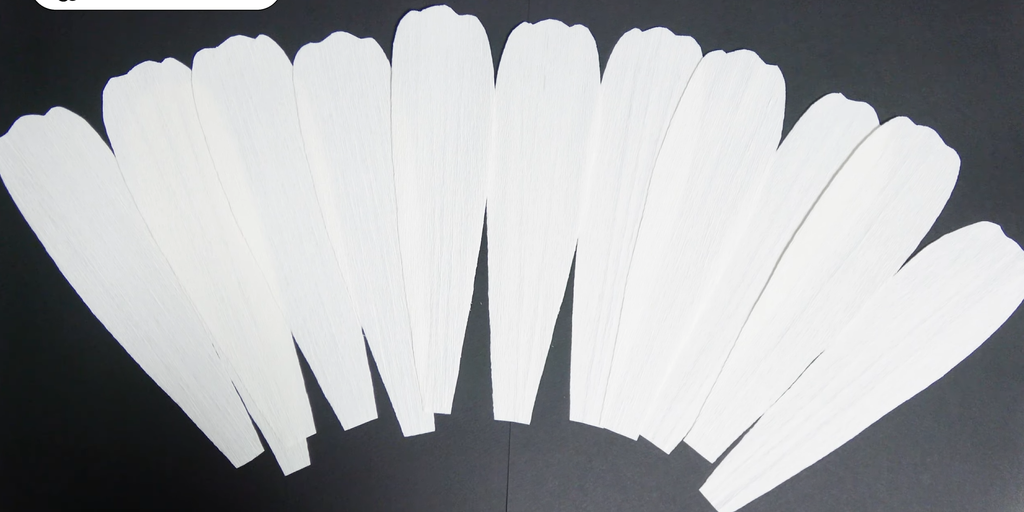
For Petal B, make 12 petals in the same way, but do not gather or pinch the bottom of the petals.
Step 8
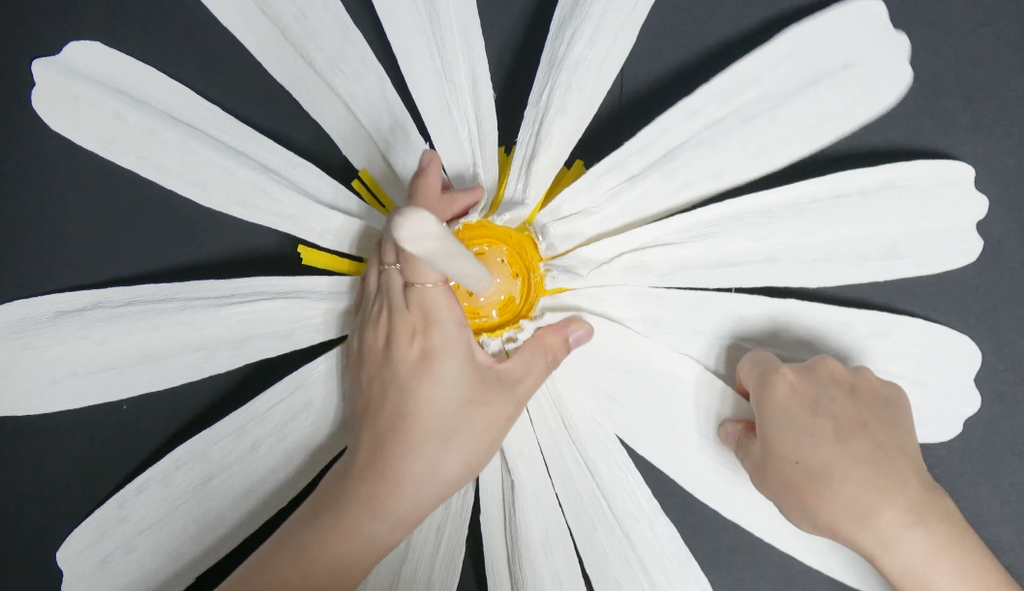
Attach Petal A to the daisy center first, spacing the petals evenly for a balanced shape.
After all 12 Petal A petals are attached, gently spread them out, then attach the Petal B petals in between them.
Step 9
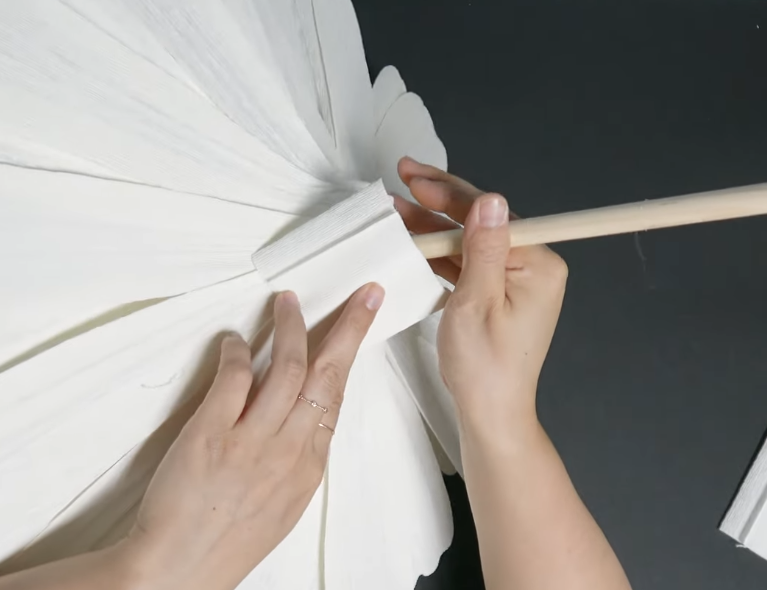
Cut a strip of white crepe paper, then wrap it around the flower stem/base and secure it in place.
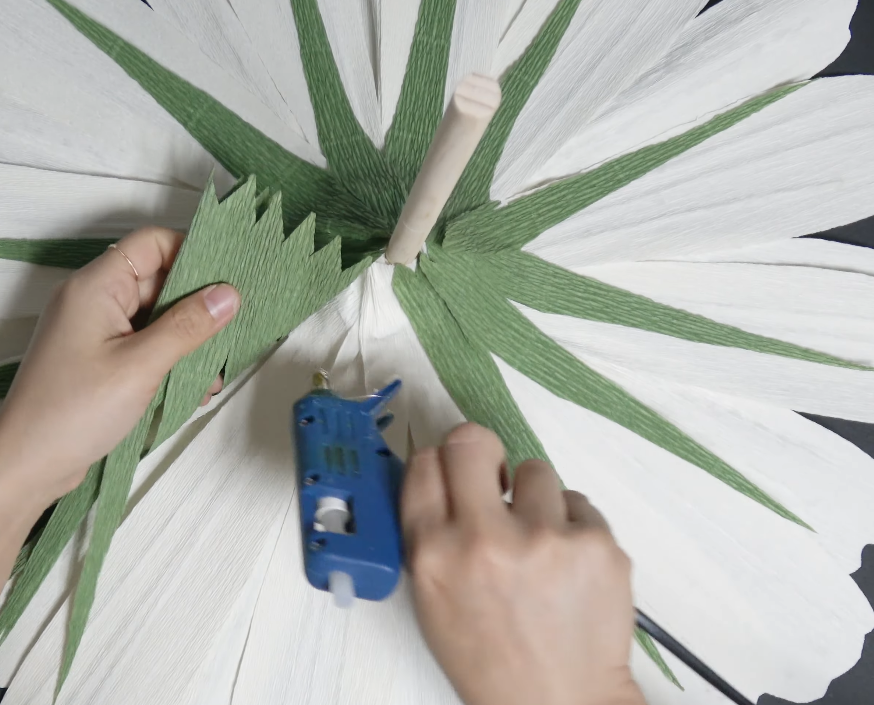
Step 10
Wrap and attach the sepal around the bottom of the flower.
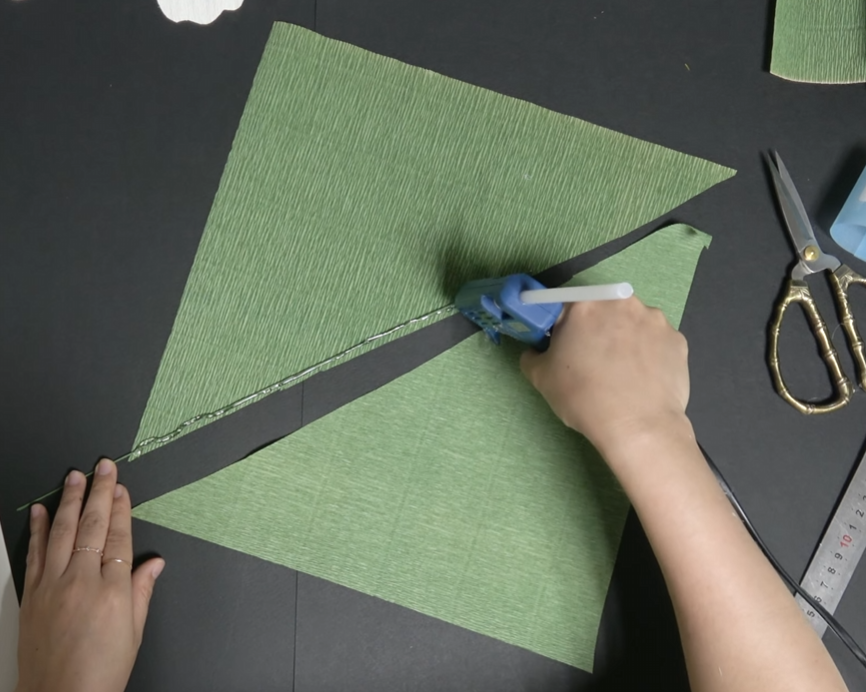
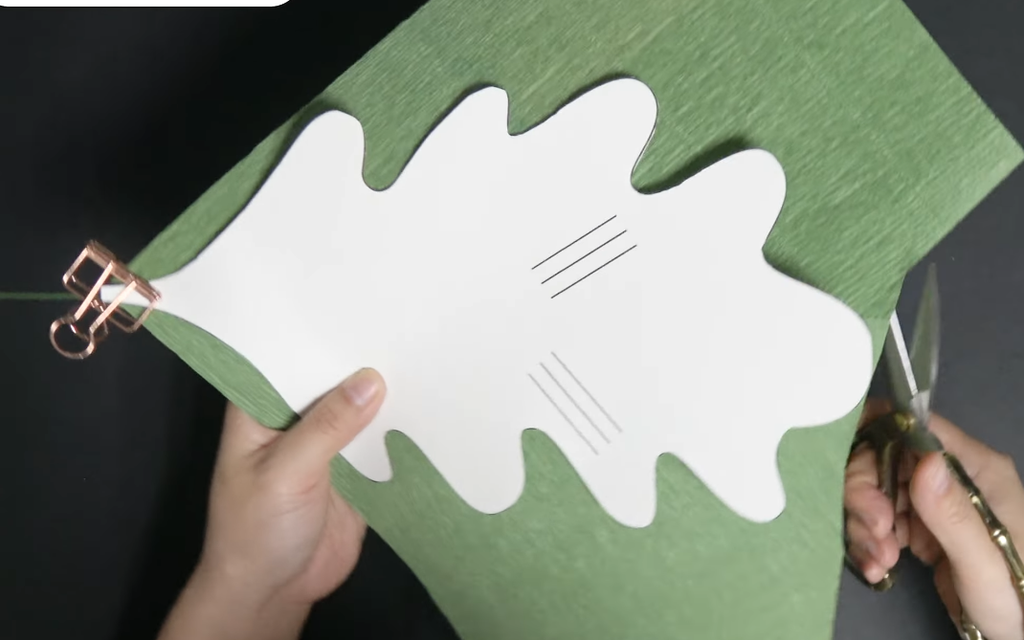
Step 11
cut the crepe paper for the leaves diagonally in half. Flip one half over, then place the two pieces together so the crepe paper grain forms a V shape.
Place a piece of floral wire between the two layers and glue them together securely.
Next, place the leaf template on the prepared crepe paper and cut along the shape
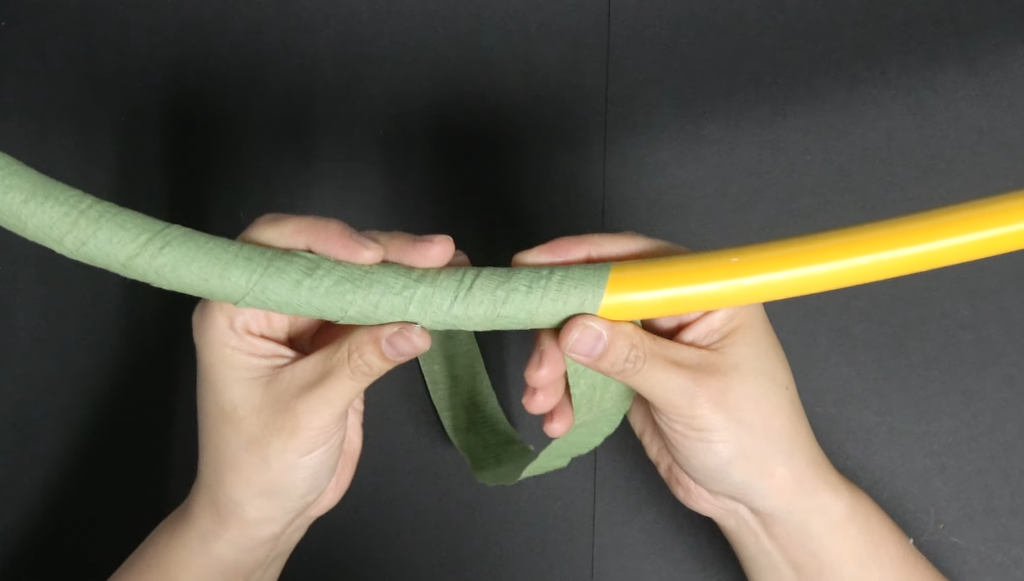
Step 12
Stretch the green crepe paper slightly, then wrap it around the pipe.
Step 13
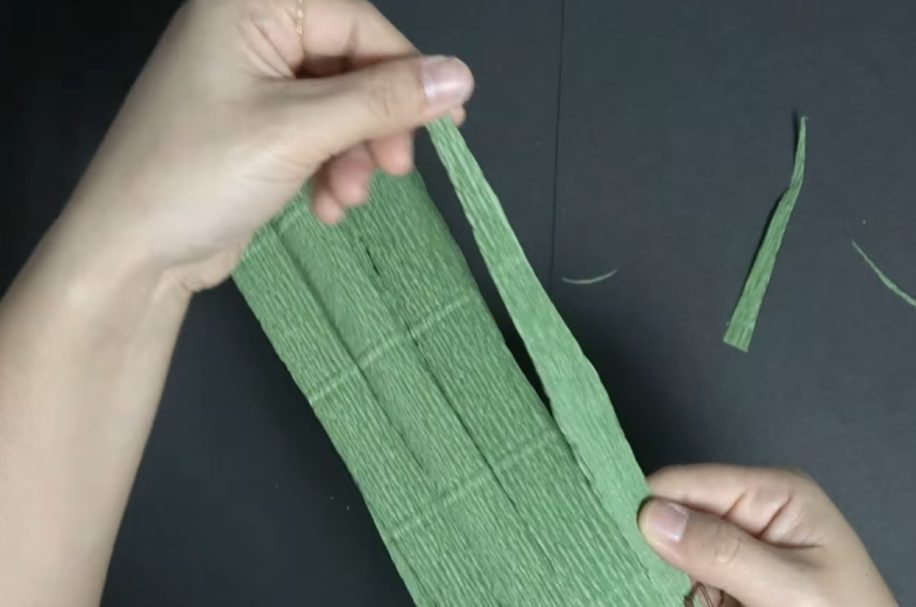
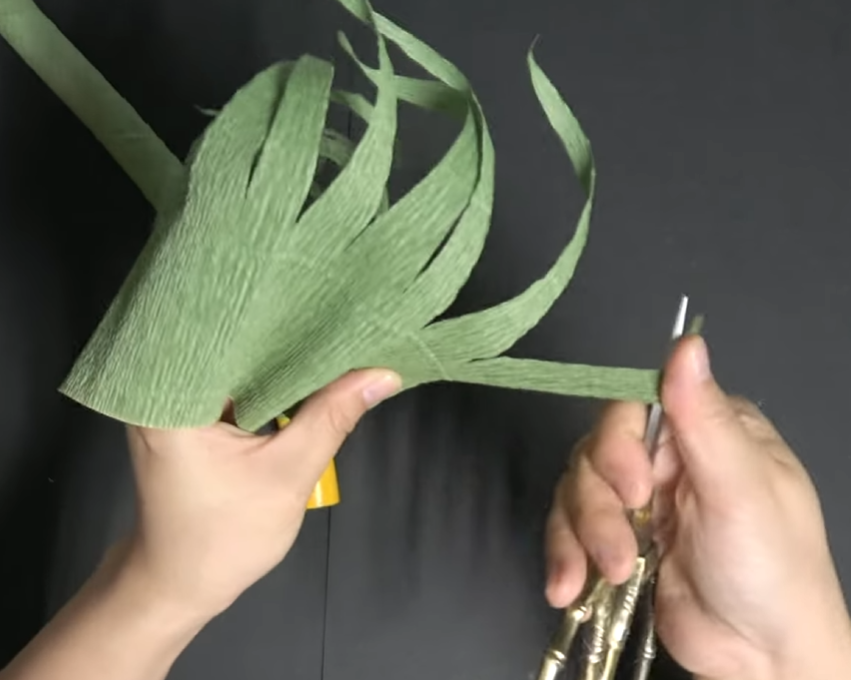
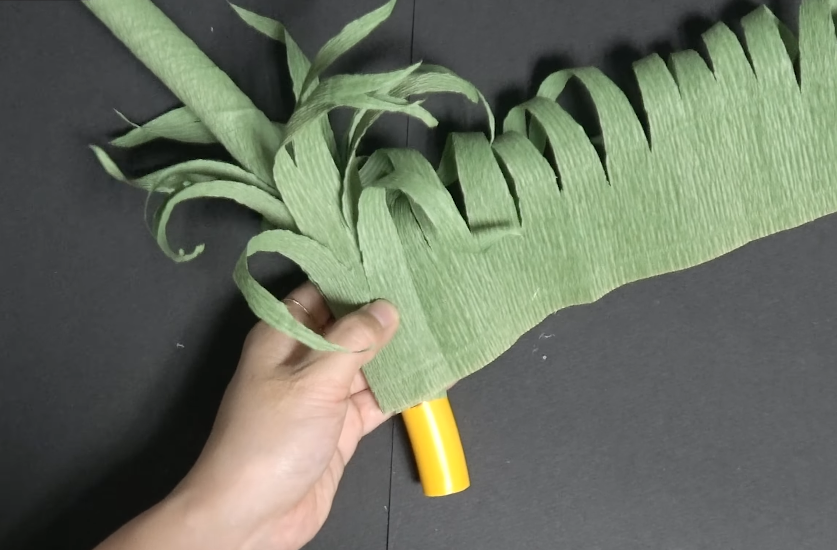
Cut the green crepe paper for the grass into pointed shapes.
Then hold each piece at the base and gently pull it with scissors to create a natural curl.
Next, wrap and attach the grass pieces around the lower part of the stem.
Final Step
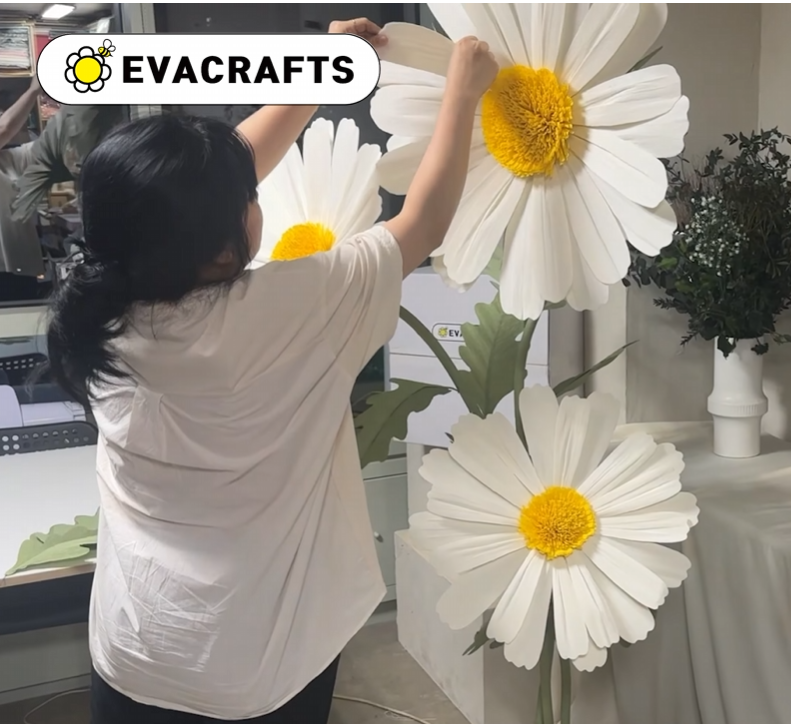
Insert the flower head and leaves into the stem, and your giant daisy is complete! 🌼
Tips for a More Balanced Giant Daisy
When bonding two layers of crepe paper together for the petals, press and rub the surface carefully so the two layers stick together evenly.
When attaching all 12 petals, try not to glue them one by one in the same direction. This can easily make the flower look uneven or heavier on one side.
Instead, attach the first four petals at the top, bottom, left, and right to create guide points. Then fill in the spaces between them with the remaining petals.
This simple method makes it much easier to keep the flower balanced and evenly shaped. 🌼
If you finish attaching the petals and notice that the flower is leaning too much to one side, don’t worry.
Gently place the tip of the hot glue gun against the glued area for a few seconds. The hardened glue will soften again, allowing you to remove and reposition the petal without tearing the paper.
A Giant Flower That Brightens the Whole Space
Our giant daisy flowers were also displayed at the EVACRAFTS pop-up store at Hyundai Department Store, where many visitors stopped to take photos with them. 🌼
The arrangement combines three different flower sizes — large, medium, and small — at different heights and angles, creating a full and lively look from every direction.
The white petals instantly brighten a space while blending naturally with many different interior colors and styles.
They work beautifully at café or shop entrances, event venues, photo zones, and photography studios.
You can also use them as oversized decorations for special occasions such as birthday parties, first-birthday celebrations, weddings, exhibitions, and other events.
If gathering all the materials separately feels like too much work, you can also use a complete DIY kit that includes the materials you need. 😊
Thanks for stopping by my little paper flower garden, my lovely bloom. 🌼 See you among the petals again!
Leave a Reply