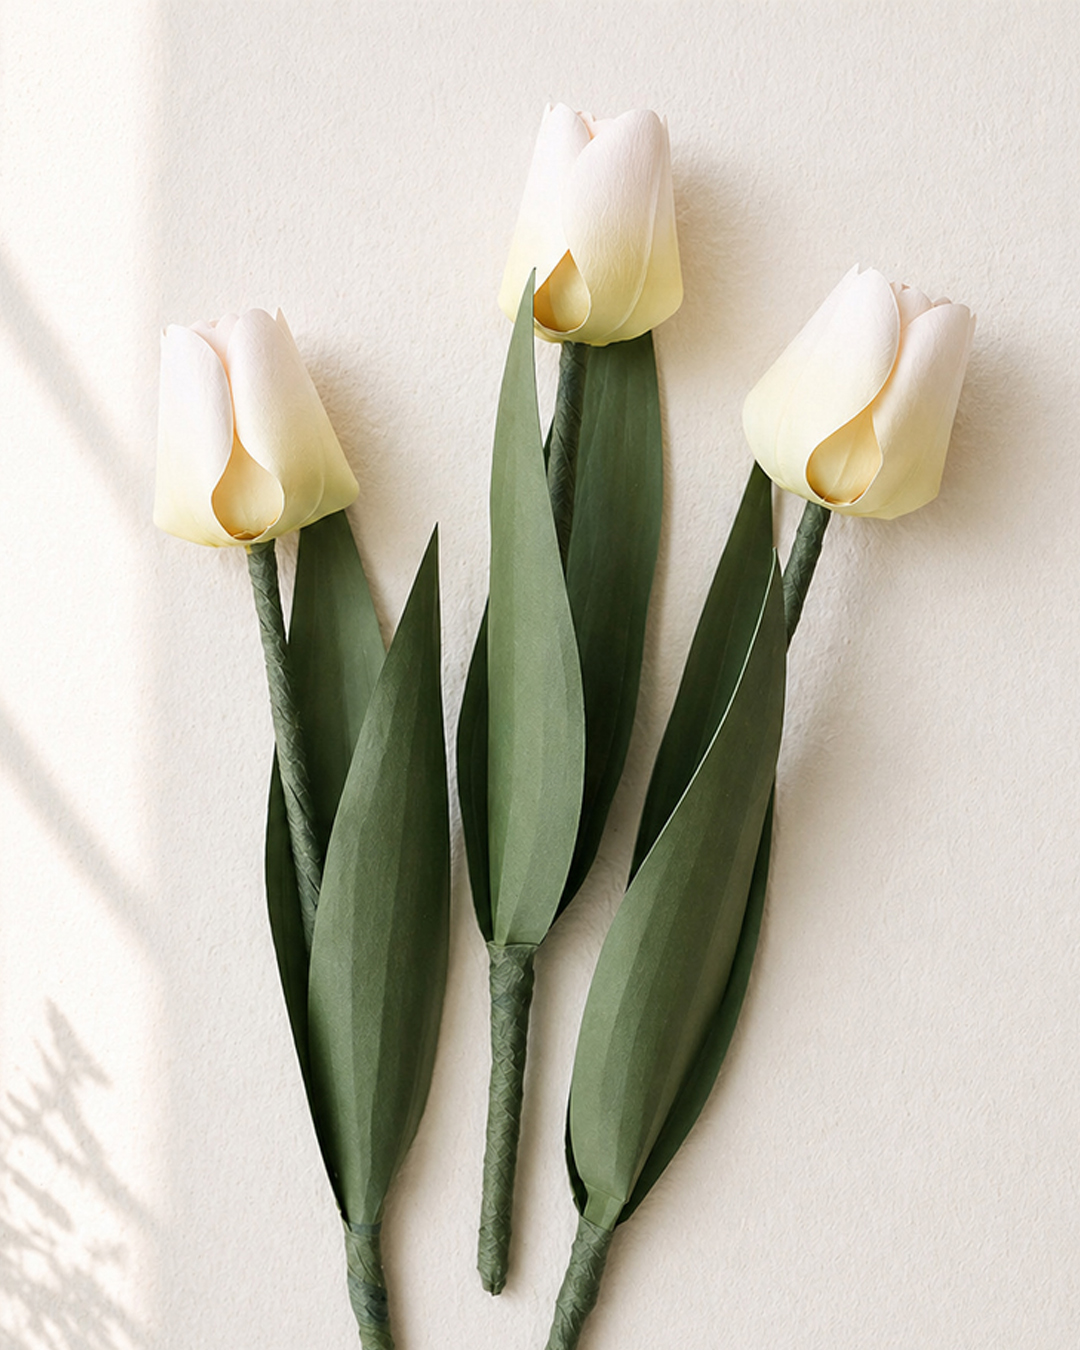
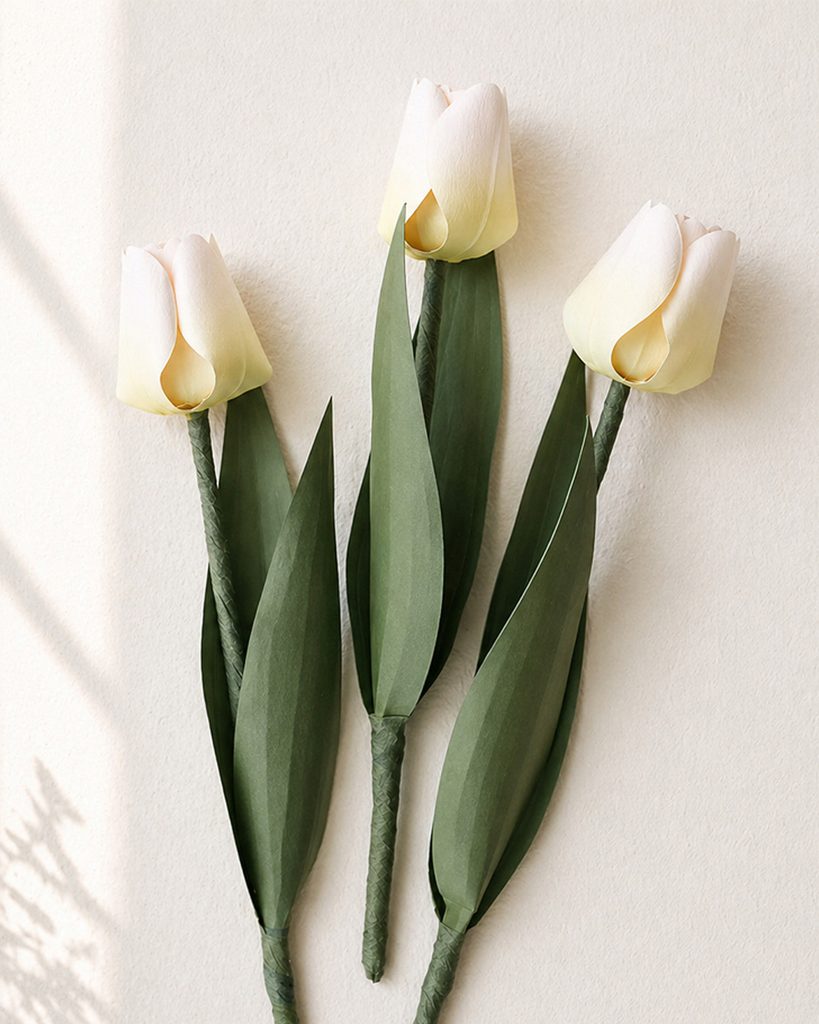
Hey, lovely bloom! Thanks for wandering into my little paper flower garden. 🌸
Today, we’re going to make a lovely paper tulip bouquet together. 🌷
Tulips are a great flower for beginners because the petal shapes are simple and each flower only needs a small number of petals. If this is your first time making paper flowers, this is a wonderful project to start with. 🙂
For this design, I used soft pink petals with a touch of light green shading near the bottom to create a gentle and elegant look.
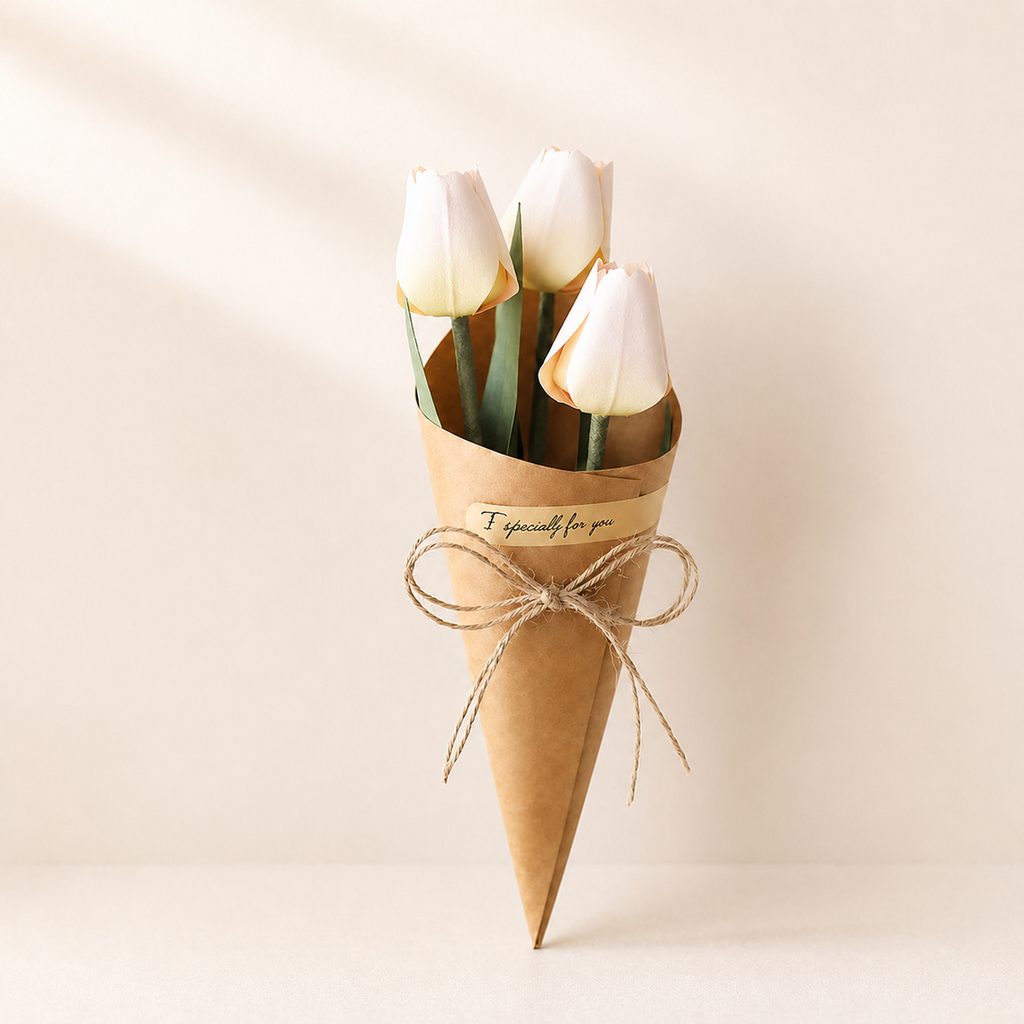
Once finished, the paper tulips look beautiful arranged in a vase, or you can gather three flowers together and wrap them to make a small paper flower bouquet that will never wilt. 🎁
You don’t need any complicated techniques to create a polished result. Follow along with my detailed YouTube video and the step-by-step tutorial below, and let’s enjoy making these paper tulips together. ^^
Difficulty: ★☆☆☆☆
Time: About 1–2 hours
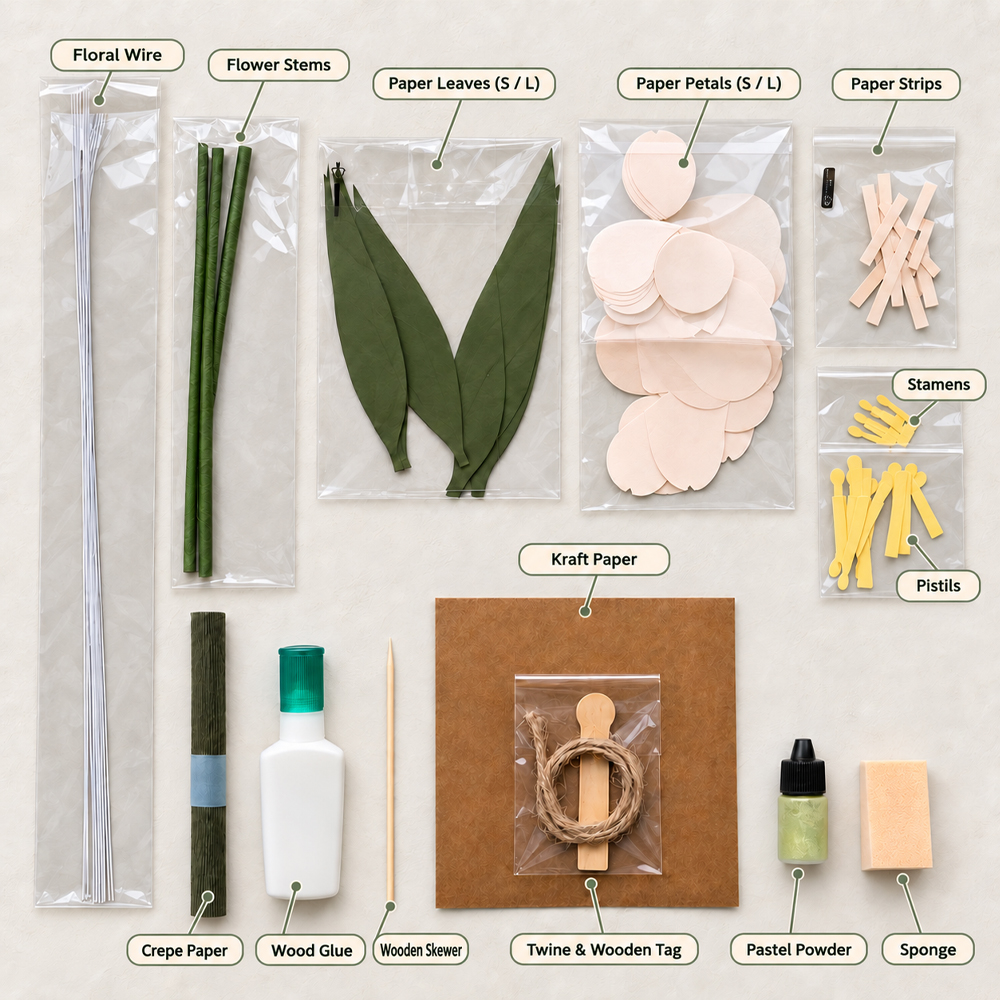
Materials
- Scissors
- Hot glue gun
- 4 mm floral stem
- 27-gauge white paper-covered floral wire
- Wood glue
- 90 gsm green crepe paper
- 150–180 gsm green cardstock
- 150–180 gsm yellow cardstock
- 100–120 gsm light pink cardstock
- Thin wooden stick
- Light green pastel powder
- Sponge
- Kraft paper
- Jute twine
- Sticker
Tulips are one of the easier paper flowers to make, so they’re a great choice if you’re just getting started. 🌷
You can cut the petals and leaves by hand with scissors, or if you have a cutting machine, you can prepare several sets of petals and leaves much more quickly and easily. ^^
For this project, I chose a soft pink color to create a sweet and delicate tulip, but bright red or yellow tulips would also look beautiful. 🙂
For the petals, you can use slightly thinner cardstock than the leaves—around 100–120 gsm works well. Since floral wire is attached to the petals, they’ll still hold their shape nicely and can be curved the way you want.
To create a natural gradient on the petals, lightly shade the lower part with pastel powder. If you don’t have pastel powder, you can simply shave or grind a regular soft pastel and use the powder instead. 🎨
For the stem, I recommend using a thicker floral stem rather than regular floral wire. If you don’t have a thick stem, you can bundle several 18-gauge floral wires together and wrap them with crepe paper to create a sturdy stem. ^^
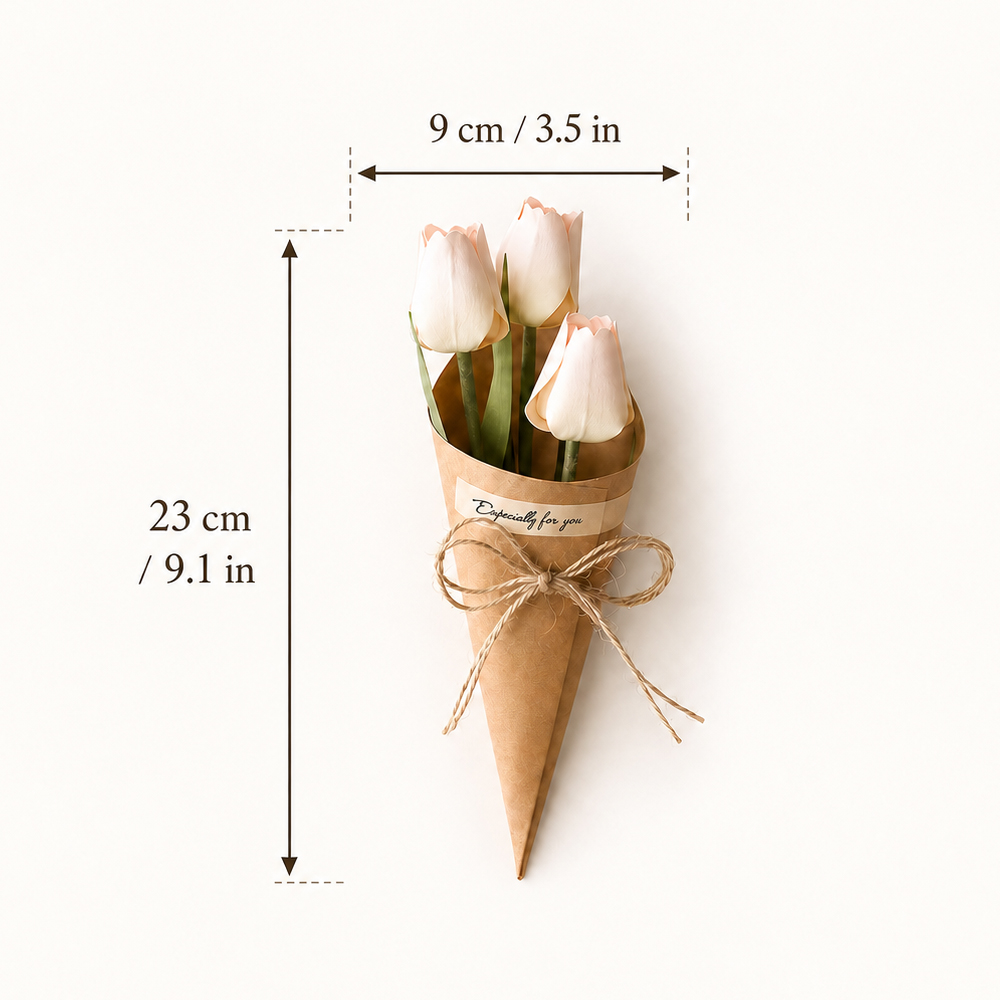
I designed this paper tulip bouquet in a cute, compact size that fits comfortably in one hand. 🌷
Including the wrapping, the finished bouquet measures about 23 cm tall and 9 cm wide.
The final size may vary slightly depending on how you shape the flowers and wrap the bouquet, so don’t worry if yours turns out a little bigger or smaller. ^^
How to Make It 🌷
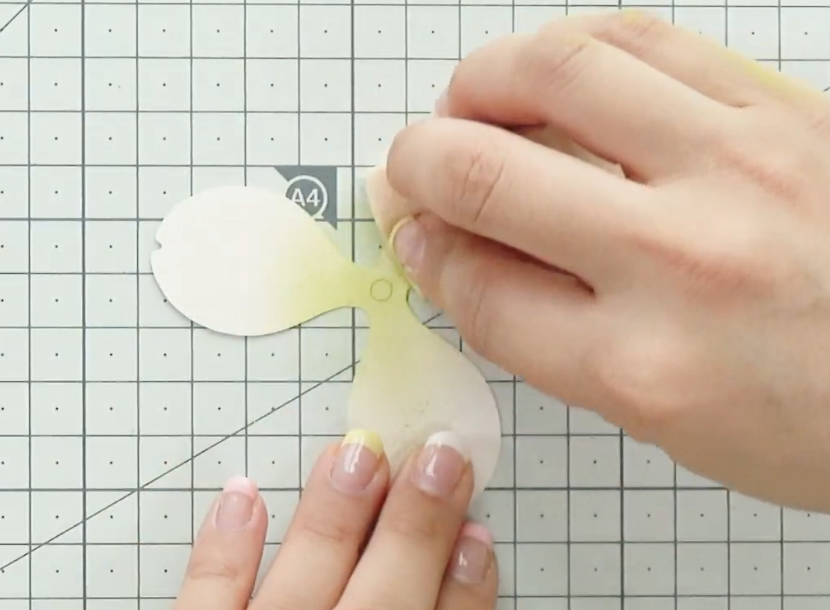
STEP.1 ⬆️
Cut the light pink cardstock into petal shapes, then add light green pastel powder only to the center area of each petal. 🎨
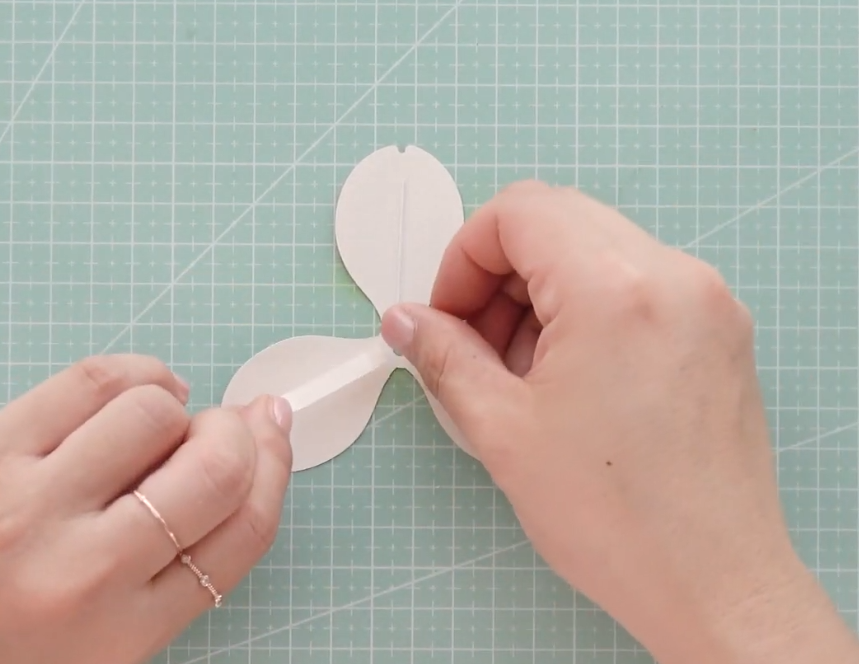
STEP.2 ⬆️
Attach a piece of 27-gauge floral wire to the center of each petal. Cover the wire with a small strip of paper in the same color as the petal so the wire is hidden neatly.

STEP.3 ⬆️
Use a thin wooden stick to gently curl the edges of each petal and give it a natural shape. 🌷
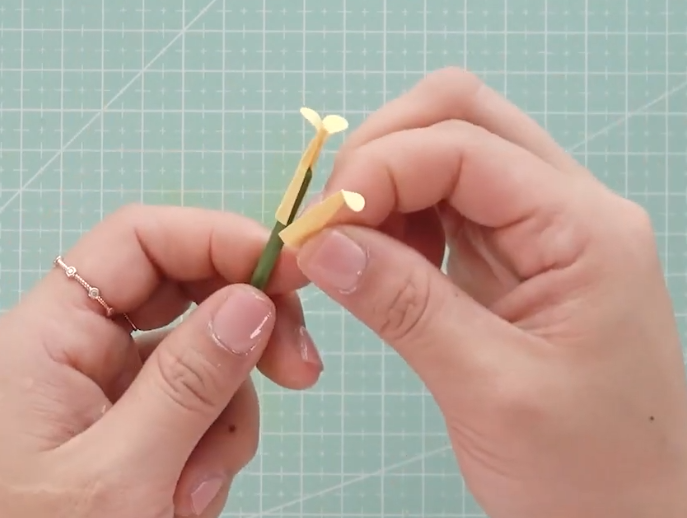
STEP.4 ⬆️
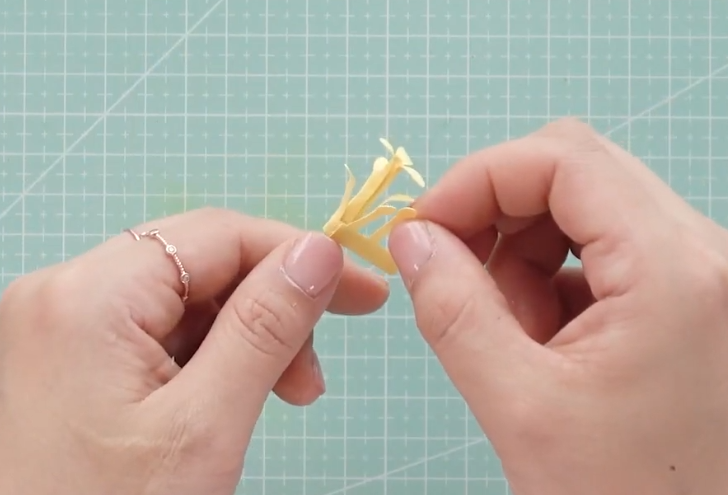
Attach 3 pistil pieces evenly around the floral stem.
STEP.5 ⬆️
Attach 2 sets of the three-part stamens around the pistil, making sure they do not overlap each other.

STEP.6 ⬆️
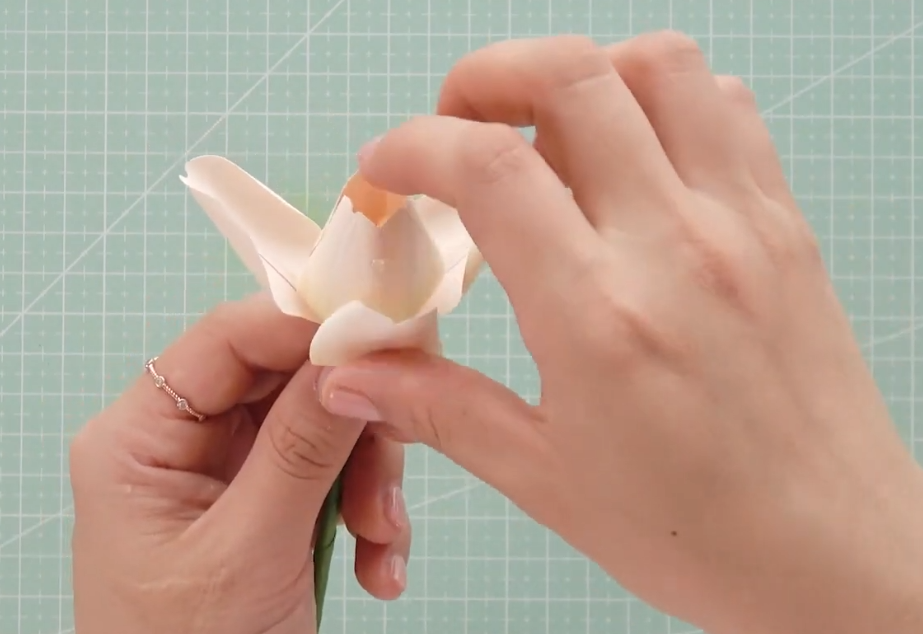
Insert the first layer of petals just below the stamens and secure them in place.
STEP.7 ⬆️
Attach the second layer of petals between the petals from the first layer so the flower looks full and balanced. ✨

STEP.8 ⬆️
Cut the green cardstock into leaf shapes, then use a thin wooden stick to draw gentle vein lines onto the leaves. 🌿
STEP.9 ⬆️
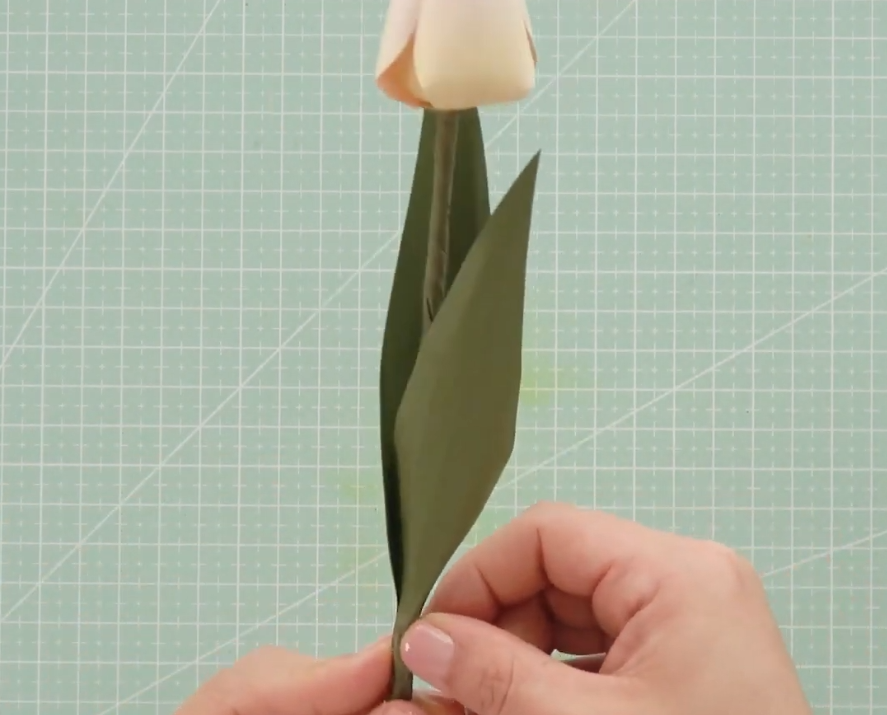
Attach the leaves to the floral stem.
STEP.10 ⬆️
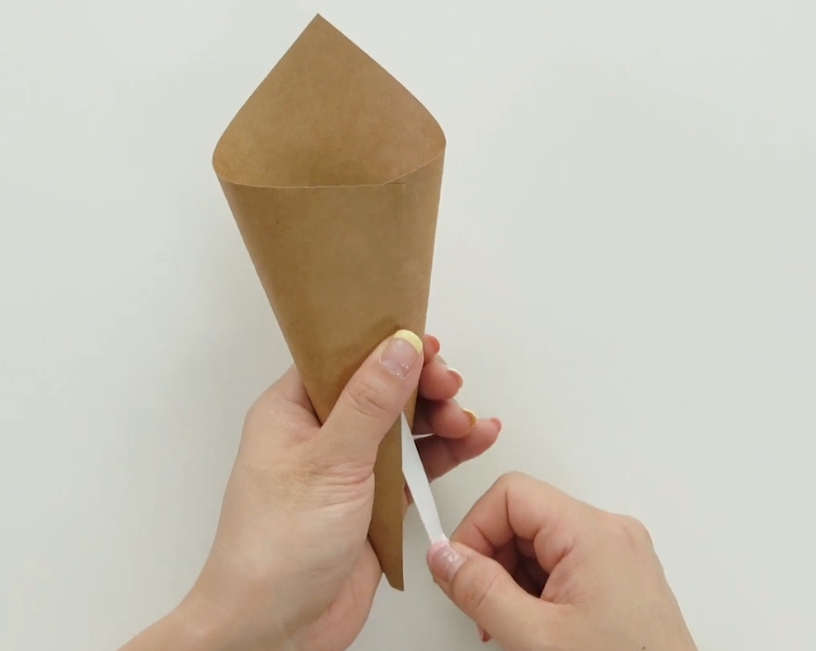
Roll a square piece of kraft paper into a cone shape and glue it in place. 🎁

FINAL STEP ⬆️
Make a bow with jute twine and attach it together with the sticker.
Your paper tulip bouquet is complete! 🌷🎀
Eva’s Tip
When adding the leaf veins with a thin wooden stick, try following the natural outline of the leaf. This makes the vein lines much easier to draw and helps them look neat and realistic. 🌿
If using a wooden stick feels difficult, you can also use an awl. Just apply very light pressure so you create the vein lines without tearing or damaging the paper. ^^
For the kraft paper wrapping, you don’t need a separate template. Simply start with a square piece of kraft paper, roll it into a cone shape, and secure it in place. This is a very simple way to create a cute bouquet wrapper. 🎁
You can use double-sided tape or a hot glue gun to hold the kraft paper together.
If you prefer to use wood glue, hold the paper firmly in place for at least 1 minute so the cone doesn’t open back up before the glue sets. ^^
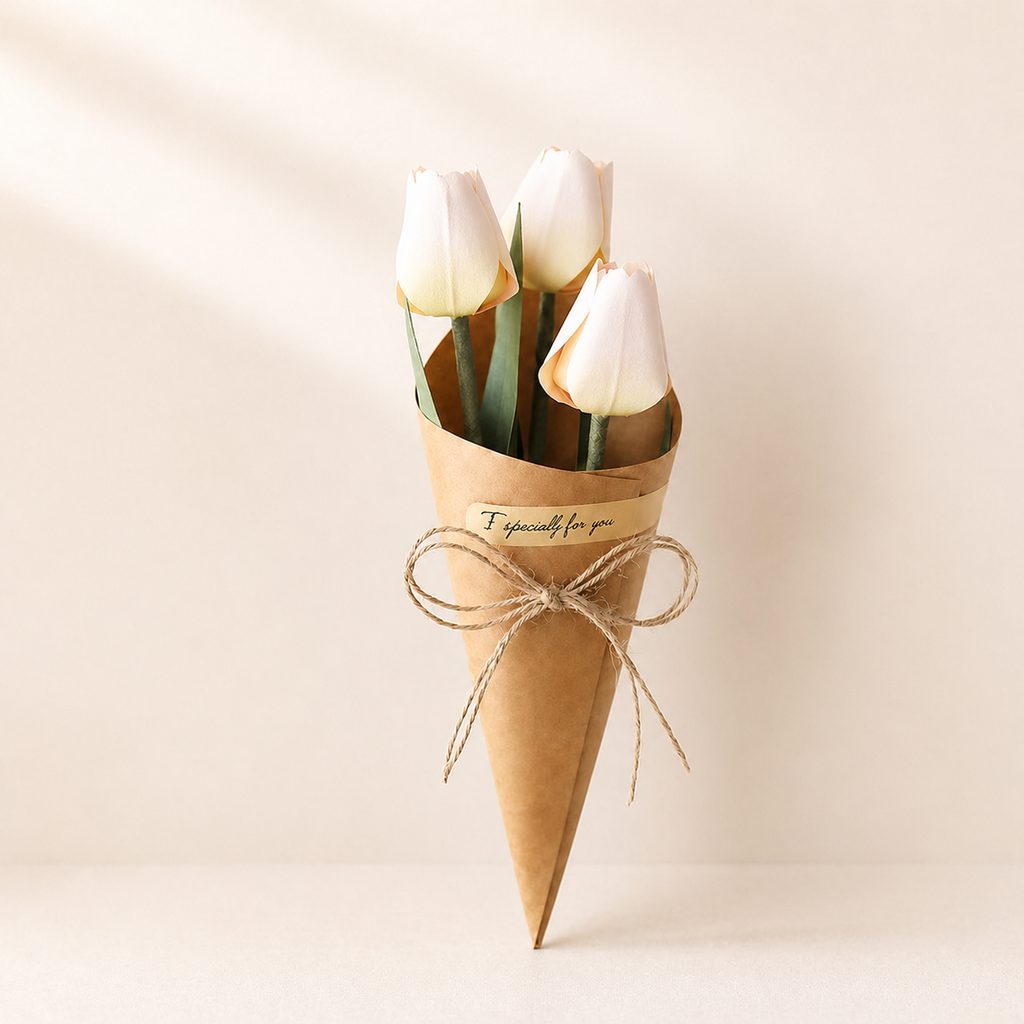
Once your paper tulips are finished, you can wrap them with kraft paper and ribbon to create a sweet mini bouquet, or place them in a small vase to decorate a desk, shelf, or other cozy corner. 🌷
At about 9 cm wide and 23 cm tall, the finished paper tulip bouquet is compact enough to fit naturally into smaller spaces without feeling overwhelming. 🙂
If you make it as a gift, one of the nicest things about paper flowers is that they won’t wilt quickly like fresh flowers. They can be kept for a long time, and because they’re handmade, they also carry the time and care you put into creating them.
That little bit of effort can make the gift feel even more personal and memorable for the person who receives it. ^^


Leave a Reply