
Hey, lovely bloom! Thanks for wandering into my little paper flower garden. 🌸
Today, I’m sharing a detailed step-by-step guide on how to make a realistic crepe paper rose using Italian crepe paper.
Roses are one of the most familiar and loved flowers, which makes them a perfect project for learning the basics of crepe paper flower making.
If you’re completely new to making paper flowers, a rose may look difficult at first. But with the free video tutorial and the detailed tips in this post, you’ll be able to follow the process at your own pace and create a beautiful rose — even as a beginner.
And here’s one thing that makes this project much easier: your petals do not need to be perfect or identical.
So don’t worry if every petal comes out a little differently. In fact, those small differences in shape and curve are what can make your finished crepe paper rose look softer, more natural, and more like a real flower. 🌹

Crepe Paper Rose DIY
Difficulty: ★★☆☆☆
Time Required: About 60 minutes
.
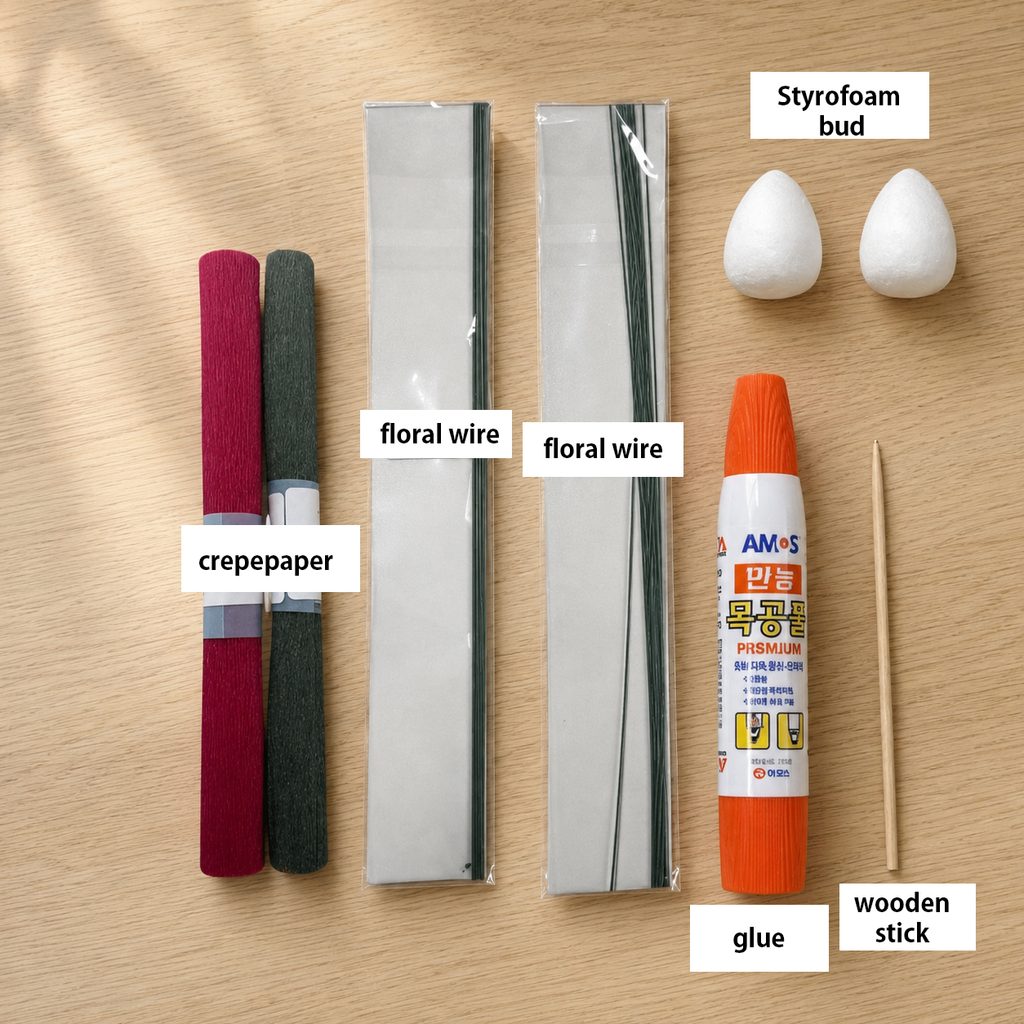
Materials You’ll Need
Here are the exact materials I used to make this crepe paper rose, so you can prepare everything before you start.
- Rose petal template
- 23-gauge green floral wire
- 18-gauge green floral wire
- Red 90 gsm crepe paper
- Green 90 gsm crepe paper
- Styrofoam form for the rosebud
- Wood glue
- Thin wooden skewer
- Scissors
- Hot glue gun
Having all your materials ready before you begin will make the process much easier and help you follow the tutorial without stopping along the way.
This is the realistic crepe paper rose we’ll be making today. 🌹

Why Crepe Paper Makes a More Realistic Rose
One of the biggest advantages of crepe paper flower making is that the paper can be stretched, curved, and shaped by hand. This makes it much easier to create the soft, natural curves of real rose petals than with regular colored paper.
The fine grain and texture of crepe paper also resemble the delicate veins you see on real flower petals, helping your finished crepe paper rose look more realistic and lifelike.
For this rose, I used 90 gsm Italian crepe paper.
The weight of crepe paper can make a big difference in how a flower looks and feels. Choosing the right paper weight for each type of flower helps the petals hold their shape while still looking soft and natural, which can significantly improve the overall finish of your paper flower.
If possible, I recommend using Italian crepe paper. I’ve tested many different types of crepe paper, and I personally find Italian paper works best for realistic flowers because of its rich colors, fine texture, stretch, and balanced thickness.
For the main flower stem, I recommend using 18-gauge floral wire. It provides enough strength to support the rose while still looking well balanced with the size of the flower.
For the leaves, 23-gauge green floral wire works better because it is thinner and helps the leaves look more delicate and natural instead of stiff or bulky.
The finished rose size may vary slightly depending on how you shape your petals, but the rose shown in this tutorial is approximately:
Flower diameter: 9 cm / 3.5 in
Overall length: 30 cm / 11.8 in
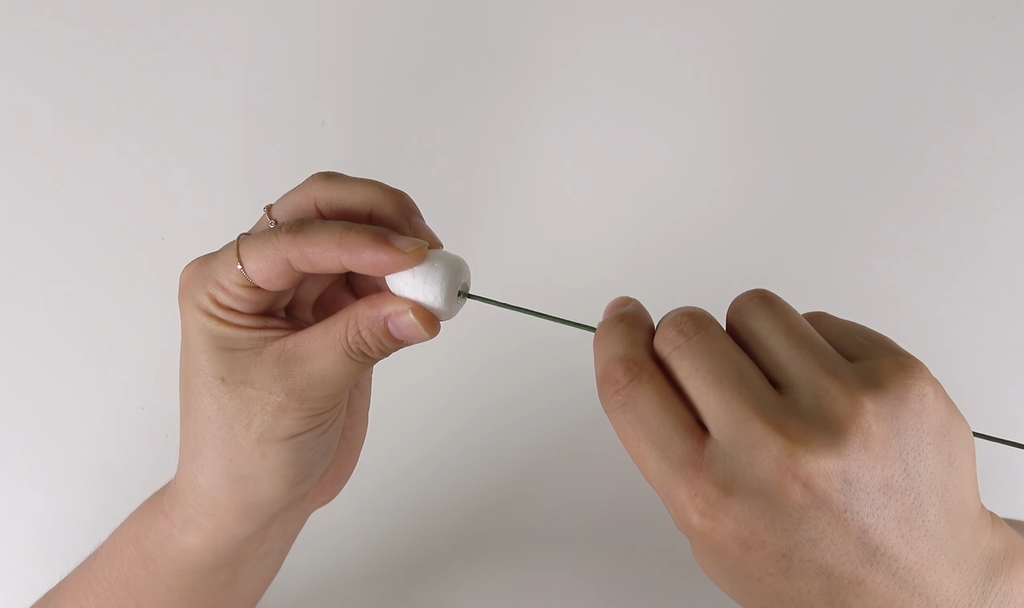
1. Insert the 18-gauge floral wire into the rosebud foam.

2. Cut a small piece of crepe paper and wrap it around the Styrofoam to cover it completely.

3. Cut the crepe paper following the template.
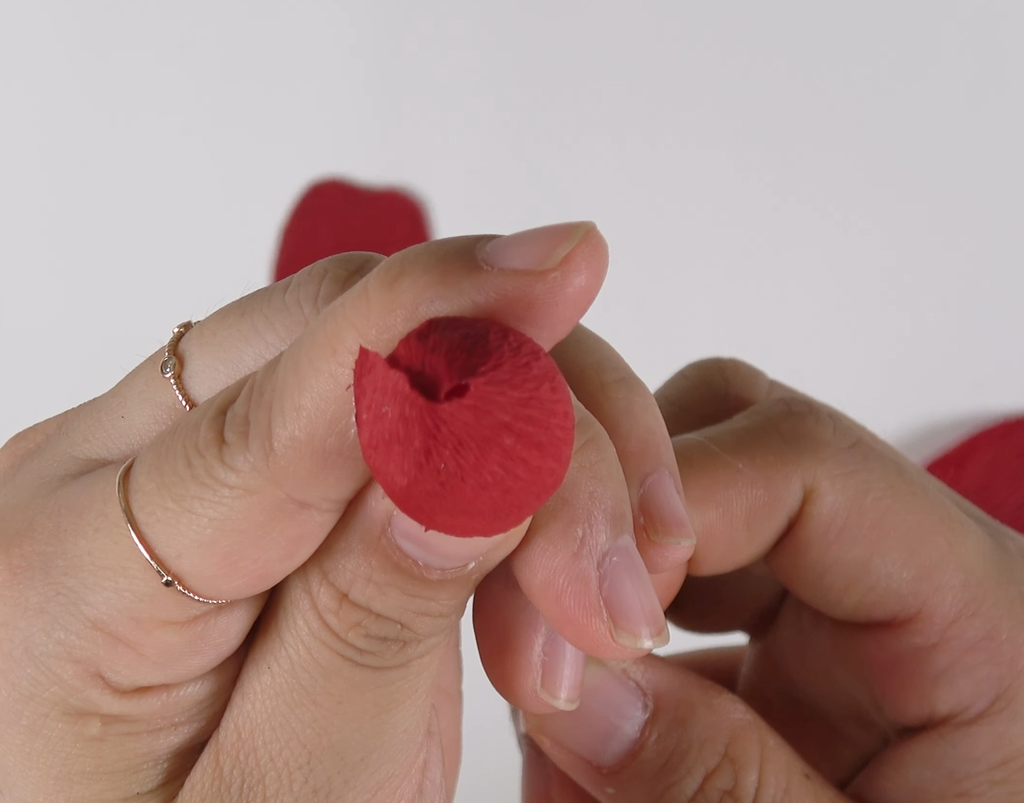
4. Wrap the entire rosebud foam with crepe paper.

5. Use a thin wooden skewer to gently curl and shape the top edge of each petal.

6. Gently press and stretch the center of each petal with your thumbs to create a natural curved shape.
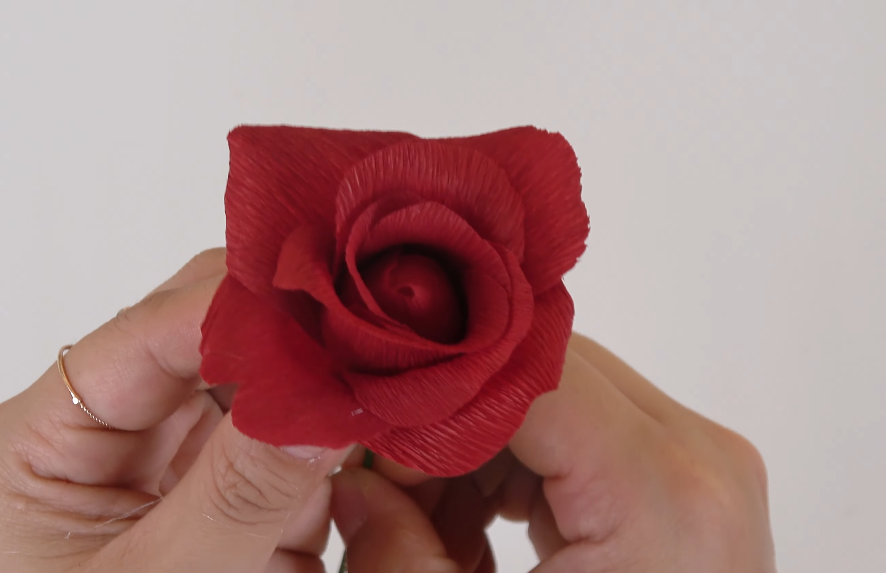
7. Layer and glue the petals one by one to gradually build the rose.

8. Cut the green crepe paper using the sepal template.

9. Use a hot glue gun to attach the sepal around the base of the flower.

10. Cut the green crepe paper using the leaf template. Place two leaf pieces facing each other, insert the floral wire between them, and glue them together so the crepe paper grain forms a V shape.
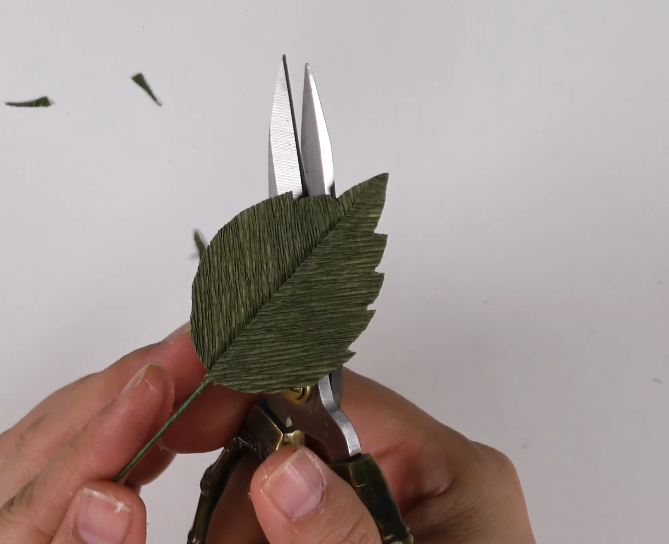
11. Trim the edges of each leaf into a fine serrated shape.

12. Attach the leaves to the flower stem to complete the rose.
Eva’s Tip
The height and spacing of the petals are very important when shaping your rose. Try not to attach the petals at dramatically different heights. Keeping them relatively even will help your finished crepe paper rose look fuller and more balanced.
When cutting the crepe paper, make sure the direction of the paper grain matches the direction shown on the template. This is important because the grain controls how the paper stretches and curves when you shape each petal.
If it’s difficult to hold the template and crepe paper firmly while cutting, try securing them together with a small clip. This can make cutting easier and help you get cleaner, more consistent petal shapes.
And don’t worry if you accidentally leave too much space between the petals!
You can gently stretch the petals on both sides to make them slightly wider. This helps fill the gap and usually looks much more natural than leaving a large empty space between the petals. 🌹

Your Crepe Paper Rose Is Complete 🌹
Your crepe paper rose is now complete!
Don’t worry if every petal looks a little different. Once the petals are layered together, those small differences actually help create a fuller, softer, and more natural-looking rose.
A single rose can be wrapped simply and given as a thoughtful handmade gift, while two or three roses look beautiful arranged together in a vase as long-lasting home decor.
Unlike fresh flowers, crepe paper roses won’t wilt, so you can enjoy them for a long time. And because you made them yourself, they carry a personal touch that makes them even more meaningful.
If you remember just two things — the direction of the crepe paper grain and the order in which you attach the petals — even a beginner can successfully make a beautiful paper rose.
If you’d like to try making just one rose without gathering all the materials separately, I also have a ready-to-make crepe paper rose kit with the materials prepared for you. ^^
Thanks for stopping by my little paper flower garden, my lovely bloom. 🌼 See you among the petals again!
Leave a Reply