Hey, lovely bloom! Thanks for wandering into my little paper flower garden. 🌸
Difficulty: ★★☆☆☆
Estimated Time: About 2 hours
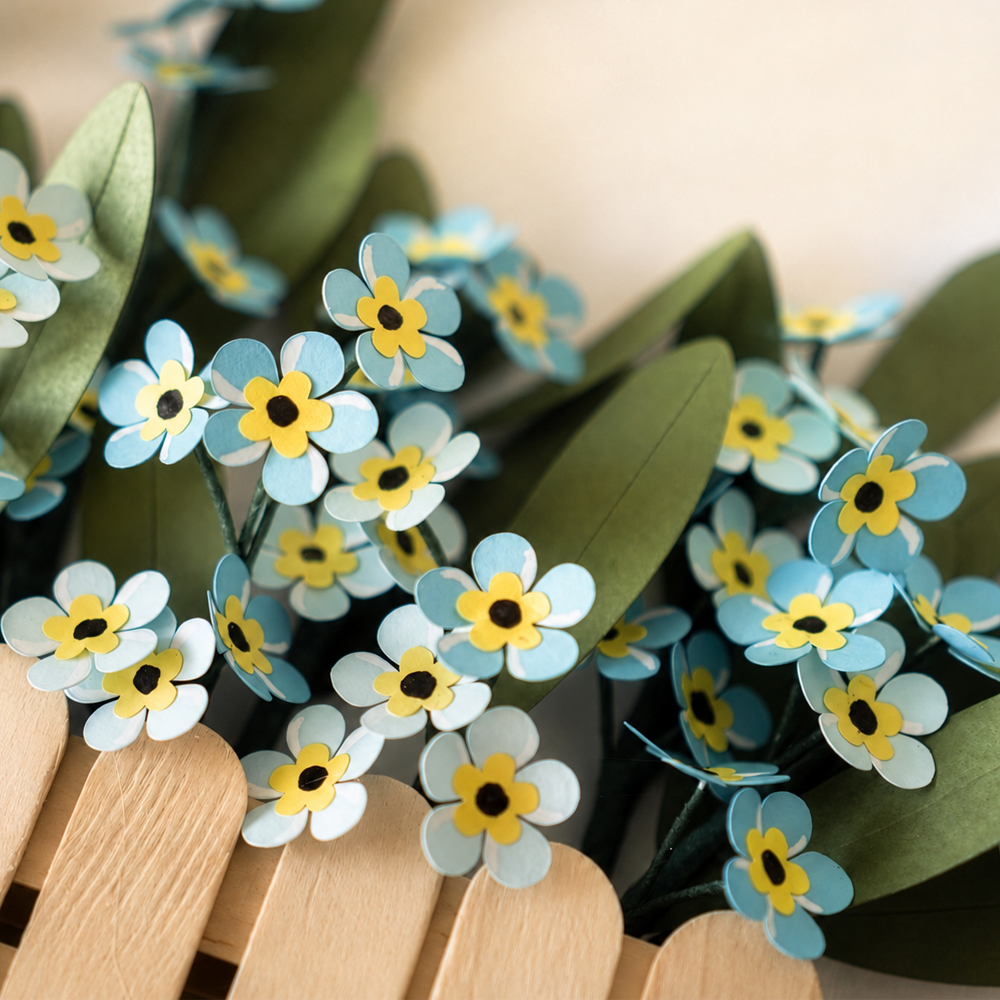
Today, we’re going to make tiny forget-me-not flowers from cardstock and fill a white canvas with them. 💙
The soft sky-blue and blue flowers will come together to create a sweet and cheerful paper flower wall art piece. ^^
The process is simple and repetitive—color the petals, shape them, glue the pieces together, and gradually build up the flowers—so even beginners can quickly get comfortable with this project.
Follow along with my detailed YouTube tutorial and the step-by-step instructions below, and let’s make this cute forget-me-not paper flower wall art together. 🌼
Materials
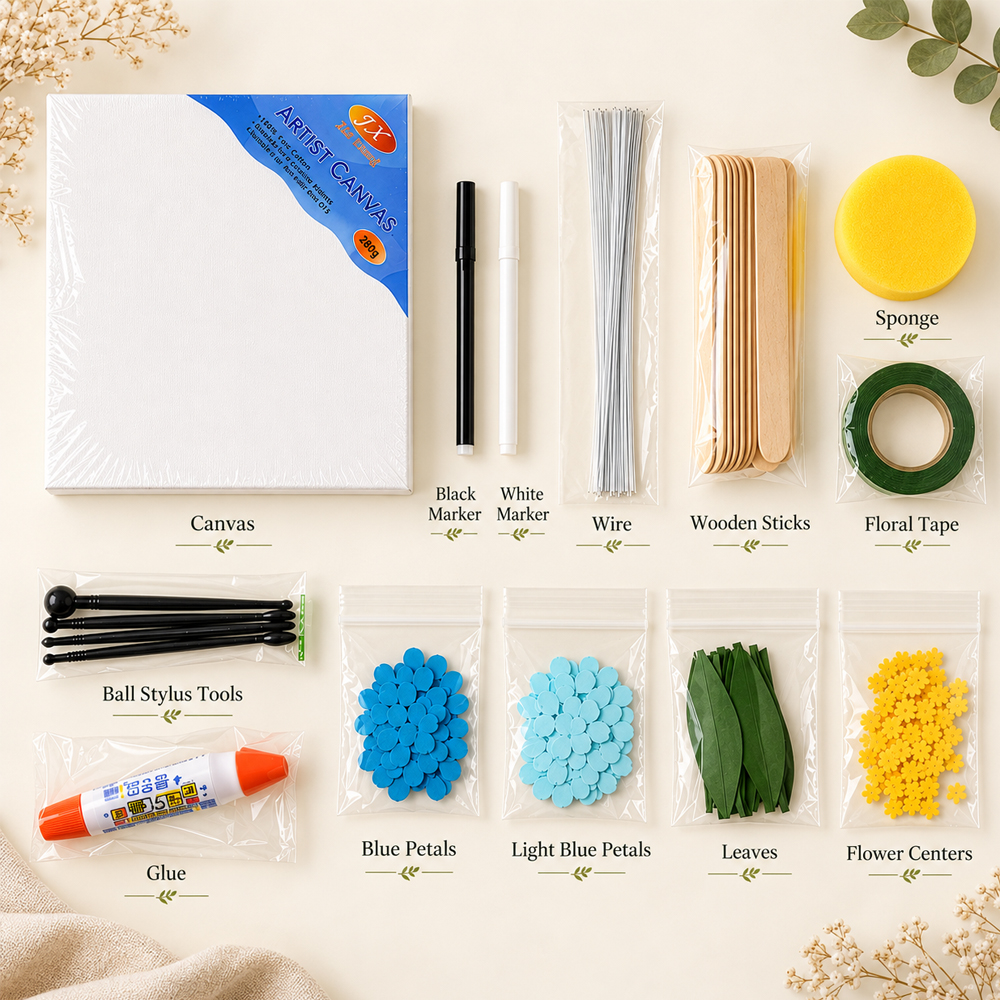
- Scissors
- Hot glue gun
- Square canvas, 24–25 cm
- Wood glue
- Black water-based marker
- White gel pen
- White 23-gauge paper-covered wire
- Wooden craft sticks
- Foam pad
- Plastic ball tool
- Floral tape
- Blue cardstock, 150–180 gsm
- Sky-blue cardstock, 150–180 gsm
- Green cardstock, 150–180 gsm
- Yellow paper, 80 gsm

Forget-me-nots don’t require any complicated petal-shaping techniques, so they’re a wonderful project for beginners. 💙
The process is very simple—you just add a little color around the edges of the petals and attach the flower centers. It’s easy enough that even children can enjoy making these little paper flowers. ^^
Instead of using only one shade of blue, try mixing two or three different colors from the same blue family. This gives your forget-me-not paper flowers more depth and makes the finished arrangement look much more lively and natural. 🌼
I made lots of small flowers and turned them into paper flower wall art because I wanted to hang the finished piece on the wall.
But you don’t have to make this many flowers. If you make just a few stems and place them in a small vase, they can also become a lovely decoration for a dining table, desk, or shelf. ^^
For my wall art, I used a white canvas and arranged blue forget-me-not flowers above a small handmade fence.
Canvas boards come in many different colors, so feel free to choose one that matches your space. You can also paint a plain canvas with acrylic paint first and create your own custom background. 🎨
To make the little fence, I cut and glued wooden craft sticks together.

If you don’t have wooden sticks, you can also cut strips from cardstock heavier than 180 gsm and use those instead.
For this project, I used a square canvas measuring about 24.5 cm.
If you want to display your paper flower wall decor on a desk or shelf, a slightly smaller canvas would work nicely too.
A 24.5 cm canvas is a comfortable size for hanging on a wall or even decorating a door without feeling too large. ^^
How to Make the Forget-Me-Not Paper Flower Wall Art
STEP.1⬆️
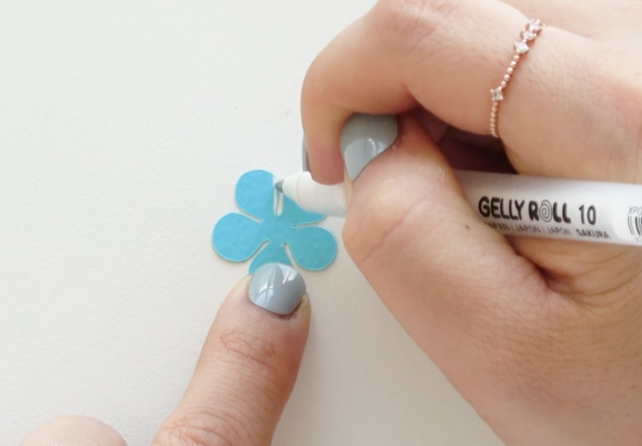
Cut the sky-blue and blue cardstock into petal shapes.
Use a white gel pen to color one edge of each petal. This little detail gives the flowers a soft and delicate look. 💙

STEP.2⬆️
Cut the yellow paper into the flower-center shapes.
Draw a small black circle in the middle of each center using a black marker. 🌼
STEP.3⬆️
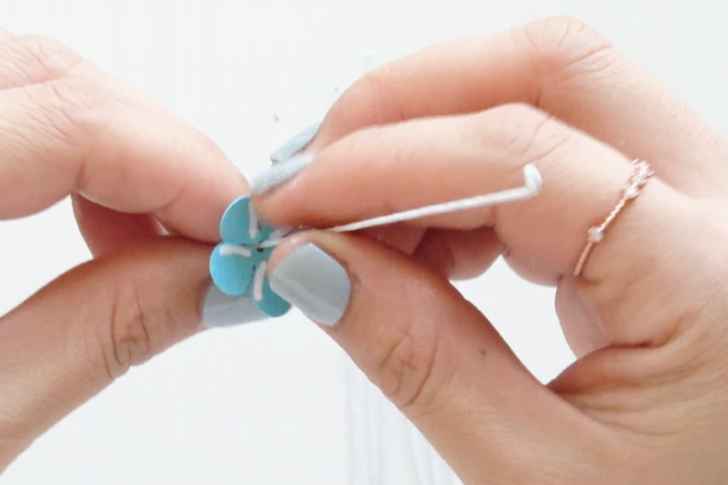
Bend the top of a 23-gauge paper-covered wire into a small loop.
Insert the wire through the center of the petals.
STEP.4⬆️
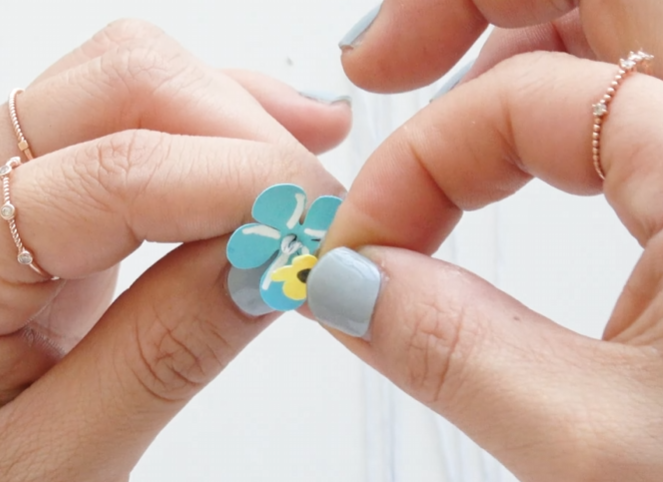
Glue the yellow flower center onto the middle of the petals.
Press gently until it is firmly attached. ^^
STEP.5⬆️
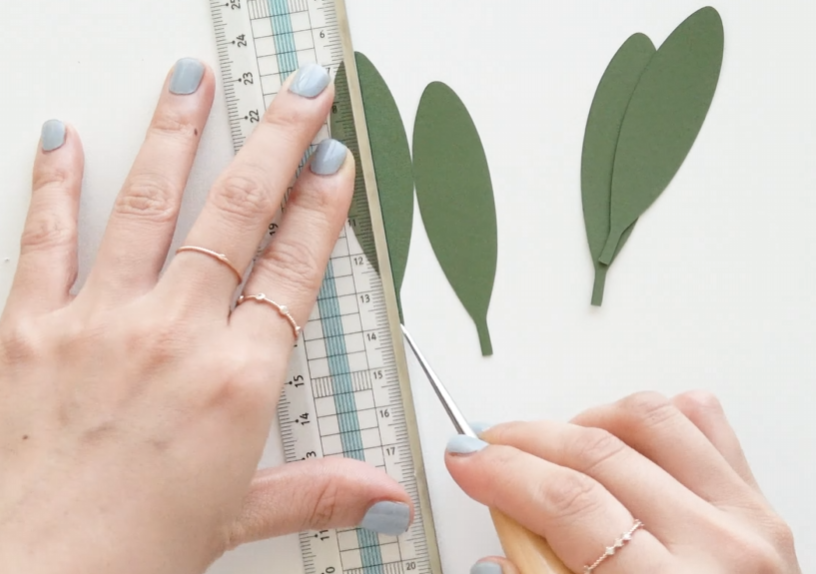
Cut the green cardstock into leaf shapes.
Use an awl or another pointed tool to draw a line down the center of each leaf to create a natural vein. 🌿
STEP.6⬆️
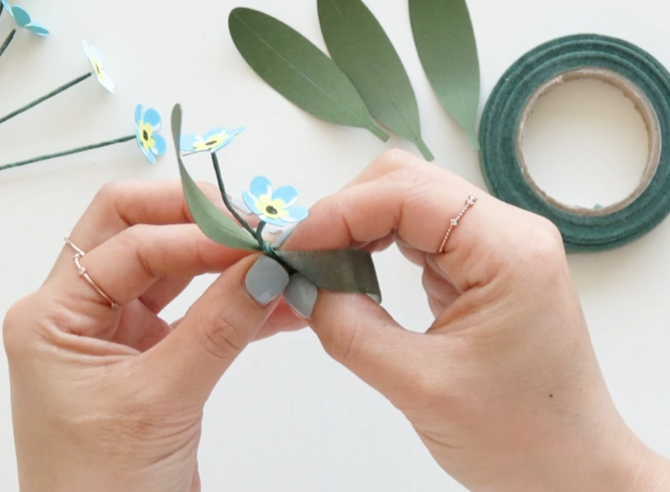
Use green floral tape to connect the forget-me-not flowers and leaves together.
Wrap the tape neatly around the stems as you assemble each small branch.
STEP.7⬆️
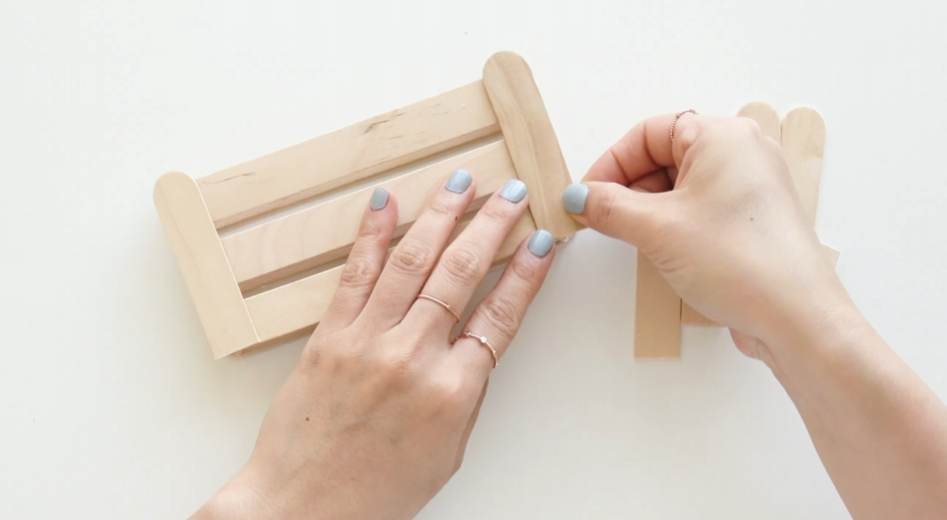
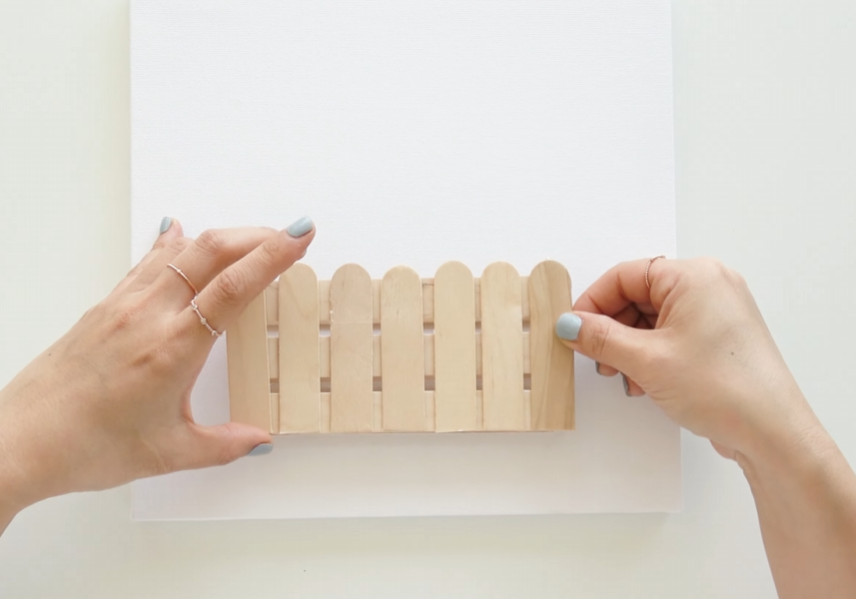
Glue the wooden craft sticks together to create a small fence shape like the one shown in the photo. 🪵
STEP.8⬆️
Position the fence in the center of the lower part of the canvas.
Secure it firmly with a hot glue gun.
STEP.9⬆️
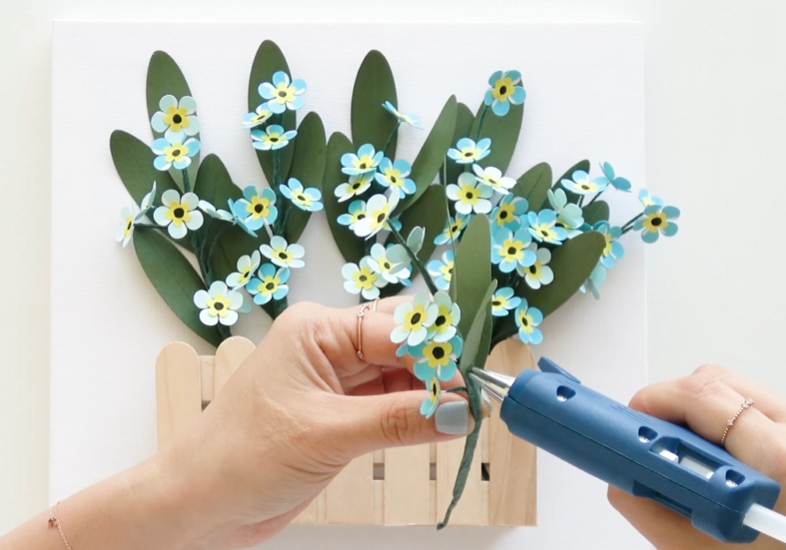
Apply hot glue to the stems of the finished forget-me-not flowers.
Insert and secure them behind the fence one by one. 💙🌼

FINAL STEP⬆️
Continue adding the flowers and leaves until there are no noticeable empty spaces.
Once the arrangement looks full and balanced, your forget-me-not paper flower wall art is complete! ✨
Eva’s Tip
When adding white details around the edges of the petals with a gel pen, simply follow the natural outline of each petal.
You don’t need to make the line perfectly thin or even. A mix of thicker and thinner white edges actually makes the forget-me-not paper flowers look more natural. 💙
Before gluing the flowers permanently behind the fence, arrange all of them first and check the overall balance.
Once you find a layout you like, secure each flower in place with a hot glue gun. This makes it much easier to adjust the composition before everything is fixed. ^^
You can also freely mix the blue and sky-blue flowers.
There’s no need to use an exact 50:50 ratio—a slightly uneven mix can make your finished paper flower wall art look even more natural and lively. 🌼

The meaning behind forget-me-not flowers is “Don’t forget me.” 💙
I think that sweet meaning suits these tiny, delicate flowers perfectly. ^^
My lovely blooms, your support means so much to me. Purchasing the pattern is a huge help and allows me to keep creating and sharing more paper flower tutorials with you. ^^
If it’s difficult to find all the materials individually, I’ve also prepared a complete one-project kit with everything you need.
So please don’t give up before you start—I hope you’ll give it a try, enjoy the process, and experience the joy of creating something beautiful with your own hands. 🌼
Thanks for stopping by my little paper flower garden, my lovely bloom. 🌼
See you among the petals again!
Leave a Reply