
Hey, lovely bloom! Thanks for wandering into my little paper flower garden. 🌸
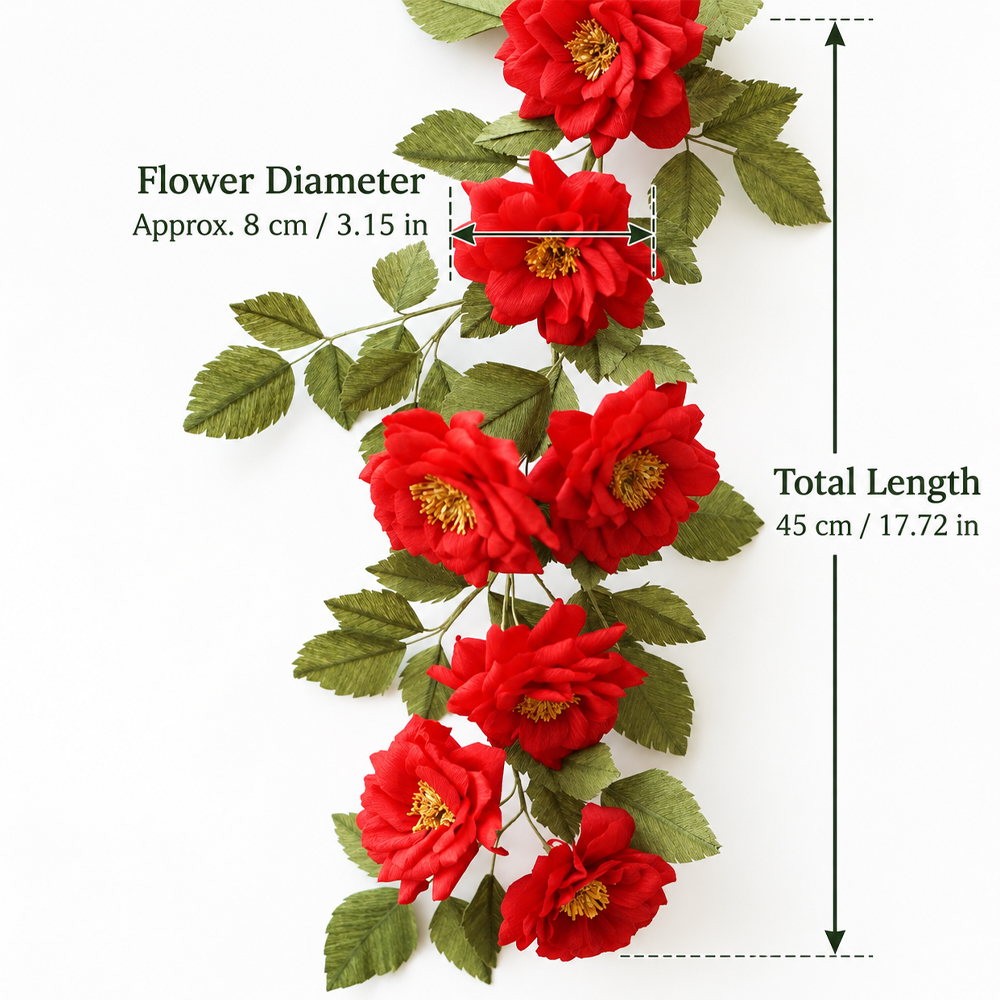
Today, we’re going to make a beautiful crepe paper rose garland, with rich red roses and green leaves flowing naturally along the vine. 🌹🌿
If you’ve ever wondered how to make paper roses that look full and realistic, this project is a lovely one to try. The layered petals give each rose a soft, natural shape, while the leafy vine turns the finished piece into beautiful paper flower wall decor. ✨
I’ve uploaded a detailed step-by-step video tutorial on YouTube, and I’ve also listed all the materials and helpful tips you’ll need right here in this post. 🎥✂️
Follow along with the video and blog tutorial at your own pace—even if you’re completely new to making crepe paper flowers, you can create a beautiful finished piece you’ll be proud to display. 😊
This rose garland has the lush, romantic look of fresh roses, but unlike real flowers, it won’t wilt. 🌹💕 Hang it on a wall, decorate a special corner of your home, or use it as a long-lasting floral accent for an event or photo backdrop.
Difficulty: ★★★☆☆
Time: About 3 hours
Today’s project is a crepe paper rose garland that you can hang and use as beautiful wall decor. 🌹🌿
A few days ago, I shared a vase-style crepe paper rose project, and this one has a completely different charm. Instead of arranging the roses upright in a vase, we’re connecting them into a flowing vine shape so they can drape naturally along a wall. ✨
One of the best things about this rose garland is that you can easily customize the length. Just add more paper roses and leaves to make the vine as long as you like. If you make several garlands, you could even decorate a larger section of your wall and create a full paper flower display. 💕🏡
If you’re looking for a creative hobby you can enjoy at home, this is a lovely project to try. Making each flower by hand is relaxing, and seeing the finished piece hanging on your wall gives you such a satisfying sense of accomplishment. 😊
I share the entire process in detail on both YouTube and this blog, so you don’t need to attend an offline class to learn how to make paper roses. You can simply follow along step by step at your own pace. 🎥✂️
For this project, I use Italian crepe paper. I especially like Italian crepe paper because the colors are beautiful, and the texture and stretch help the petals and leaves hold a more natural shape. 🌹
For the stems, I use 23-gauge green floral wire. While thicker 18-gauge wire is often used for regular flower stems, the thinner 23-gauge wire works especially well for a hanging rose vine because it allows the branches to bend and drape more naturally. 🌿
If you don’t have a Styrofoam ball, you can also roll aluminum foil into a small, firm ball and use it as an alternative. 👍
The finished flowers are approximately 8–10 cm (3.1–3.9 in) in diameter, and the full rose garland is about 45 cm (17.7 in) long.
The exact size may vary slightly depending on how you shape the flowers and how you measure the finished piece. If you’d like a longer paper flower garland, simply add more rose blooms and leaves to extend the vine. 🌹✨

Materials 🌿
- Pattern
- Scissors
- Hot glue gun
- Wood glue
- 23-gauge green floral wire
- Thin wooden stick
- 140 gsm lemon-yellow crepe paper
- 140 gsm brown crepe paper
- 90 gsm yellow crepe paper
- 90 gsm green crepe paper
- 60 gsm red crepe paper
How to Make It ✂️🌹

STEP.1 ⬆️
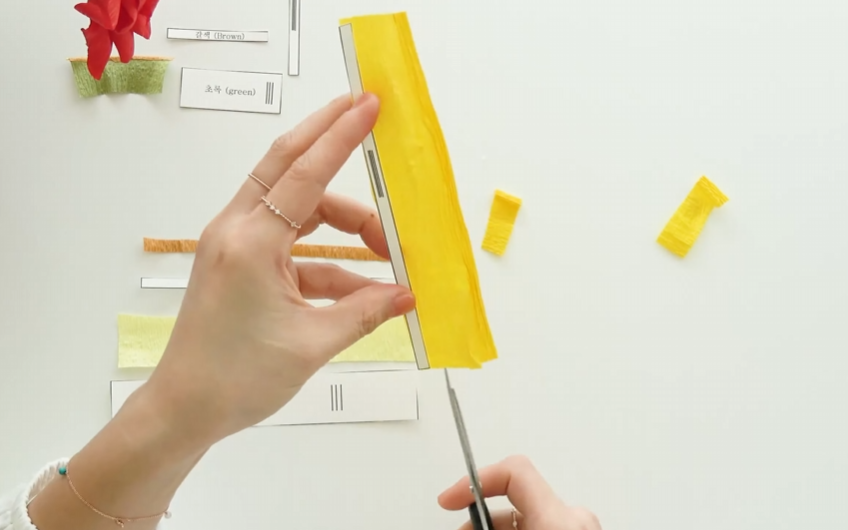
Stretch the green, brown, and yellow crepe paper as much as possible, then cut each piece according to the pattern templates. ✂️

STEP.2 ⬆️
Attach the brown crepe paper to the top of the green piece. Twist the yellow paper into thin strands, place them along the border between the green and brown sections, and then fold the brown paper over them to secure everything in place. 🌿
STEP.3 ⬆️
Fully stretch the lemon-yellow, brown, and yellow crepe paper, then cut each piece according to the pattern. ✂️✨

STEP.4 ⬆️
Attach the brown paper to the top of the lemon-yellow piece. Twist the yellow paper, place it along the border between the lemon-yellow and brown sections, and cover it with the brown paper. 🌼
STEP.5 ⬆️
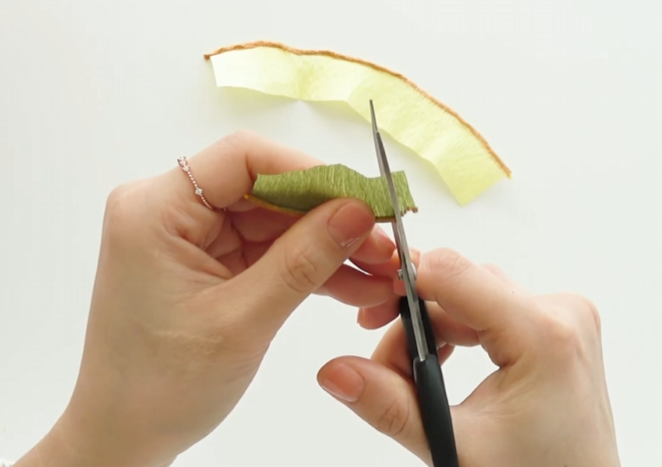
Take the green stamen piece and make very thin cuts from the brown section downward, about 1 cm (0.4 in) deep. ✂️

STEP.6 ⬆️
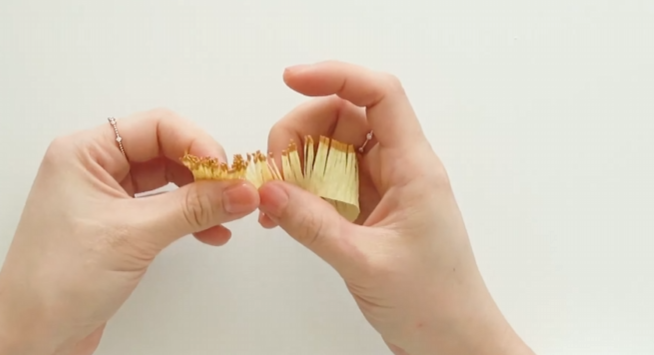
For the lemon-yellow stamen, cut thin fringes while leaving about the bottom one-third uncut. 🌼
STEP.7 ⬆️
Gently rub and roll the thin strips between your fingers to give the stamens a more natural, textured appearance. 🤲✨

STEP.8 ⬆️
Insert a 23-gauge green floral wire into the Styrofoam ball. If you don’t have a foam ball, you can also use a small, tightly rolled ball of aluminum foil. 👍
STEP.9 ⬆️
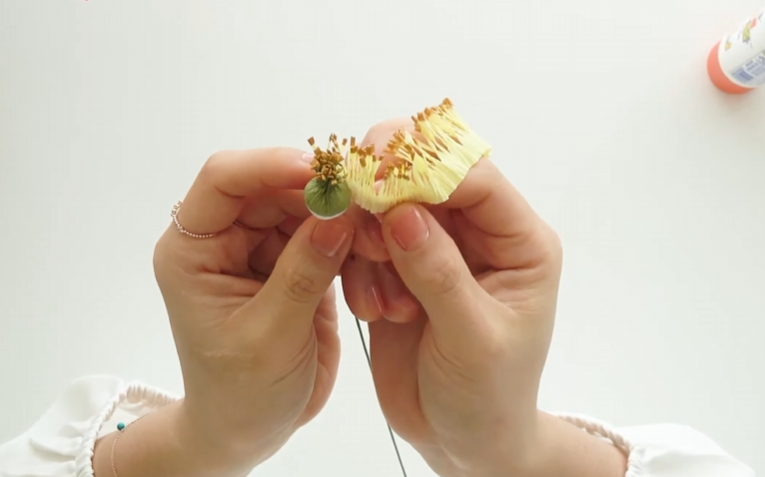
Attach the green stamen around the middle of the foam ball. Then wrap the lemon-yellow stamen around the outside of the green section to create the center of the paper rose. 🌹
STEP.10 ⬆️
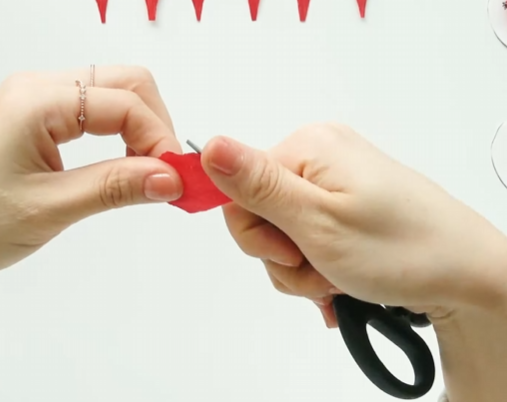
Cut the red crepe paper according to the petal templates. Use the edge of your scissors to gently pull and curl the edges outward, creating a more natural rose petal shape. ✂️🌹
STEP.11 ⬆️
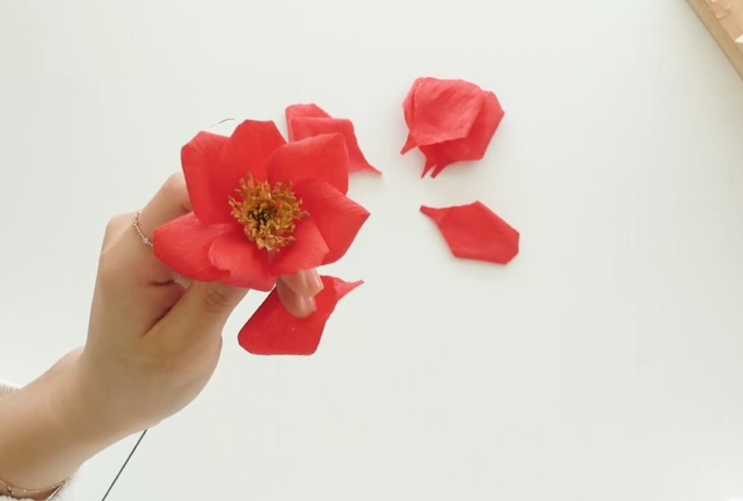
Attach 7 Petal A pieces evenly around the finished flower center. 🌹
STEP.12 ⬆️
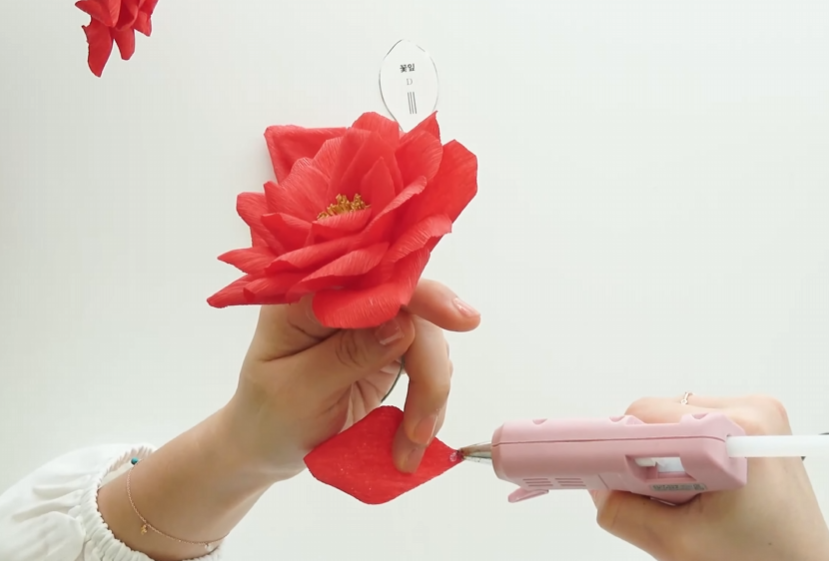
Next, attach 7 Petal B pieces between the gaps of the first layer. Continue building the rose by adding 9 Petal C pieces, followed by 8 Petal D pieces. ✨
Layering the petals this way helps your crepe paper rose look fuller and more realistic.
STEP.13 ⬆️
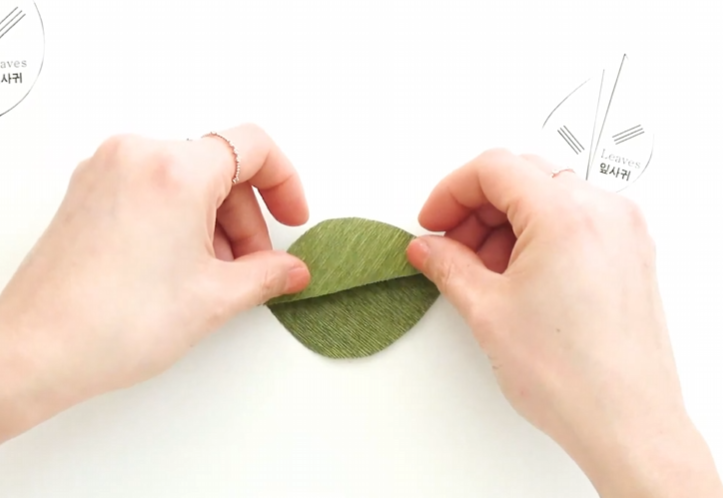
Cut the green crepe paper according to the leaf pattern. Glue a piece of 23-gauge floral wire along the edge of one half of the leaf, then place the other half over the wire and glue the two sides together. 🌿
STEP.14 ⬆️
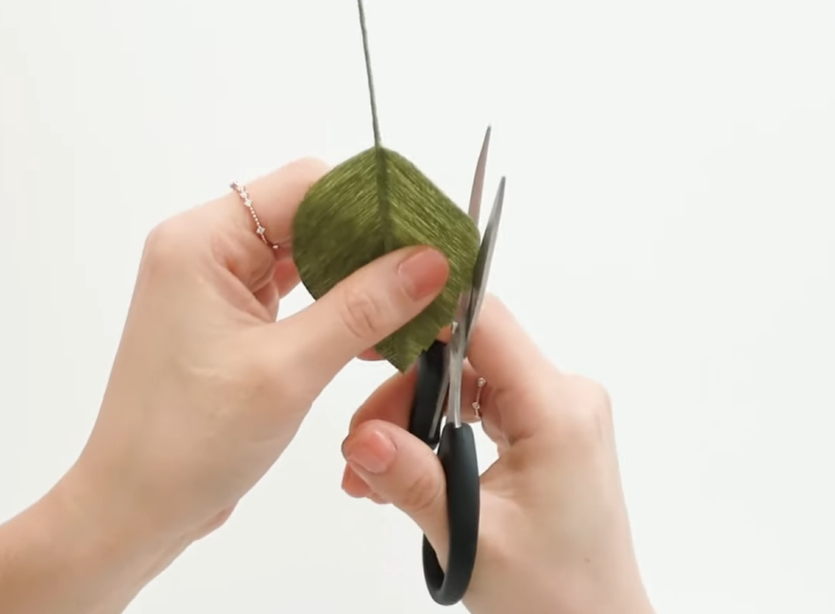
Trim the edges of each leaf into a small serrated, saw-tooth shape to give the leaves a more realistic texture. ✂️🍃
STEP.15 ⬆️
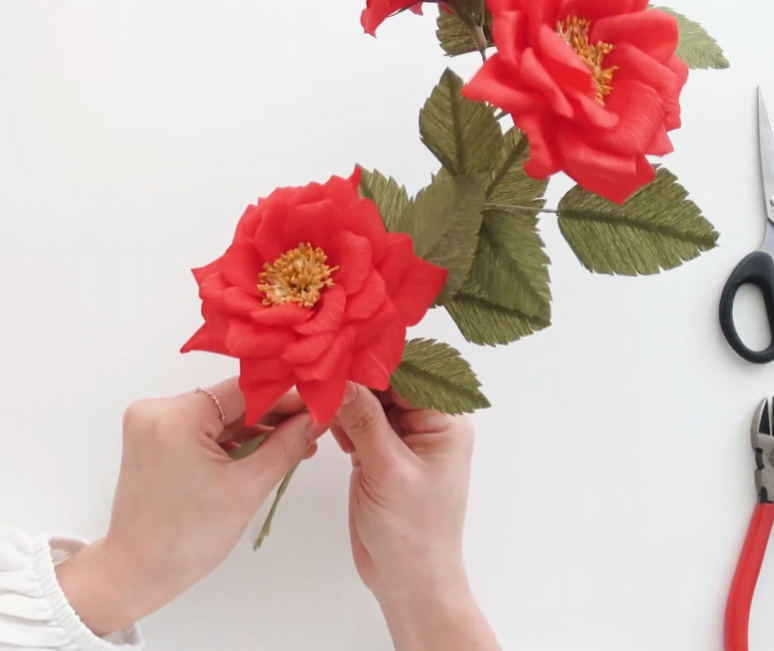
Make several roses and leaves, then connect them together along the floral wire to create your finished crepe paper rose vine. 🌹🌿✨
You can add more paper roses and leaves if you want a longer rose garland, so feel free to adjust the length to fit your wall, photo backdrop, or decorating space. 💕
Eva’s Tip 🌹✨
When shaping the rose petals, gently pull the edge of each petal backward with your scissors. ✂️
As you do this, the edge will naturally curl and start to look more like a real rose petal.
Try using a small flick of your wrist as you pull the scissors backward, almost as if you’re bending the petal slightly away from you. This helps create a softer, more natural curve. 🌹
When making the leaves, apply wood glue over the floral wire, but use only a small amount. Too much glue can make the crepe paper tear or cause discoloration. 🌿
A thin layer is enough. After applying the glue, gently press the paper together with your fingers so the leaf stays neat and smooth. 👍
When cutting the serrated edges of the leaves, you don’t need to make too many tiny teeth. ✂️🍃
Feel free to vary the number and shape of the serrations from leaf to leaf.
That little bit of irregularity actually helps the finished crepe paper rose vine look more natural once all the roses and leaves are connected together. 🌹🌿✨
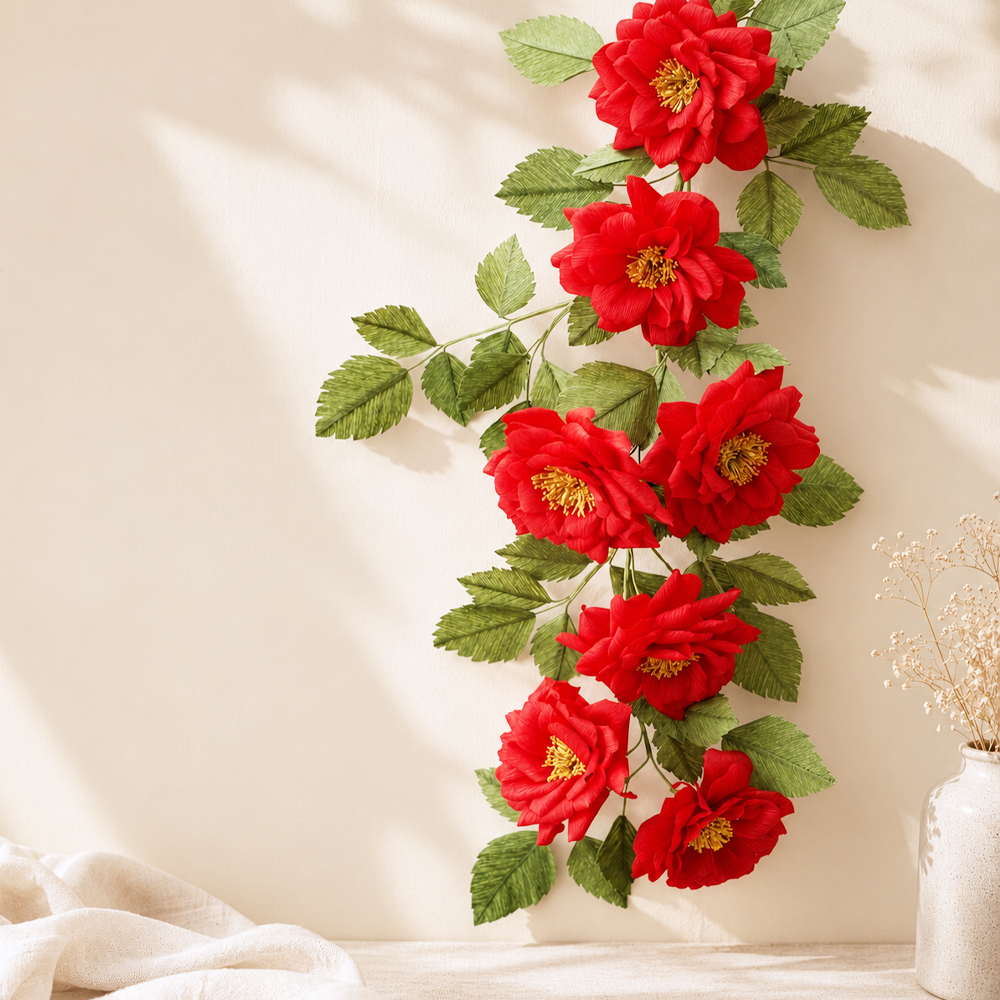
Today’s finished rose vine makes a beautiful handmade accent for a wall or door. 🌹🌿
You can also lay it across a table for a soft, natural decorative touch.
Because these crepe paper roses don’t need watering or daily care, they’re easy to enjoy for a long time without worrying about wilting. ✨
And one of the best moments is when you finally hang the finished paper flower garland on the wall. A space that once felt simple can suddenly look brighter and more special—all because of something you made with your own hands. 😊💕
That feeling of seeing your handmade flowers transform a room is one of the reasons I love paper flower projects so much. 🌹✨
My lovely blooms, your support means so much to me. Purchasing the pattern is a huge help and allows me to keep creating and sharing more paper flower tutorials with you. ^^ 🌹💕
If it’s difficult to find all the materials individually, I’ve also prepared a complete one-project kit with everything you need. ✂️🌿
So please don’t give up before you start—I hope you’ll give it a try, enjoy the process, and experience the joy and sense of accomplishment that comes from creating your own beautiful flowers by hand. 🌼✨
Thanks for stopping by my little paper flower garden, my lovely bloom. 🌼 See you among the petals again!

Leave a Reply