Author: hyojoonut3927

  • How to Make a Magically Realistic Crepe Paper Sunflower: Free Video Tutorial

    How to Make a Magically Realistic Crepe Paper Sunflower: Free Video Tutorial

    Hey, lovely bloom! Thanks for wandering into my little paper flower garden. 🌸
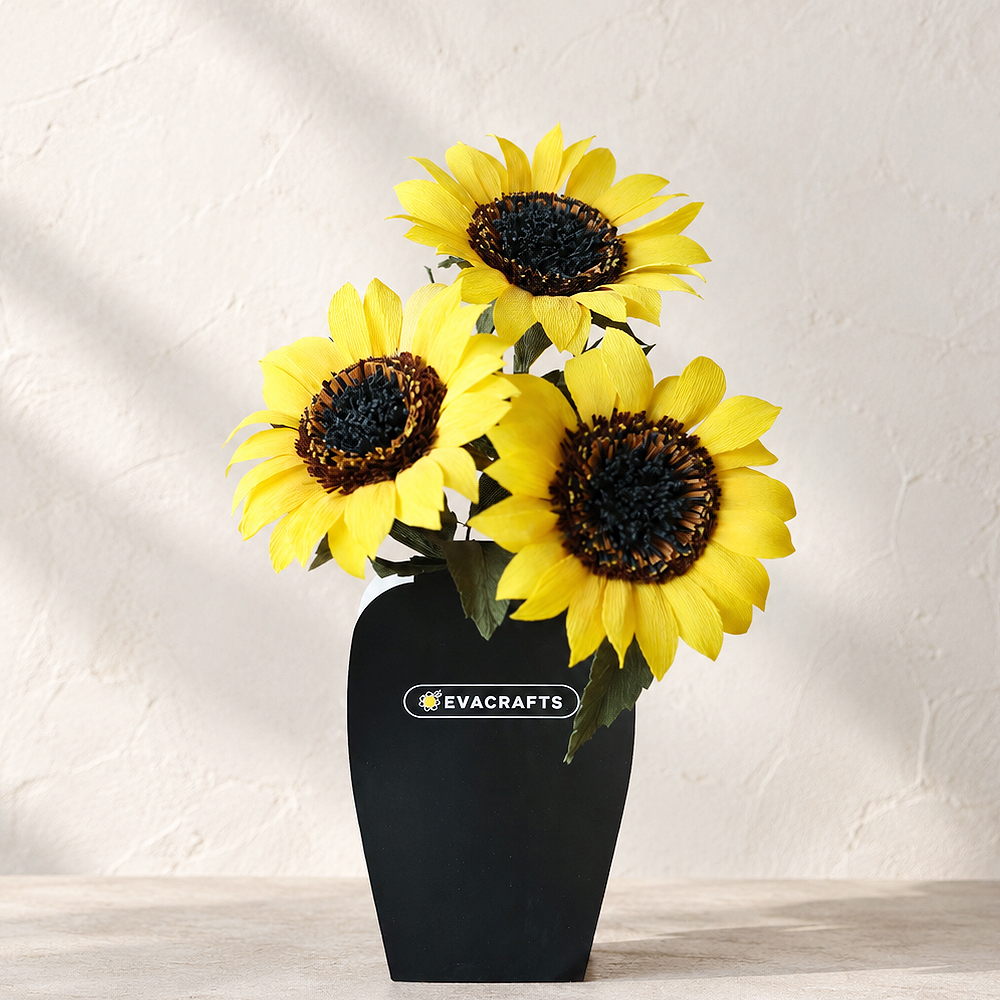
    Realistic crepe paper sunflowers arranged in a black vase

    Difficulty: ★★☆☆☆
    Time: About 1 hour per flower

    Today, we’re going to make a beautiful sunflower using crepe paper.

    Sunflowers may look difficult because their centers have so many tiny details, but don’t worry. If you follow along with my free YouTube video and the detailed step-by-step instructions below, you’ll be able to create a beautiful paper sunflower that looks surprisingly close to the real thing.

    By taking advantage of the natural grain and stretch of crepe paper, you can shape soft curves and add volume to each petal. These small details help create a sunflower that looks so natural, it’s hard to believe it’s made from paper.

    Let’s make a bright, cheerful crepe paper sunflower together—one that will never wilt and can bring a little sunshine into your home. 🌻
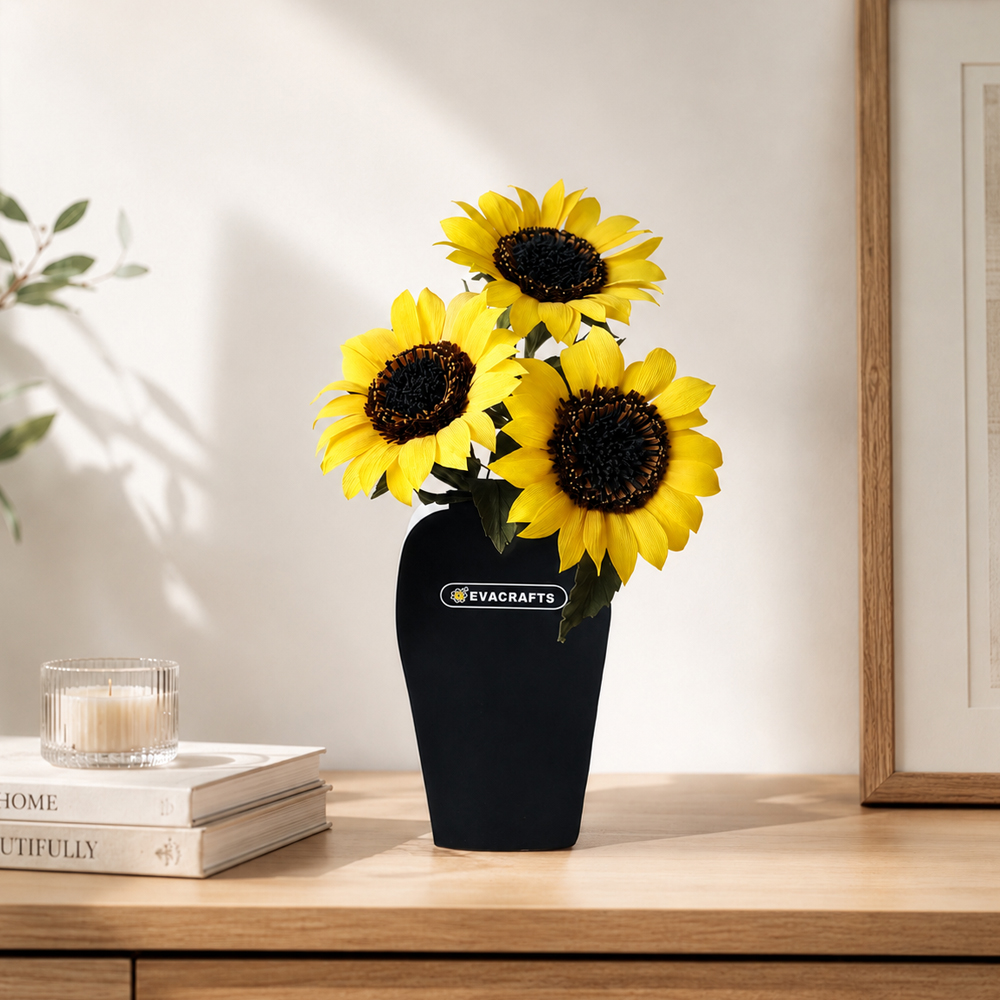
    Realistic crepe paper sunflowers displayed in a black vase on a wooden table

    Sunflowers have lots of petals, but the good news is that you’re simply repeating the same petal shape and attaching them one by one, so you don’t need any especially difficult techniques.

    If this is your first time working with crepe paper, getting used to how much pressure to use when stretching and shaping the petals may feel a little unfamiliar at first. But if you follow along with the video, you’ll quickly get the hang of it and be able to create a beautiful flower.

    And don’t worry about making every single petal perfectly identical. In fact, slight differences in size, curve, and direction make the finished flower look even more like a real sunflower. ^^

    Sunflowers are often associated with meanings such as admiration, loyalty, and waiting. Because sunflowers are known for turning toward the sun, they’re also commonly seen as symbols of warmth, positivity, and looking toward someone or something with affection.

    Their bright, cheerful appearance makes them a lovely handmade gift for encouragement, gratitude, or simply brightening someone’s day. Add a short message card to your finished crepe paper sunflower, and it can become a special paper flower gift that lasts much longer than fresh flowers. 🌻

    For the petals, I recommend using crepe paper with a clear grain that stretches smoothly and holds a soft, natural curve. I personally use Italian crepe paper because I love its texture, stretch, and rich colors.

    If you don’t have pastel powder, that’s perfectly fine. You can gently scrape a regular soft pastel with a craft knife to create a fine powder and use it for shading the petals and flower center.😍

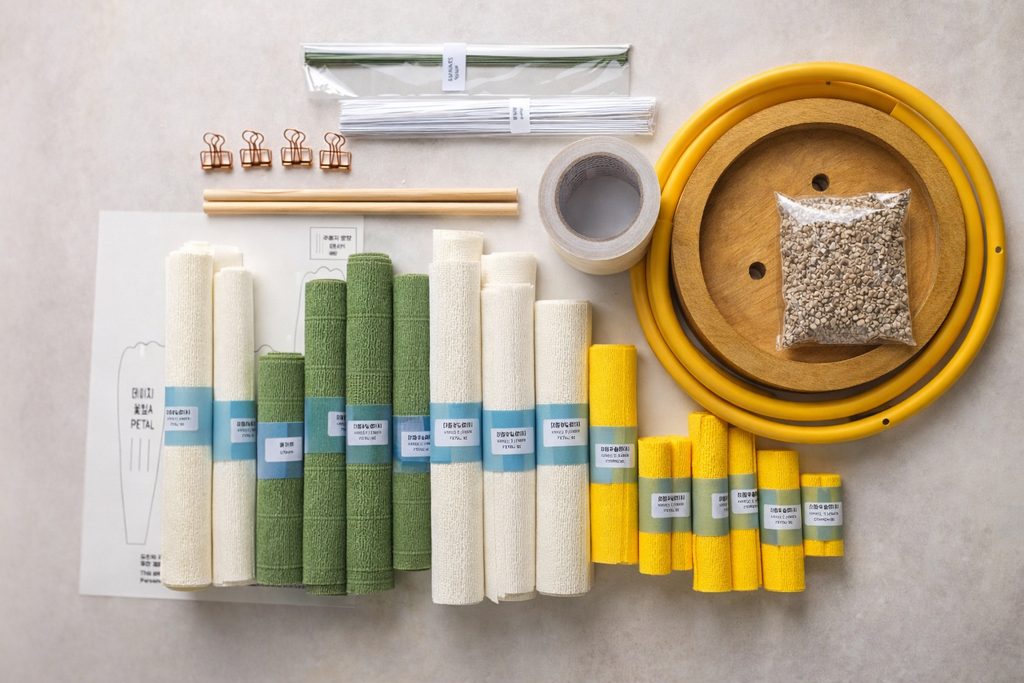
    Materials for making a realistic crepe paper sunflower, including crepe paper, wire, glue, sponge, and pastel powder

    Materials Needed

    • Sunflower template
    • Scissors
    • Hot glue gun
    • 23-gauge green floral wire
    • 4 mm floral stem
    • 90 gsm yellow crepe paper
    • 90 gsm green crepe paper
    • 140 gsm light brown crepe paper
    • 140 gsm dark brown crepe paper
    • 140 gsm black crepe paper
    • Wood glue
    • Deep yellow pastel powder
    • Sponge
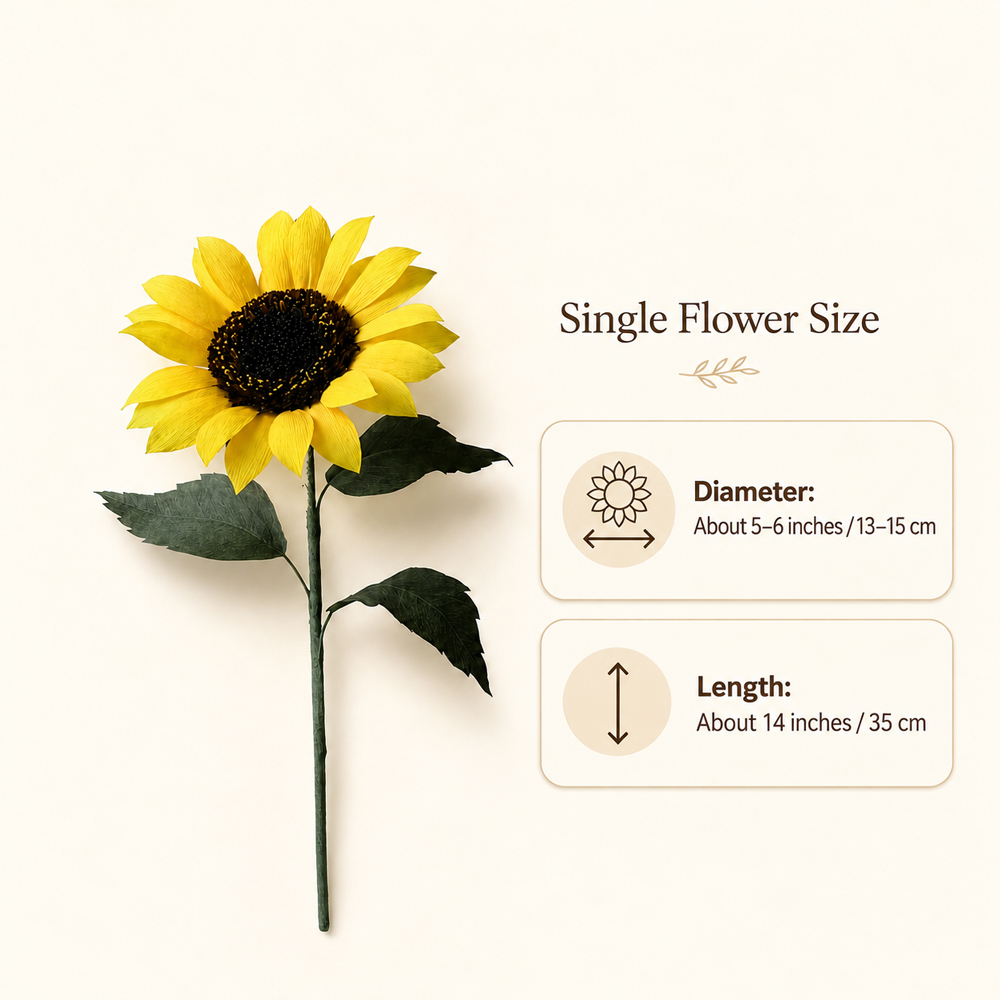
    Crepe paper sunflower size guide showing a 13–15 cm flower diameter and 35 cm stem length

    The finished flower is about 13–15 cm (5–6 inches) in diameter and approximately 35 cm (14 inches) long.

    The exact size may vary slightly depending on how you shape and assemble the flower. ^^

    Because the sunflower is quite large, even a single stem has a strong presence and can make a beautiful statement on its own. 🌻

    [How to Make a Crepe Paper Sunflower]

    Follow these steps to build the detailed flower center, shape the petals, and finish your realistic crepe paper sunflower.

    Twisting black crepe paper fringe to create the sunflower center

    STEP.1⬆️

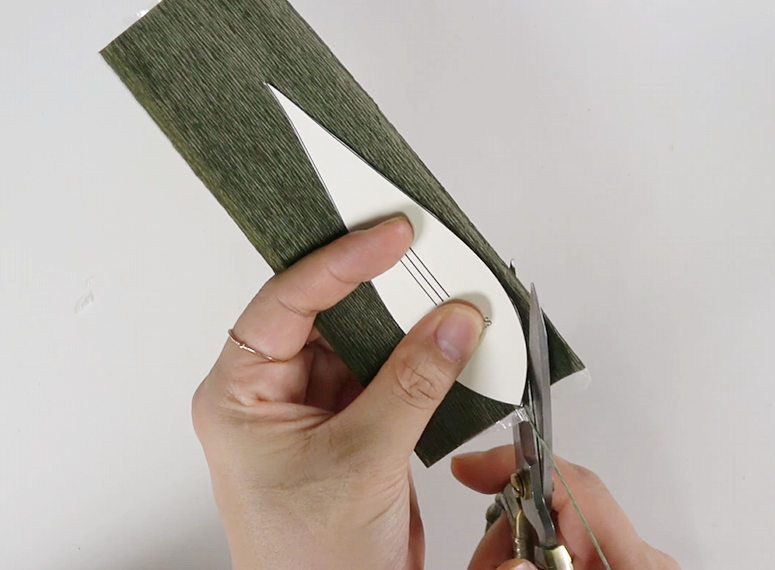
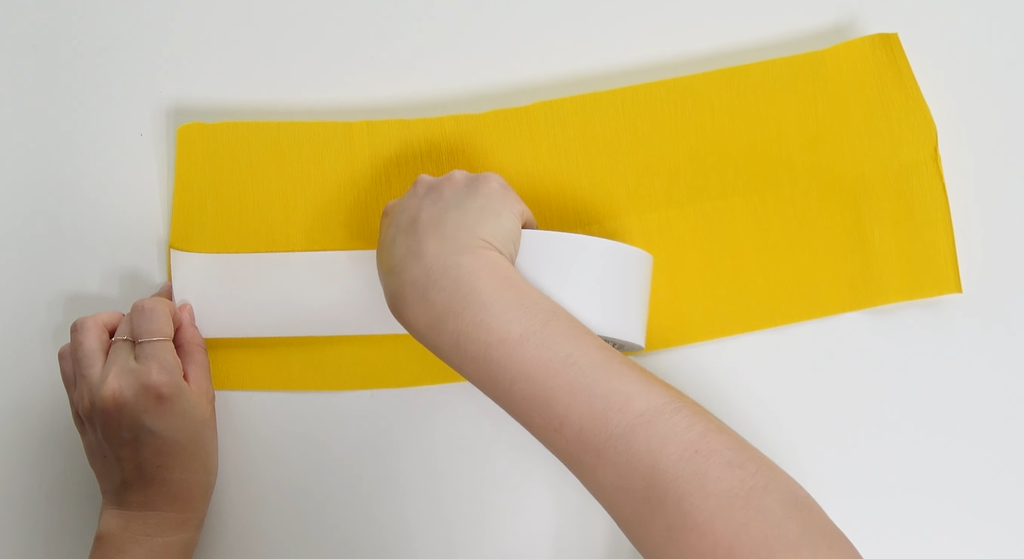
    Cut the black crepe paper using the Black A template.
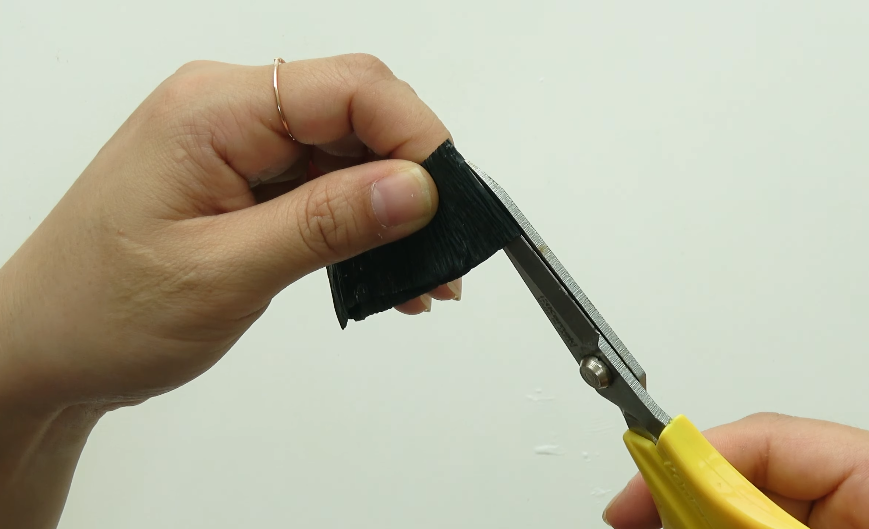
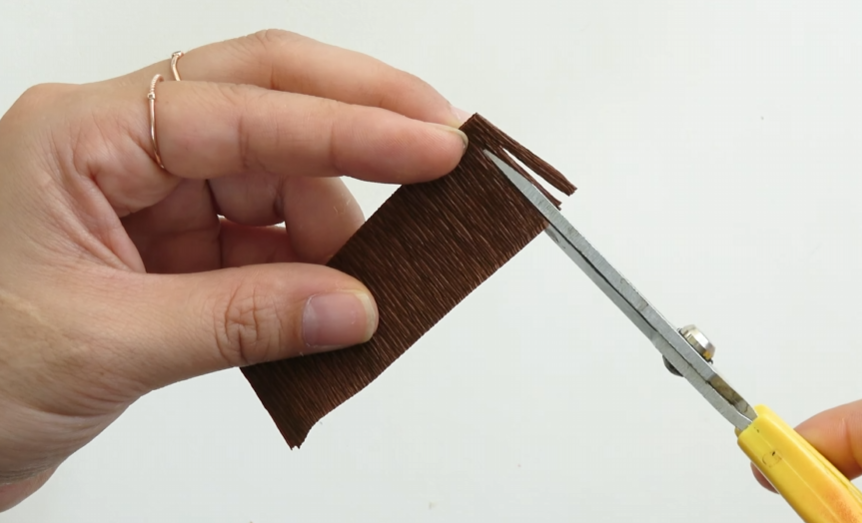
    Cutting light brown crepe paper into fine fringes for the sunflower center

    STEP.2⬆️

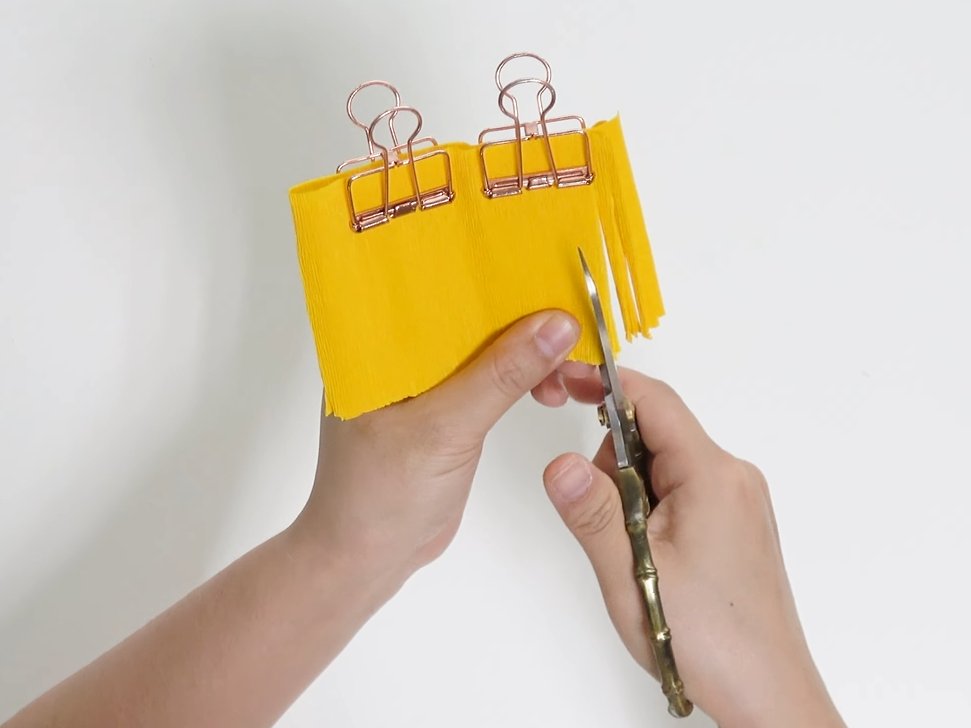
    Fold it in half and glue the layers together with wood glue. Leave about 5 mm at the bottom and cut the rest into very fine fringes.
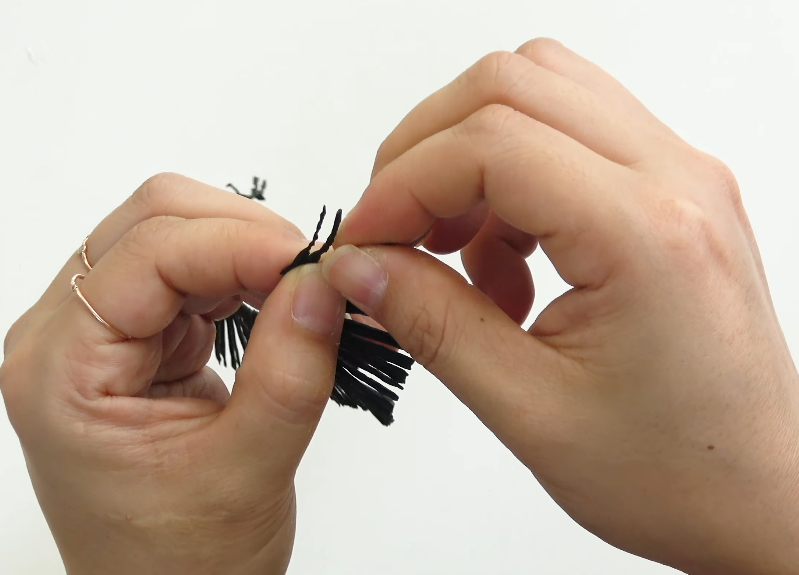
    Twisting light brown crepe paper fringes by hand for a natural texture

    STEP.3⬆️

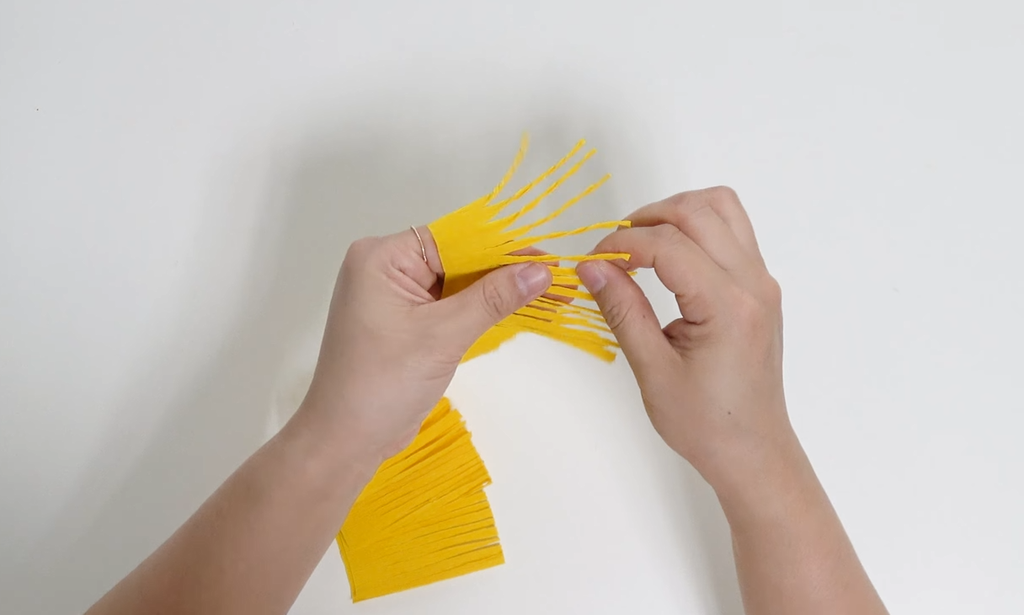
    Twist each fringe gently between your fingers. Make four identical pieces.

    Adding yellow pastel powder to black crepe paper stamens

    STEP.4⬆️

    Cut the light brown crepe paper into fine fringes as well, leaving about 5 mm uncut at the bottom.
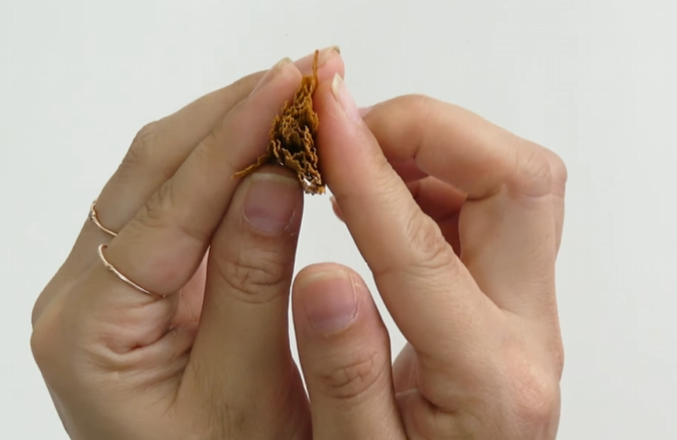
    Layering black and brown crepe paper fringes for a realistic sunflower center

    STEP.5⬆️

    Gently rub and twist the fringes between your fingers to give them a more natural texture. Make two identical pieces.😊
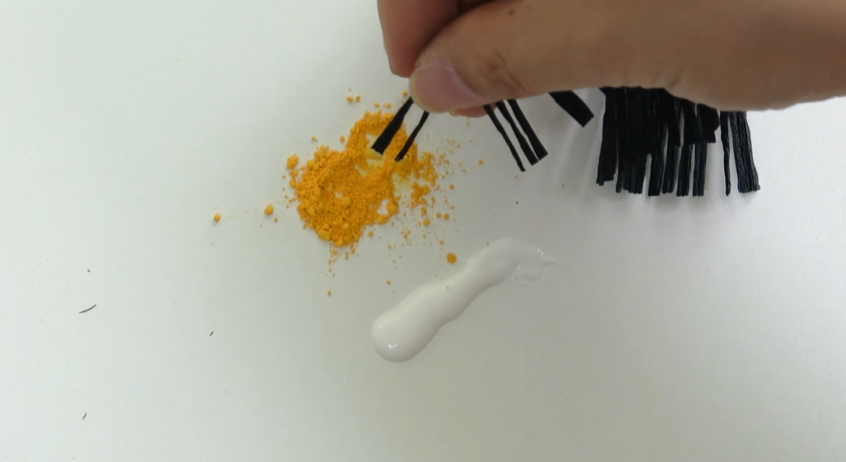
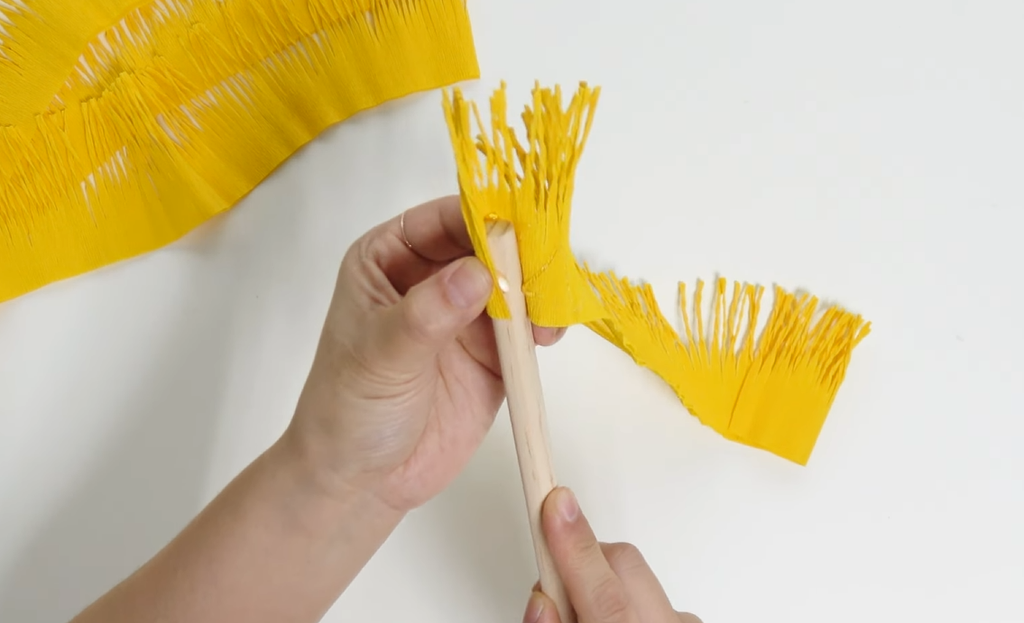
    Cutting dark brown crepe paper into fine fringes for the outer flower center

    STEP.6⬆️

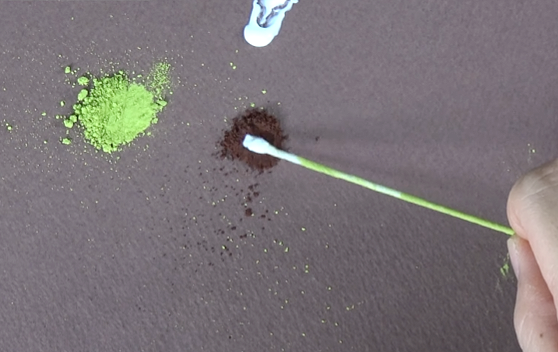
    Cut the Black B stamen piece into fine fringes. Apply a small amount of wood glue to the tips, then add deep yellow pastel powder.😘

    Finished layered center for a realistic crepe paper sunflower

    STEP.7⬆️

    Layer the pieces in this order: brown stamen, Black B stamen, and brown stamen. Glue them together.
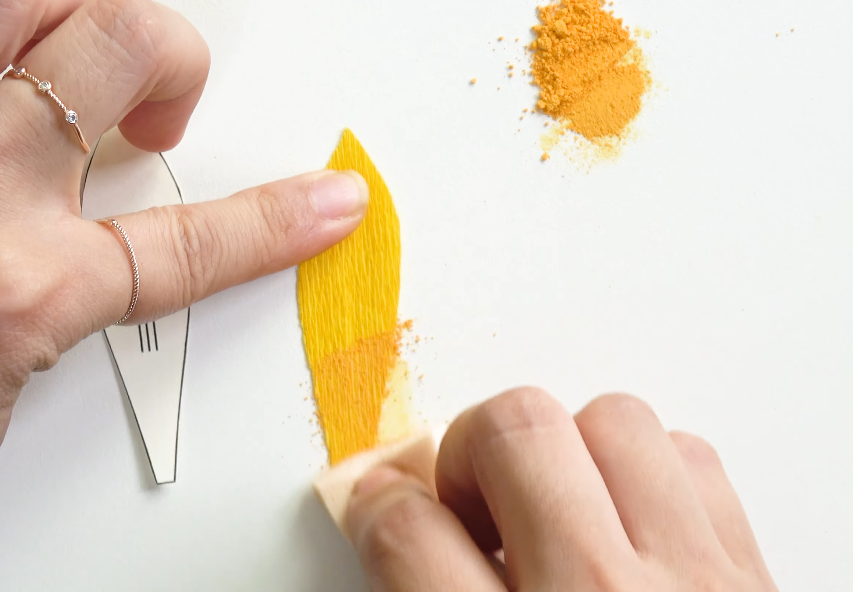
    Shading the base of a yellow crepe paper sunflower petal with pastel powder

    STEP.8⬆️

    Cut the dark brown crepe paper using the template, then cut it into fine fringes. Make six identical pieces.

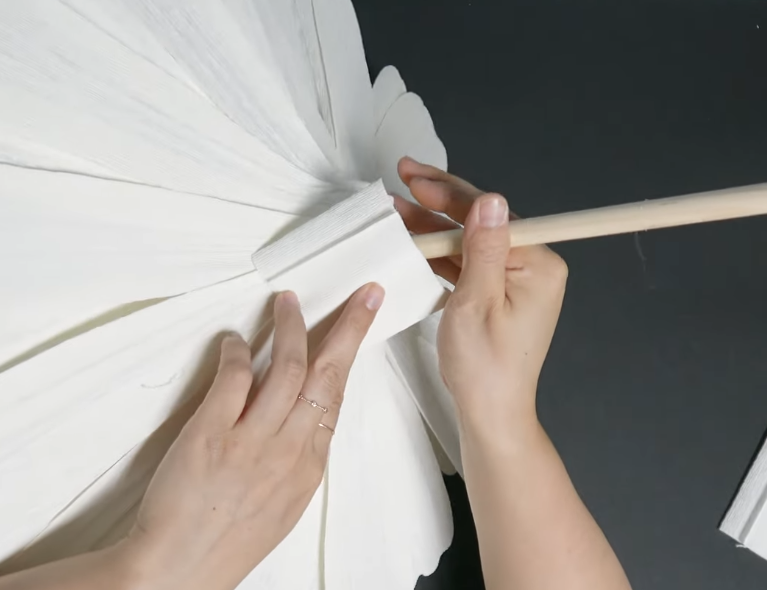
    Stretching the center of a yellow crepe paper petal to create natural volume

    STEP.9⬆️

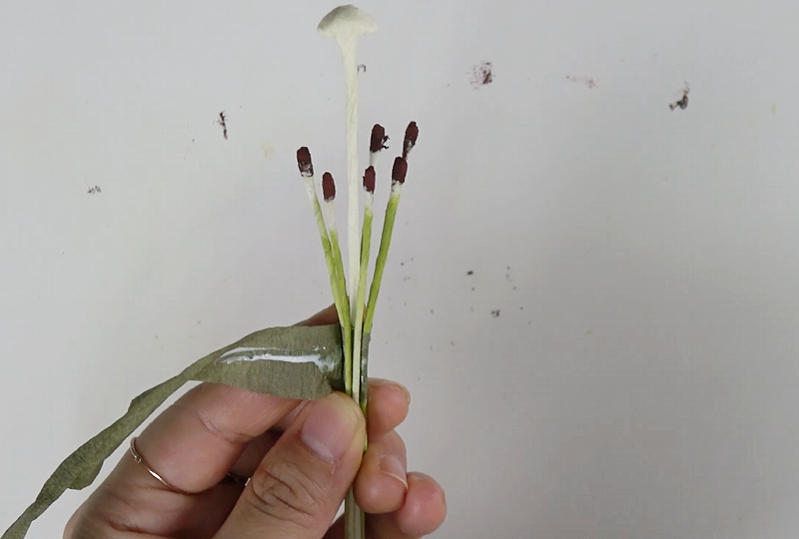
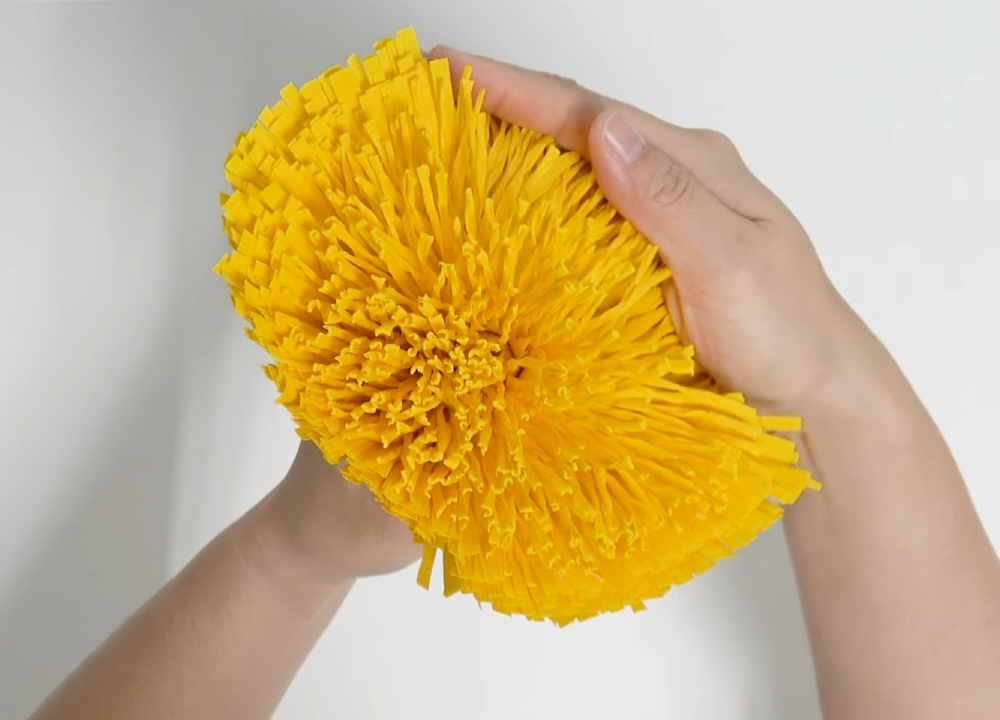
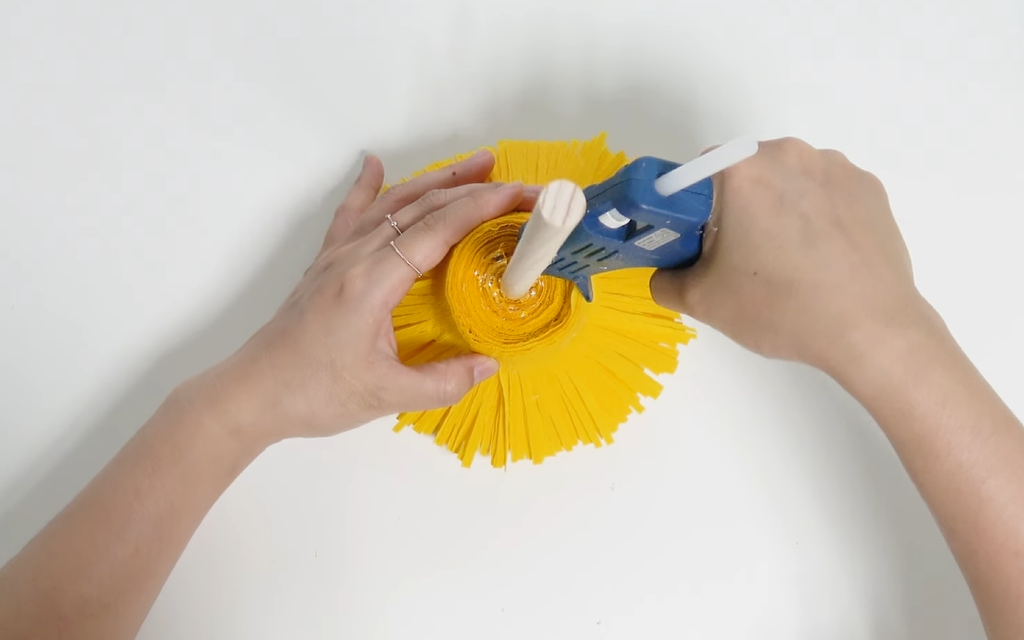
    Wrap and glue the center pieces around the floral stem in this order: Black A stamen, light brown stamen, Black B stamen, light brown stamen, and dark brown stamen.
    Attaching the first layer of yellow petals around the crepe paper sunflower center

    STEP.10⬆️

    Cut the yellow crepe paper using the sunflower petal template. Lightly shade the lower part of each petal with pastel powder.😍

    Adding a second layer of petals between the first sunflower petals

    STEP.11⬆️

    Gently stretch the center of each petal with your fingers to create a soft curved shape and natural volume.😘

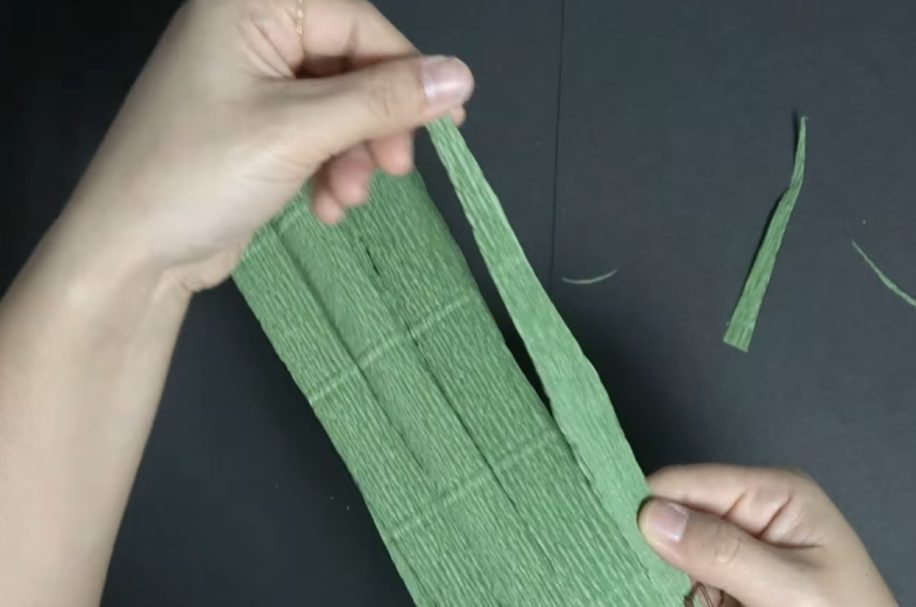
    Crumpling green crepe paper sepals to create a natural texture

    STEP.12⬆️

    Attach 12 petals evenly around the sunflower center.
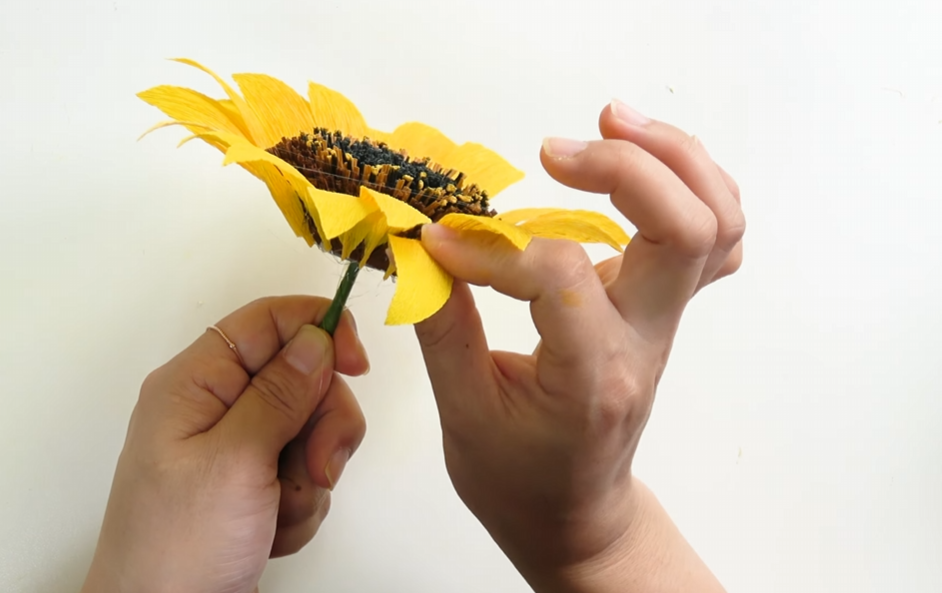
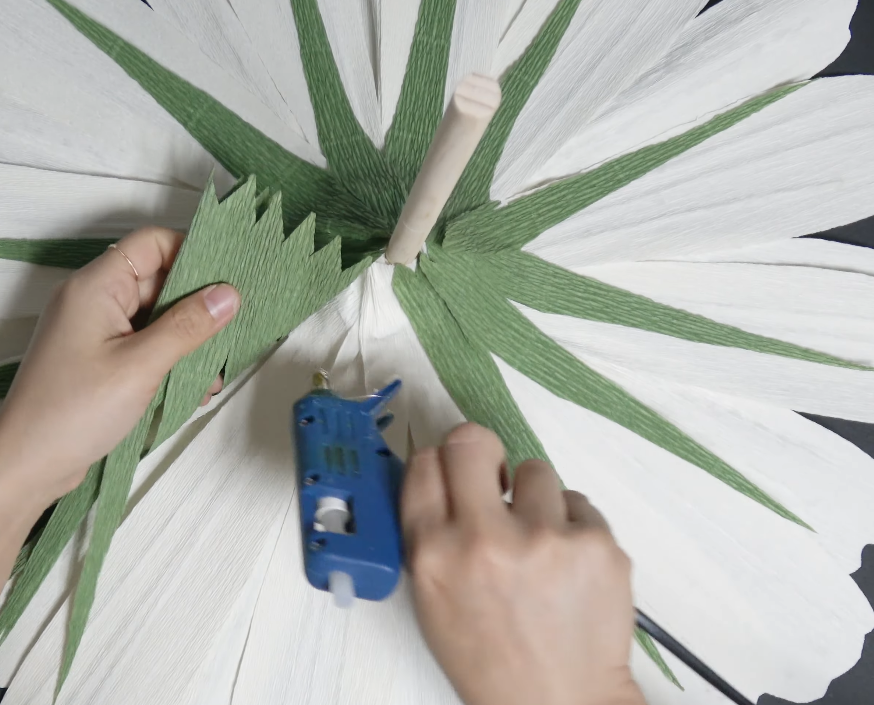
    Attaching green crepe paper sepals underneath the sunflower

    STEP.13⬆️

    Add the second layer of petals by placing each petal between the gaps of the first layer. Slight differences in angle and shape will help your paper sunflower look more natural.😘

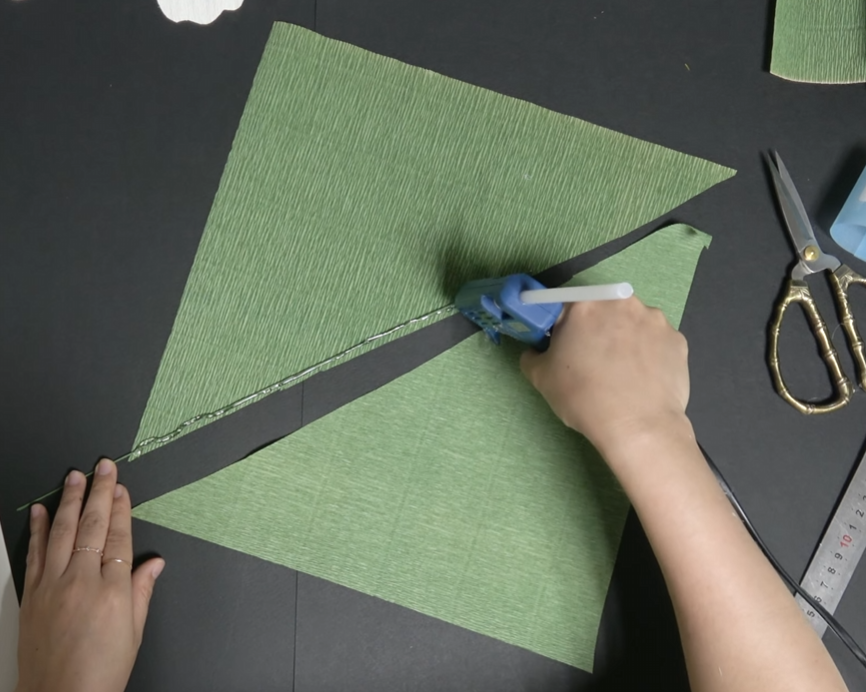
    Placing floral wire between two green crepe paper leaf pieces

    STEP.14⬆️

    Cut the green crepe paper using the sepal template. Gently crumple it, then open it again to create a realistic texture.😊

    Trimming the edge of a crepe paper sunflower leaf into a serrated shape

    STEP.15⬆️

    Glue the sepal underneath the flower.😊

    Attaching crepe paper leaves to the sunflower stem

    STEP.16⬆️

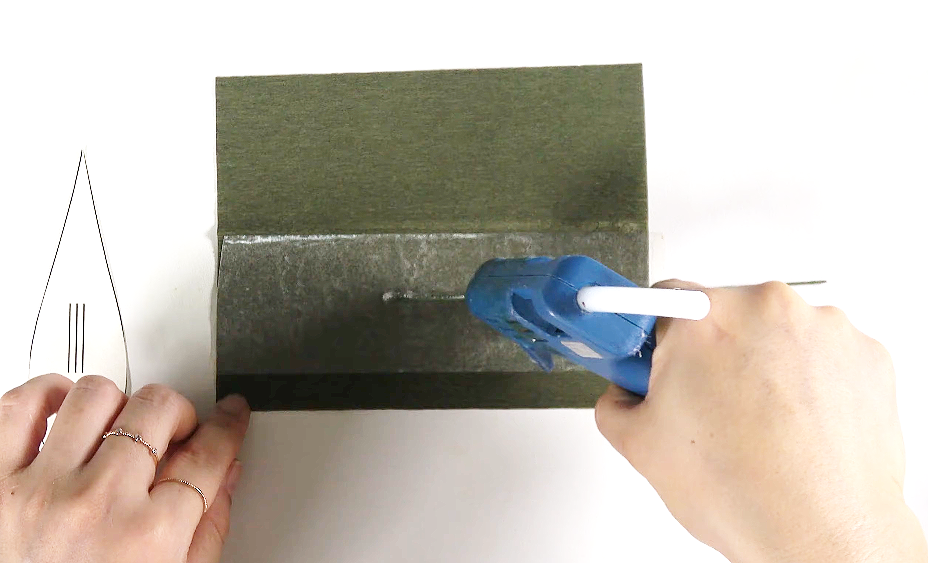
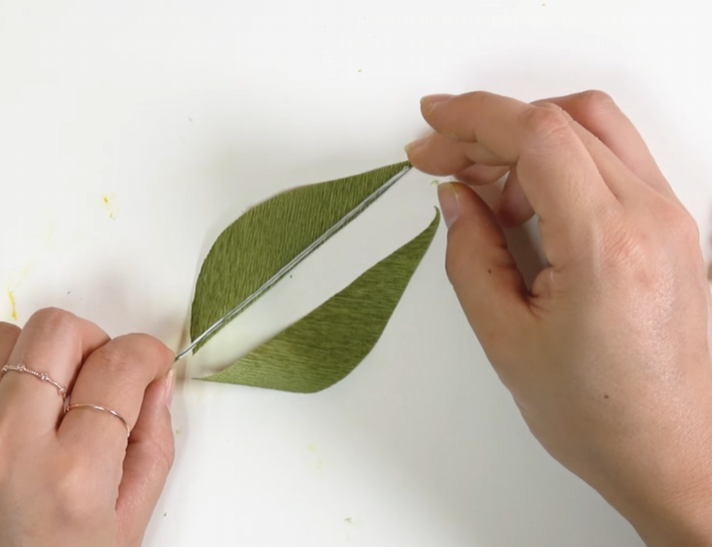
    Cut the green crepe paper using the leaf template. Place a piece of 23-gauge green floral wire along the edge of one half of the leaf, then glue the other half over it to sandwich the wire inside.

    Cutting black crepe paper with the sunflower center template

    STEP.17⬆️

    Trim the edges of the leaf into a natural serrated shape.😘

    Cutting folded black crepe paper into fine fringes for the sunflower center

    FINAL STEP😍

    Attach the leaves to the stem, and your realistic crepe paper sunflower is complete. 🌻💕

    Eva’s Tip

    Before cutting the petals, always check the direction of the crepe paper grain. If the grain runs the wrong way, the petals won’t shape as naturally.

    When forming each petal, gently stretch only the center to create a soft curve and natural volume. You don’t need to use much force—just press and stretch lightly with your fingers.

    Because a sunflower has a large center and petals that spread outward in every direction, it’s important to check the flower from above as you work.

    While attaching the petals, look down at the flower from the top to make sure the shape stays balanced. This makes it easier to spot any empty gaps and helps prevent your crepe paper sunflower from leaning too much to one side. 🌻
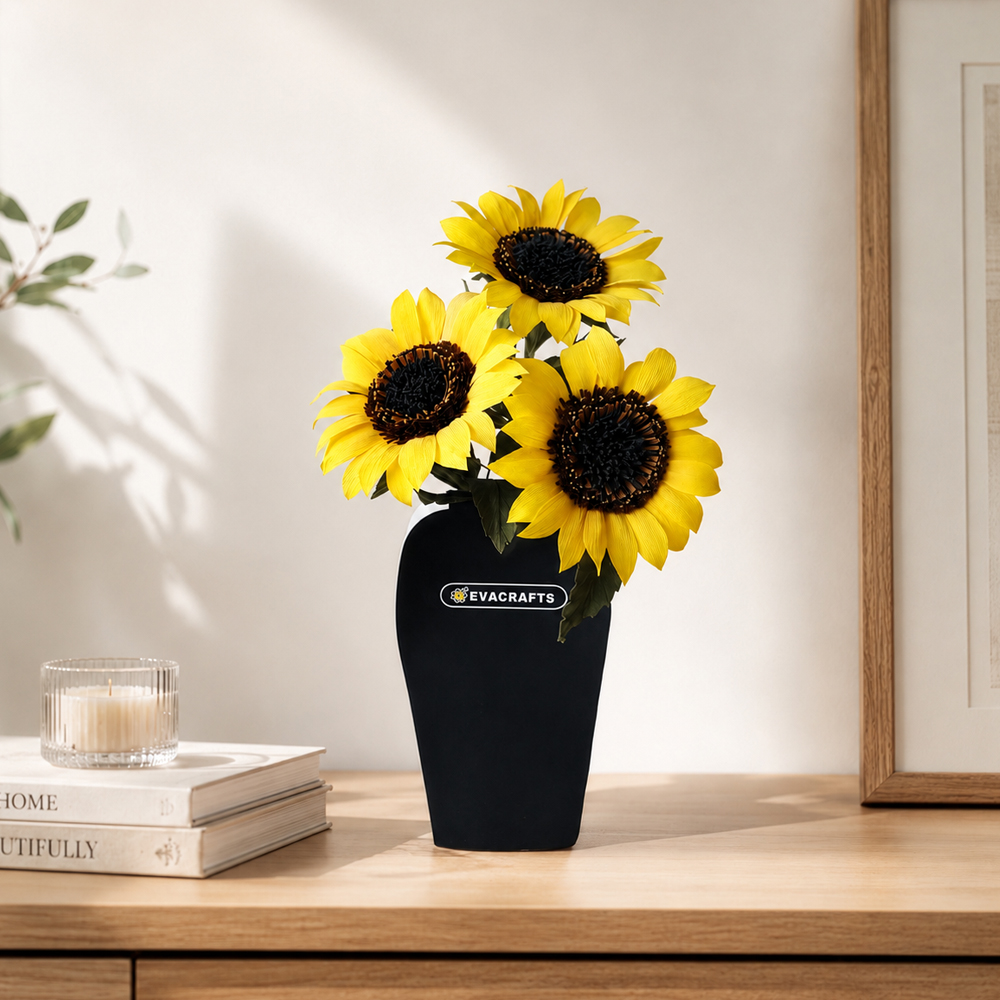
    Realistic crepe paper sunflowers arranged in a black vase as bright home decor

    Today, we made a cheerful crepe paper sunflower with bright yellow petals and a detailed, realistic flower center. ^^

    There are a few repetitive steps when making the petals and stamens, but watching each yellow petal come together and slowly turn into a full sunflower makes the whole process feel relaxing and rewarding.

    That’s one of my favorite things about making paper flowers—the process itself can be calming, and seeing the finished flower gives you such a satisfying sense of accomplishment. 🙂

    You can display your finished crepe paper sunflower in a vase as bright home decor, or give it as a special handmade flower that will never wilt.

    Paper flower making is also a lovely hobby to enjoy at home, especially if you’re looking for a creative adult craft that lets you slow down, focus, and make something beautiful with your own hands.💕

    Purchasing the sunflower flower template is a huge help in supporting the time and effort I put into creating these tutorials. Thank you so much for supporting my work. ^^

    If gathering all the materials feels difficult, I also have a complete sunflower kit with everything you need to make the flower.

    So please don’t give up before you start—give it a try and enjoy the process of creating your own beautiful crepe paper sunflower! 🌻
  • How to Make Rolled Paper Roses with a Cutting Machine: Super Easy DIY

    How to Make Rolled Paper Roses with a Cutting Machine: Super Easy DIY

    Hey, lovely bloom! Thanks for wandering into my little paper flower garden. 🌸

    Easy rolled paper roses made from cardstock with a cutting machine

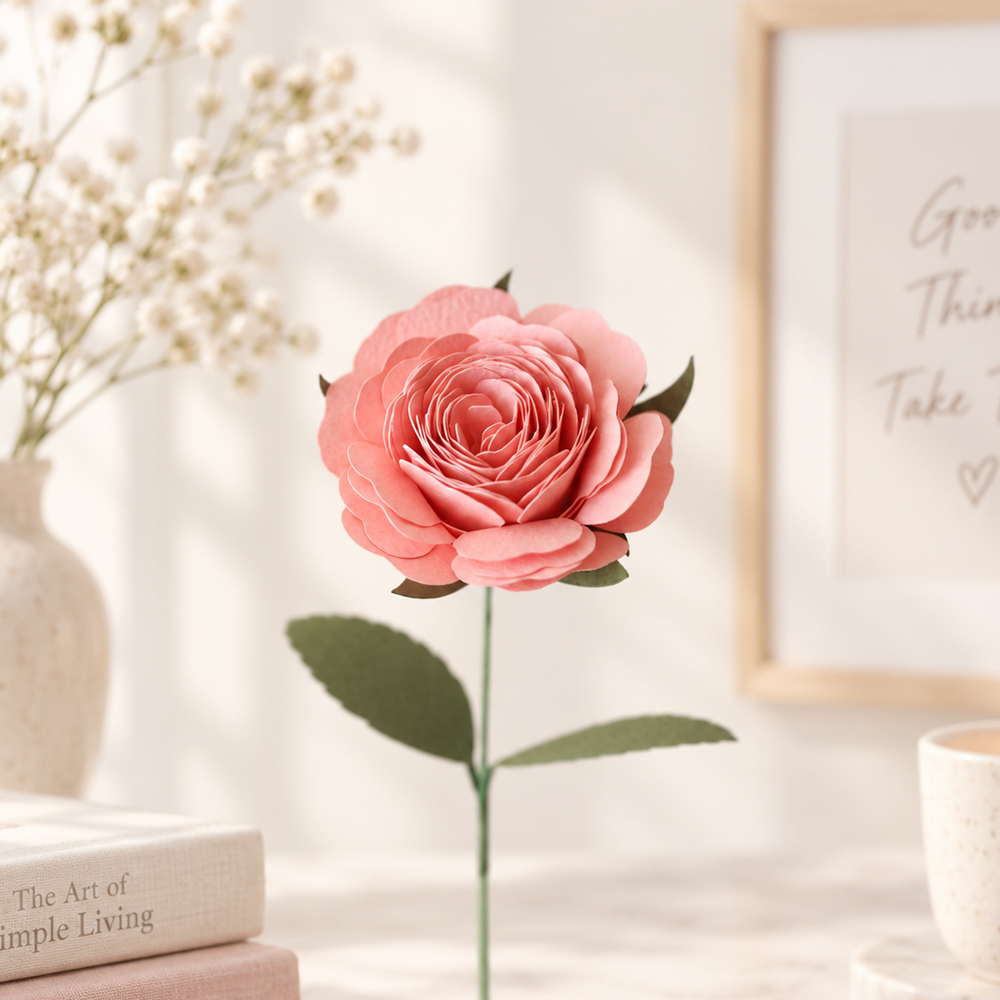
    Today, we’re making a beautiful paper rose that is incredibly easy and simple to create.

    This rolled paper rose is made by simply rolling and gluing a spiral-shaped piece of cardstock, so even complete beginners can make a lovely rose.

    At first glance, all those layered petals may make this flower look difficult. But it’s actually a very easy paper rose project. Instead of attaching each petal one by one, you simply roll the curved paper strip into shape and secure it with glue.

    That makes this paper flower DIY especially beginner-friendly. And if you use a cutting machine, preparing the flower pieces becomes even faster and easier, especially when you want to make several roses at once.

    If you’re looking for a relaxing craft you can enjoy at home, follow along with Eva’s YouTube video and the detailed tutorial below. Take your time, enjoy the process, and create your own colorful rolled paper roses. 🌹

    Pink rolled paper rose made from cardstock with a cutting machine

    Difficulty: ★☆☆☆☆
    Time: About 20 minutes per rose

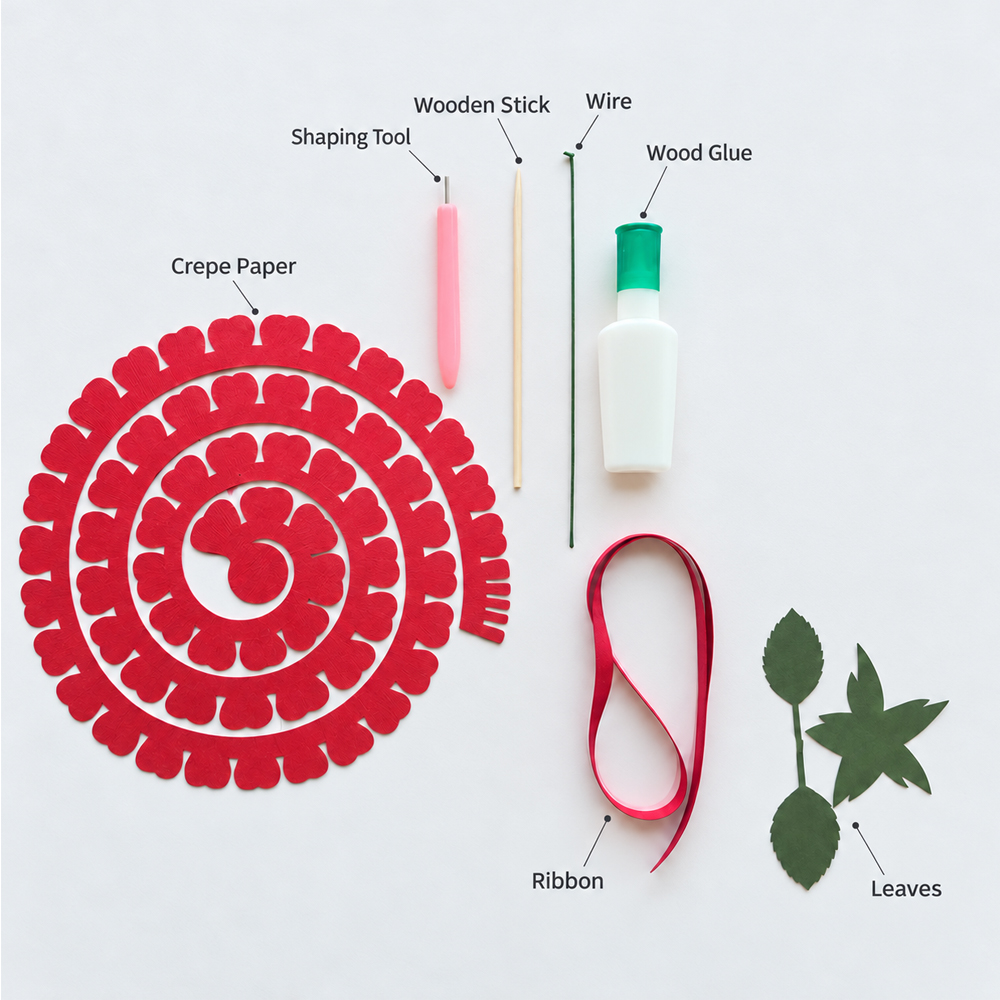
    Materials for making an easy rolled paper rose with cardstock, floral wire, glue, ribbon, and shaping tools

    [Materials You’ll Need]

    • 150–180 gsm cardstock for the rose petals, in your favorite color
    • 150–180 gsm green cardstock for the leaves and calyx
    • Paper flower rolling tool
    • 18-gauge green floral wire
    • Craft glue or wood glue
    • Flower wrapping paper and ribbon
    • Scissors

    Just Roll It Up and Get a Beautiful, High-Quality Rose!
    How to Make Rolled Paper Roses

    Cut your cardstock into a long spiral shape with curved petal edges.

    If you have a cutting machine such as a Cricut or Silhouette, cutting the pieces will be much faster and easier. But don’t worry if you don’t have one. You can also cut the spiral by hand with scissors.

    The petal edges don’t need to be perfectly even. In fact, slightly different curves can help your finished rolled paper rose look softer and more natural.

    When you start rolling the paper, keep the first two or three turns fairly tight. As you move toward the outer petals, gradually relax your grip and roll more loosely. This creates a compact center while allowing the outer petals to open up naturally, giving your paper rose a fuller, more realistic shape.

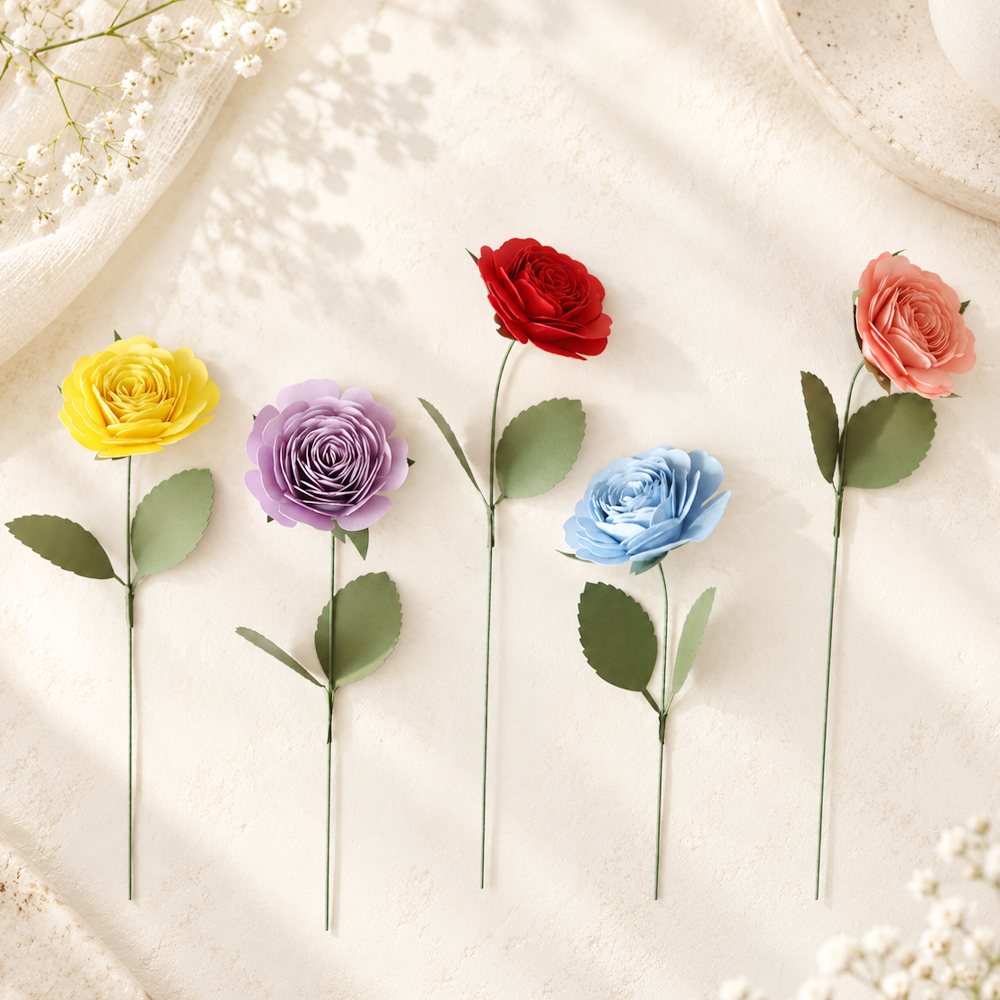
    I made my rolled paper roses in pink, red, yellow, blue, and purple, but you can choose any cardstock color you like to create your own style.

    A single paper rose looks lovely in a small vase, while several roses grouped together can become a beautiful paper flower bouquet. 🙂

    If you don’t have a paper flower rolling tool, you can simply hold the starting edge firmly with tweezers and begin rolling from there.

    For this easy paper rose project, I recommend using 150–180 gsm cardstock. Paper that is too thin may not hold the petal shape well, while cardstock that is too thick can feel stiff and become difficult to roll.

    I also prepared wrapping paper and ribbon so I could package a single finished rose as a small gift. You can also make several rolled paper roses, bundle them together, and wrap them as a colorful handmade paper flower bouquet.😍

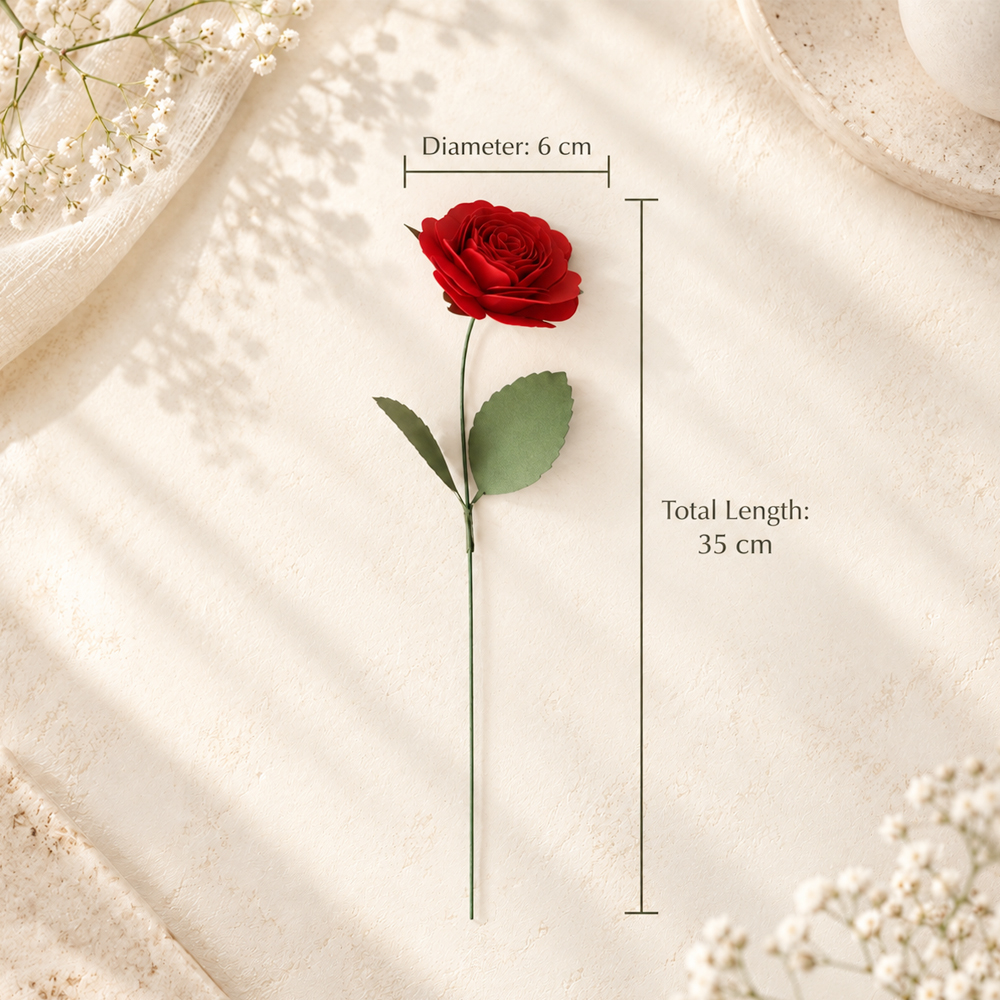
    Rolled paper rose size guide showing a 6 cm flower diameter and 35 cm total stem length

    The finished paper rose is about 6 cm in diameter and approximately 35 cm long.

    Even when you use the same paper flower template, the final size of the rose can vary slightly depending on how tightly you roll the paper and how much you loosen the outer petals. This is one of the nice things about rolled paper roses—you can easily adjust the fullness and shape while you make them.😘

    [How to Make a Rolled Paper Rose]

    Applying wood glue to the green calyx for a rolled paper rose

    STEP.1⬆️

    Insert the outer end of the cardstock spiral into your paper flower rolling tool.

    Curling a green cardstock rose leaf with scissors

    STEP.2⬆️

    Slowly turn the tool and begin rolling the paper into a tight spiral.

    Finished pink rolled paper rose with green leaves and floral wire stem

    STEP.3⬆️

    Once you have rolled about one-third of the paper, remove the rolling tool and continue rolling it gently by hand.😘

    Inserting a paper flower rolling tool into the end of the spiral cardstock

    STEP.4⬆️

    As you roll, lightly press the flower from different directions to keep the shape even. This helps your rolled paper rose form a more balanced and natural-looking shape.😘

    Rolling pink cardstock with a paper flower rolling tool

    STEP.5⬆️

    Continue rolling all the way to the end. Then gently relax your grip and allow the petals to loosen until the rose reaches the size and fullness you like.😊

    Removing the rolling tool after forming the center of the paper rose

    STEP.6⬆️

    Apply wood glue to the final section of the paper.😘

    Shaping the tightly rolled center of a pink paper rose by hand

    STEP.7⬆️

    Fold the glued section underneath the flower and attach it across the bottom to hold the rolled rose securely in place.😊

    Gently loosening the petals to shape a fuller rolled paper rose

    STEP.8⬆️

    Gently open the outer petals with your fingers to give the paper rose a fuller and more natural appearance.😘

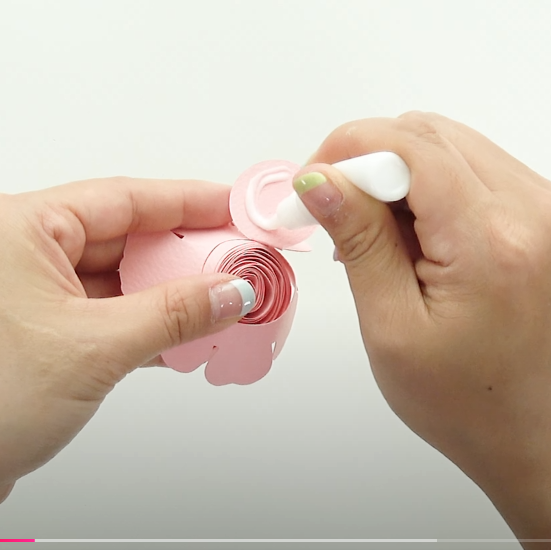
    Applying wood glue to secure the bottom of the rolled paper rose

    STEP.9⬆️

    Cut green cardstock into a calyx shape. Gently pull the cardstock along the edge of your scissors to create a slight curl.😊

    Securing the glued cardstock base underneath the paper rose

    STEP.10⬆️

    Apply wood glue to the calyx, insert an 18-gauge green floral wire, and attach it securely underneath the paper rose.😘

    Finished pink rolled paper rose made from spiral-cut cardstock

    STEP.11⬆️

    Cut green cardstock into leaf shapes, then gently curl each leaf with your scissors to create a soft, natural curve.😊

    Curling a green cardstock calyx with scissors for the paper rose

    FINAL STEP⬆️

    Attach the leaves to the stem, and your easy rolled paper rose is complete. 🌹❤️

    Here is the rolled paper rose we made today. 🌹

    Each color gives the flower a completely different feeling, so part of the fun is choosing your favorite cardstock color and creating a rose that feels uniquely yours.

    This easy paper flower project doesn’t require many materials and can be finished in a short amount of time. It’s a lovely craft for anyone looking for a relaxing hobby to enjoy at home or a thoughtful handmade gift for someone special.

    And don’t feel pressured to make your first paper rose perfect. Slight differences in the size and direction of the petals are completely okay.

    Those little variations are what make each rolled paper rose unique and turn it into a one-of-a-kind paper flower made by you.

    Thanks for stopping by my little paper flower garden, my lovely bloom. 🌼 See you among the petals again!

    EVA’S TIP

    If your rolled paper rose feels tighter than you expected, don’t worry.

    Before securing it with wood glue, gently relax your grip and let the petals loosen naturally. This will help the rose open up and create a fuller, more realistic shape.

    When attaching the calyx, avoid using too much wood glue. Too much glue can soften or tear the cardstock.

    Apply only a small amount of glue, then hold the calyx firmly in place for at least 30 seconds. This will help the paper rose stay securely attached to the stem.

    You can cut the spiral shape by hand and make this rolled paper rose yourself, or you can use the paper flower template I’ve prepared to make the process even easier.

    Purchasing the template is a huge support and helps me continue creating new paper flower projects and sharing detailed tutorials here on the blog.

    I really hope you give this easy paper rose a try and enjoy that little moment of happiness when you see your own beautiful handmade rose come to life. 🌹

    Thanks for stopping by my little paper flower garden, my lovely bloom. 🌼 See you among the petals again!

  • Make This Elegant Crepe Paper Hyacinth for a Beautiful Corner of Your Home

    Make This Elegant Crepe Paper Hyacinth for a Beautiful Corner of Your Home

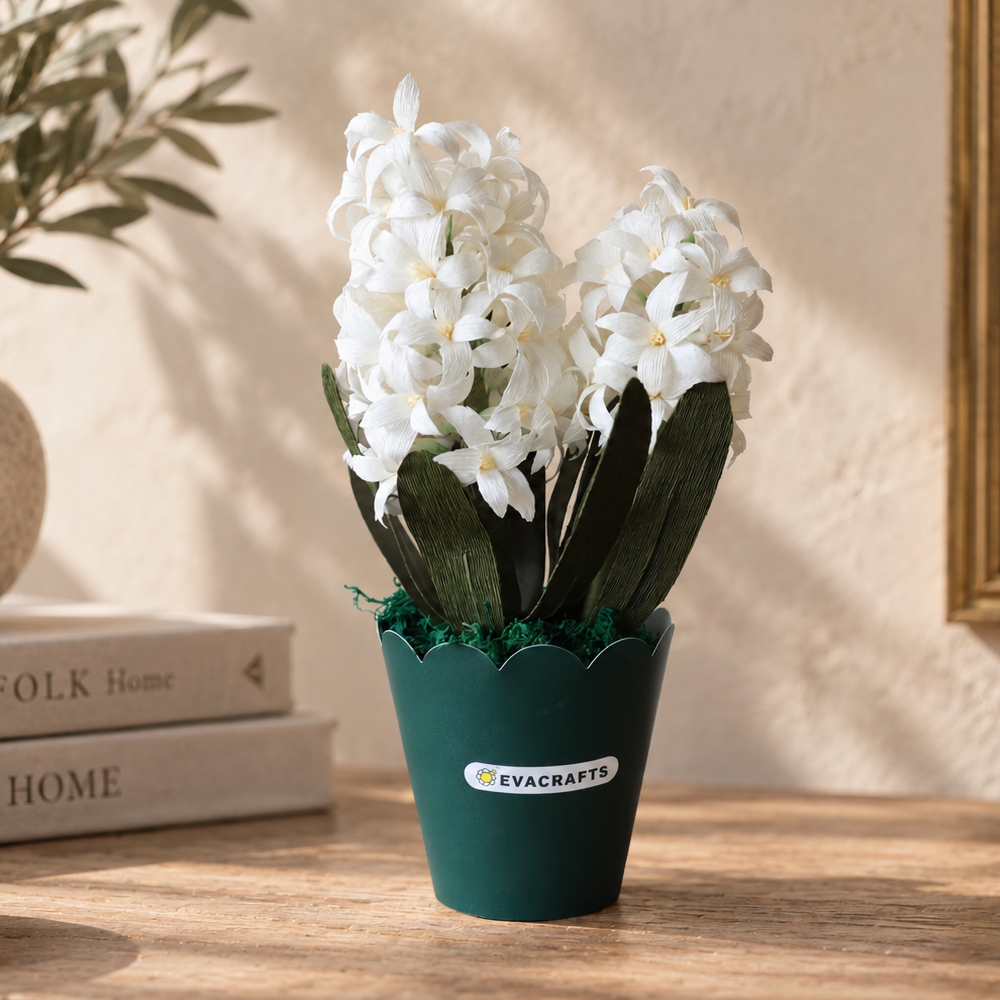
    Elegant white crepe paper hyacinth flowers in a dark green decorative pot

    Difficulty: ★★☆☆☆
    Time: About 3 hours

    Hey, lovely bloom! Thanks for wandering into my little paper flower garden. 🌸

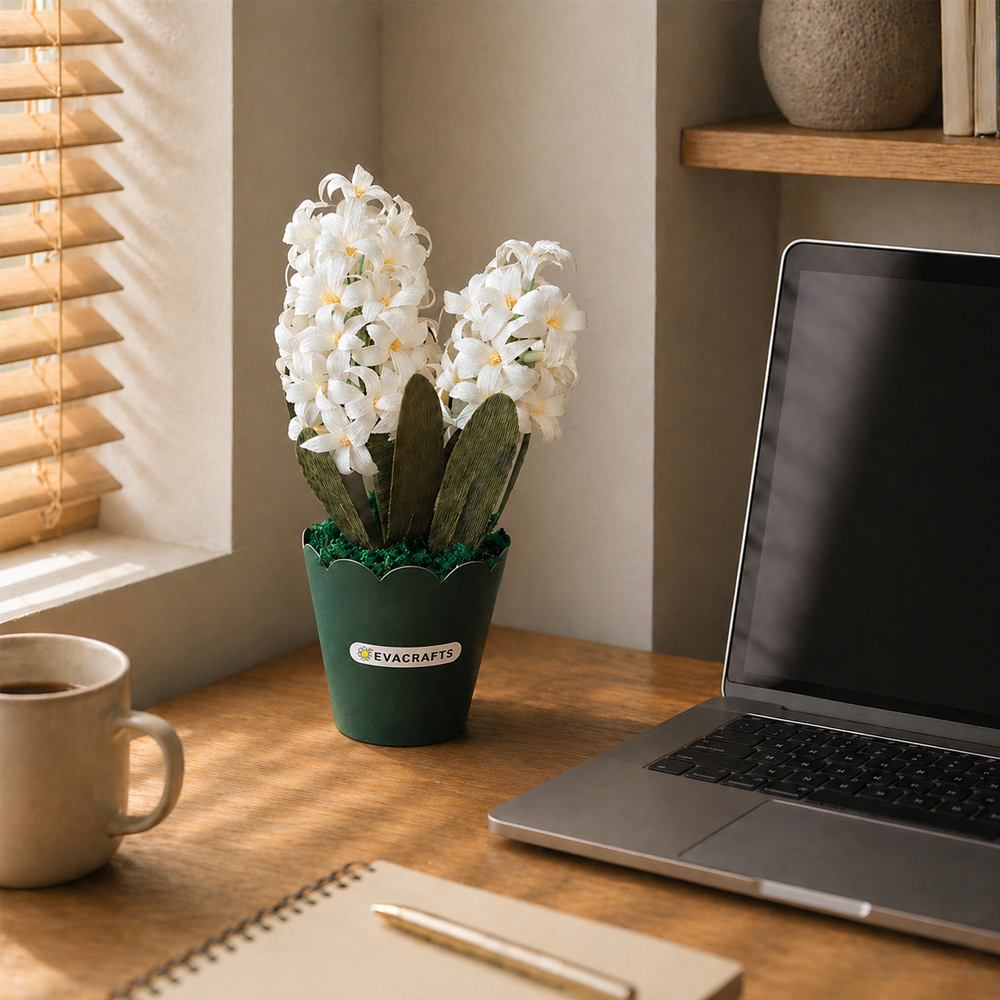
    White crepe paper hyacinth flowers in a green pot decorating a cozy home office desk

    Hey, lovely bloom! Thanks for wandering into my little paper flower garden. 🌸

    Today, we’re going to make a beautiful hyacinth using crepe paper!

    By creating lots of small flowers and combining them together, you can build a full and elegant hyacinth with plenty of volume and detail.

    If you follow along with the detailed YouTube tutorial I shared and the step-by-step instructions below, you’ll be able to create a polished crepe paper hyacinth of your own, even if you’re still new to paper flowers. 😊

    Materials for making white crepe paper hyacinth flowers with crepe paper, floral wire, floral tape, pastel powder, moss, and a flower pot

    Materials You’ll Need

    • Scissors
    • Hot glue gun
    • 23-gauge green floral wire
    • 4 mm floral stems
    • White floral tape
    • Green cardstock, 150–180 gsm
    • White crepe paper, 90 gsm
    • Green crepe paper, 90 gsm
    • Light yellow crepe paper, 140 gsm
    • Green pastel powder
    • Sponge
    • Wood glue
    • Flower pot
    • Styrofoam
    • Artificial grass

    Today’s flower is a beautiful crepe paper hyacinth. 🌿

    We’ll make lots of small individual flowers first, then bring them together to create the full, rounded shape of a hyacinth.

    The stamens are made first, and the petals are attached in two layers of three petals each. This 3 + 3 arrangement makes it much easier to keep the flower balanced, so even beginners can achieve a neat and polished result.

    Hyacinths are often associated with purity and quiet beauty, which feels especially fitting for these soft white blooms. Let’s make this elegant crepe paper hyacinth together. 😊

    For the petals and leaves, I used 90 gsm Italian crepe paper.

    I’ve worked with German, Chinese, and several other types of crepe paper, but for paper flowers, I personally find Italian crepe paper especially nice to work with because of its texture, grain, and beautiful color range.

    If you don’t have green pastel powder, no problem. Simply scrape a green pastel stick gently with a craft knife to create a fine powder, and use that instead.😍

    White crepe paper hyacinth flower measuring about 19 cm tall and 8 cm wide in a green decorative pot

    The hyacinth I made is approximately 19 cm (7.5 in) tall and 8 cm (3.1 in) wide.

    If you make more of the small individual flowers, you can easily create a larger and fuller hyacinth.

    I chose this size because it’s just right for decorating a desk, shelf, or table without taking up too much space. 😊

    How to Make Crepe Paper Hyacinth Flowers

    Shaping white crepe paper petals for a handmade hyacinth flower

    STEP.1⬆️

    Cut the light yellow crepe paper using the stamen template.😊

    Finished single white crepe paper hyacinth flower on floral wire

    STEP.2⬆️

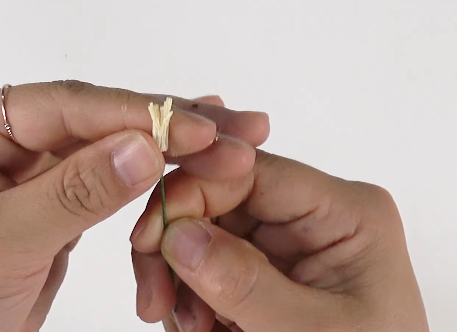
    Fold the cut piece in half lengthwise. Leaving the bottom half uncut, make three vertical cuts with scissors.

    Combining a crepe paper hyacinth flower with three floral stems

    STEP.3⬆️

    Twist the top sections of the stamens gently with your fingers, then wrap and glue them around a piece of 23-gauge floral wire.

    Adding small white flowers to build a full crepe paper hyacinth

    STEP.4⬆️

    Twist the top sections of the stamens gently with your fingers, then wrap and glue them around a piece of 23-gauge floral wire.😍

    Cutting green crepe paper leaves with a hyacinth leaf template

    STEP.5⬆️

    Attach three petals evenly around the stamens.

    Shaping a green crepe paper hyacinth leaf by hand

    STEP.6⬆️

    Make three more petals using Petal Template 2 in the same way, then attach them between the first three petals.

    Attaching green leaves around a finished crepe paper hyacinth

    STEP.7⬆️

    Wrap white floral tape from the base of the flower down along the stem.

    Cutting light yellow crepe paper with a hyacinth stamen template

    STEP.8⬆️

    Apply green pastel powder from the bottom of the flower down to the upper part of the stem to add natural color.

    Making small cuts in folded yellow crepe paper for hyacinth stamens

    STEP.9⬆️

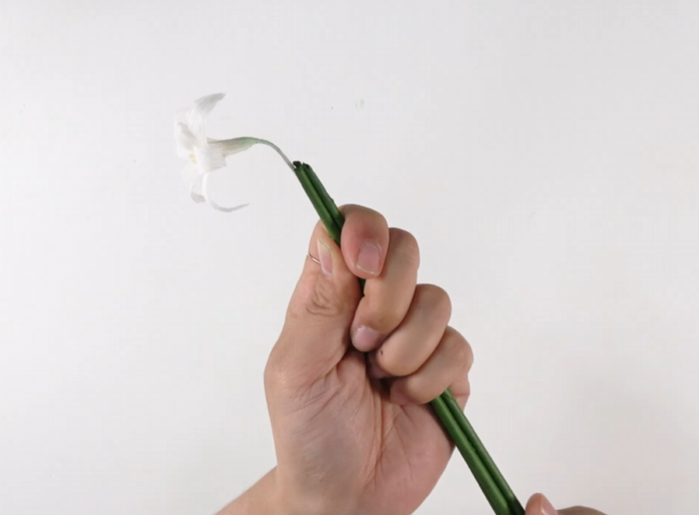
    Combine three floral stems with one finished flower, then wrap them together with green crepe paper.😊

    Wrapping handmade crepe paper stamens around green floral wire

    STEP.10⬆️

    Continue adding the small flower clusters one by one to build the full hyacinth shape.

    Curling white crepe paper petals around a floral stem

    STEP.11⬆️

    Cut the leaf shapes from both green cardstock and green crepe paper using the leaf template.

    Attaching three white crepe paper petals around the hyacinth stamen

    STEP.12⬆️

    Place a piece of 23-gauge floral wire on the green cardstock, apply wood glue, then cover it with green crepe paper and press firmly.

    Finished six-petal white crepe paper hyacinth flower

    FINAL STEP⬆️

    Attach about six to seven leaves around the finished flower stem. Your crepe paper hyacinth is complete! 🌿

    White crepe paper hyacinth flowers in a green pot decorating a cozy home office desk

    EVA’S TIP

    When cutting crepe paper, always make sure the direction of the crepe paper grain matches the direction shown on the template. This is important because the grain direction affects how the petals stretch and take shape.

    If your petals don’t seem to form properly, check the direction of the crepe paper first. 😊

    When curling the petals around a floral stem, don’t pull or wrap them too tightly. Gently roll each petal around the stem once or twice to create a soft, natural curve.

    When attaching the individual flowers, avoid leaving too much space between them. If the gaps are too wide, the stem may show through and the finished hyacinth can look less full. Keep the flowers fairly close together for a beautiful, dense shape. 🌿

    I really hope you give this project a try and get to feel that happy moment when your own hyacinth is finally finished. I’d love for us to share that sense of accomplishment together. 😊

    Purchasing the template is a huge help and makes it possible for me to keep creating and sharing more paper flower tutorials.

    And if gathering all the materials feels difficult, I also have a complete kit with everything you need included. So please don’t give up—give it a try and enjoy making your own beautiful crepe paper hyacinth! 🌿

  • How to Make Crepe Paper Trumpet Vine Flowers: A Realistic DIY Tutorial

    How to Make Crepe Paper Trumpet Vine Flowers: A Realistic DIY Tutorial

    Hey, lovely bloom! Thanks for wandering into my little paper flower garden. 🌸

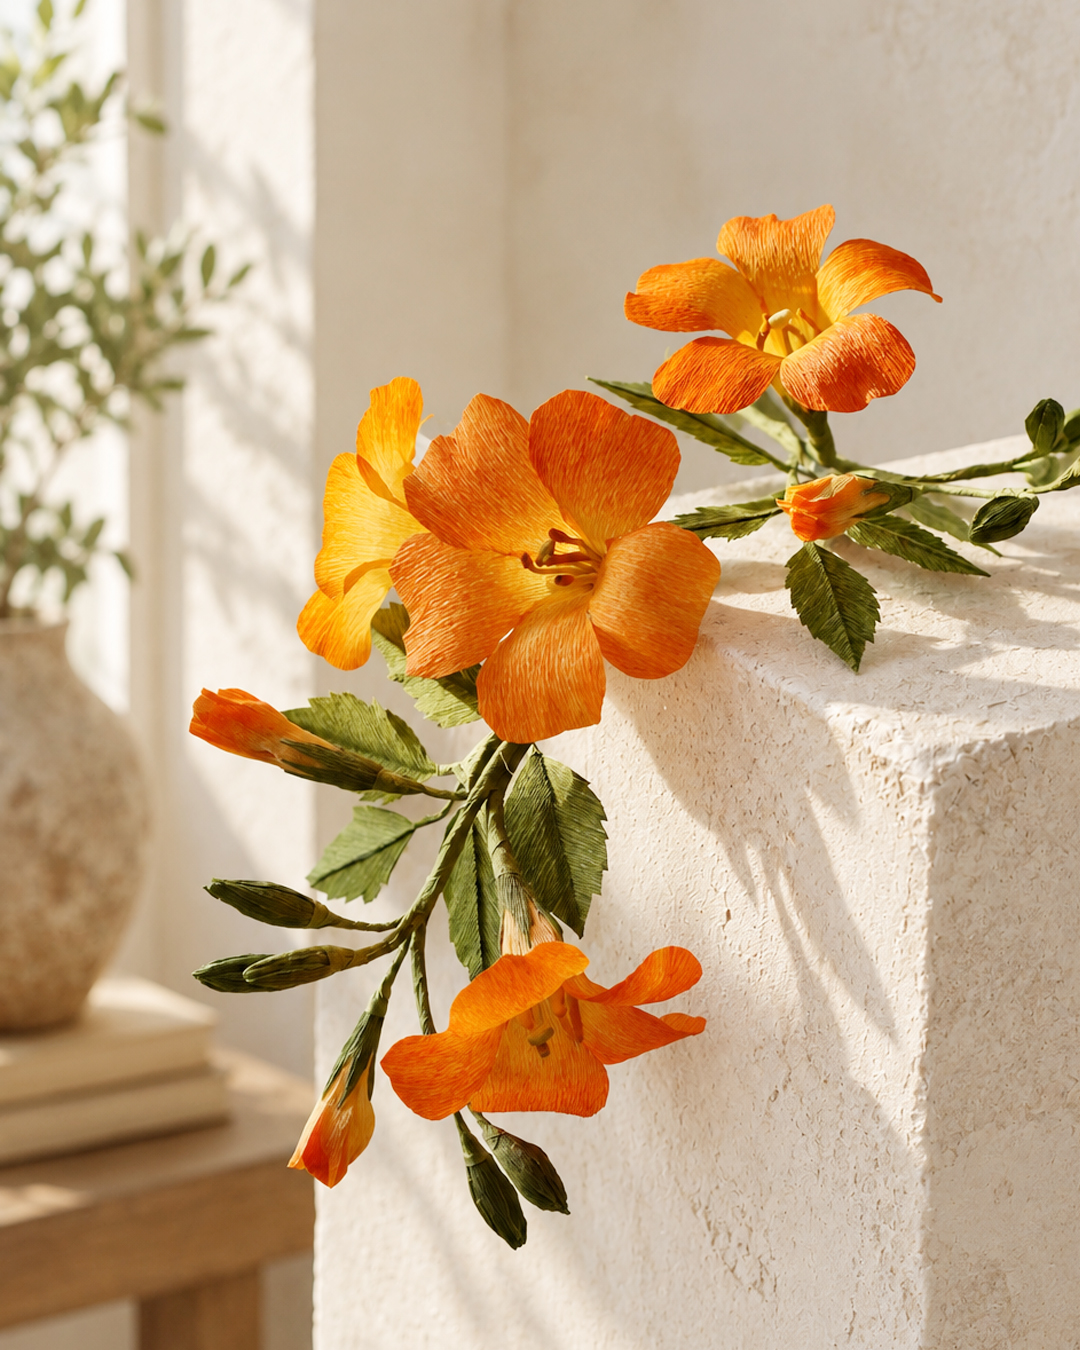
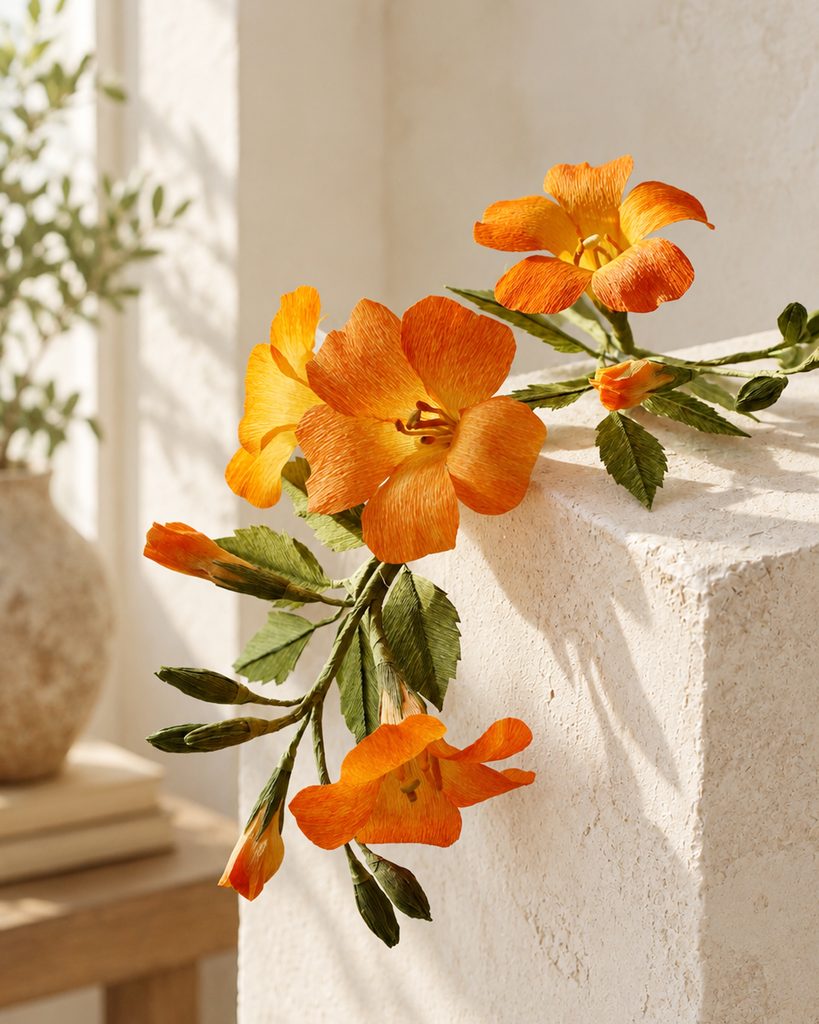
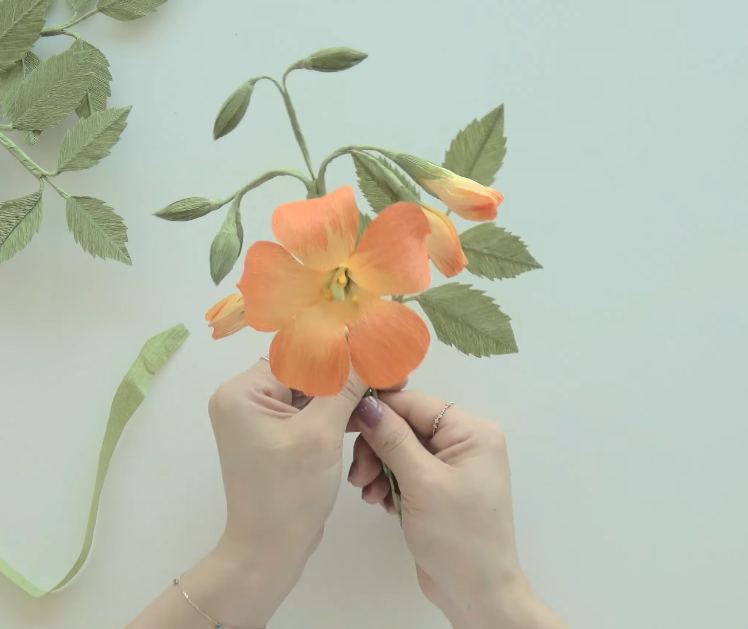
    Realistic orange crepe paper trumpet vine flowers with green leaves

    Difficulty: ★★☆☆☆
    Time: About 2–3 hours

    Hey, lovely bloom! Thanks for wandering into my little paper flower garden. 🌸

    Today, we’re going to make beautiful trumpet vine flowers using crepe paper!

    I’ll show you how to turn these bright orange flowers into a long, flowing vine that you can hang on a wall or door, or simply place on a table as a cheerful piece of home decor.

    Trumpet vine flowers have only five petals and a simple shape, so they’re a great project even if you’re new to making paper flowers.

    I’ll guide you through the entire process—from coloring the crepe paper to connecting the stems and building the vine. You can follow along with my YouTube video and the detailed step-by-step instructions below.

    By the end, you’ll have your own beautiful crepe paper trumpet vine that can instantly brighten up your space. 😊

    Materials for making crepe paper trumpet vine flowers with crepe paper, floral wire, floral tape, pastel powder, wood glue, and a wooden stick

    Materials You’ll Need

    • Template
    • Scissors
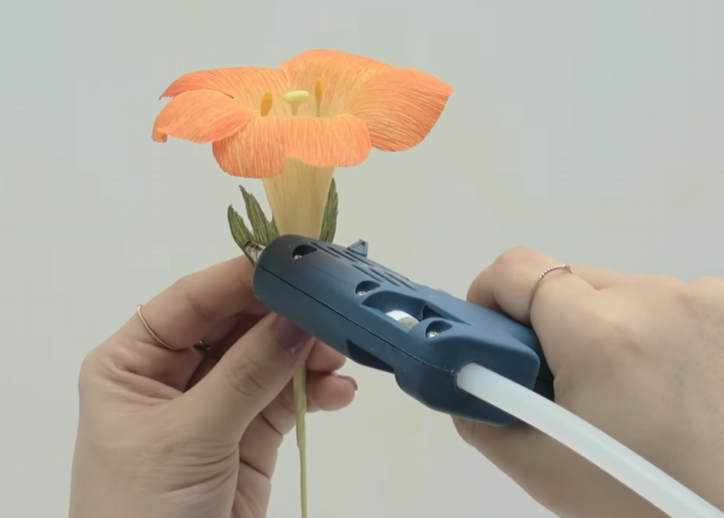
    • Hot glue gun
    • 23-gauge green floral wire
    • 90 gsm light yellow crepe paper
    • 90 gsm light green crepe paper
    • Dark yellow pastel powder
    • Yellow floral tape
    • Wood glue
    • Thin wooden stick
    • Orange spray paint

    Make a Crepe Paper Trumpet Vine: A Delicate DIY Paper Flower Project

    Here’s the crepe paper trumpet vine we’ll be making today.

    I created these flowers by adding an orange gradient to yellow crepe paper, which gives the petals a soft, natural look that feels surprisingly close to real trumpet vine flowers.

    It’s almost like bringing those beautiful orange blooms you see outdoors right into your home. 😊

    Trumpet vines are summer flowers, but with paper flowers, you can enjoy their bright color all year round. Let’s make this beautiful crepe paper trumpet vine together!

    For the petals, I used 90 gsm Italian yellow crepe paper and lightly added orange spray paint to create a natural gradient.

    Orange crepe paper is available, but starting with yellow paper makes it easier to create the soft transition from yellow to orange that gives the petals more depth.

    If you don’t want to use spray paint, you can also create the gradient with orange pastel. Apply the color gradually and blend it lightly toward the edges.

    Yellow pastel powder is also used later to create the pollen effect on the stamens. If you don’t have ready-made pastel powder, simply scrape a yellow pastel stick with a craft knife to make a fine powder.

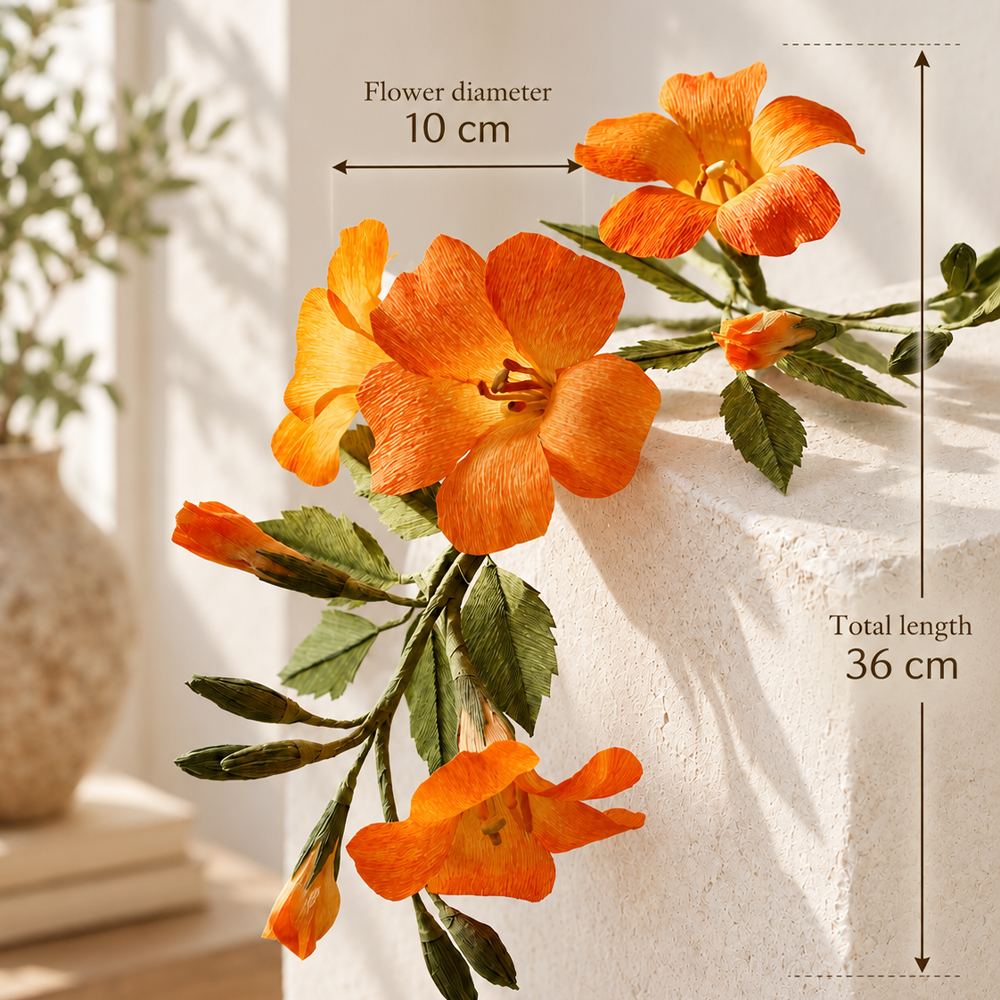
    Crepe paper trumpet vine flower size showing a 10 cm flower diameter and 36 cm total vine length

    The finished flower measures about 10 cm (3.9 in) in diameter, and the full vine is approximately 35 cm (13.8 in) long.

    How to Make Crepe Paper Trumpet Vine Flowers

    Spraying orange color onto yellow crepe paper to create a trumpet vine petal gradient

    STEP.1⬆️

    Stretch the yellow crepe paper slightly, then spray only the upper part with orange spray paint to create a soft gradient.

    Five orange gradient crepe paper petals cut for a trumpet vine flower

    STEP.2⬆️

    Cut out five petals using the petal template. Apply glue along the side edges and connect all five petals together.

    Gluing five crepe paper trumpet vine petals together along the edges

    STEP.3⬆️

    Roll the connected petals into a tube shape and glue the ends together.

    Bending green floral wire into a small figure-eight shape for the trumpet vine pistil

    STEP.4⬆️

    Bend the top of a 23-gauge green floral wire into a small figure-eight shape, as shown in the photo😊

    Wrapping yellow floral tape around wire to shape the trumpet vine pistil

    STEP.5⬆️

    Wrap the top section several times with yellow floral tape to build up the shape of the pistil.

    Adding yellow pastel powder to handmade trumpet vine stamens for a pollen effect

    STEP.6⬆️

    To make the stamens, wrap yellow floral tape around 23-gauge floral wire. Apply a small amount of wood glue to the tips, then dip them into yellow pastel powder to create a pollen effect.😘

    Combining one pistil and four stamens for a crepe paper trumpet vine flower

    STEP.7⬆️

    Gather one pistil and four stamens together and secure them as one piece.

    Curling crepe paper trumpet vine petals backward with scissors for a natural shape

    STEP.8⬆️

    Use the edge of your scissors to gently curl the petals backward and open up the flower shape.

    Inserting handmade pistil and stamens into the center of a crepe paper trumpet vine flower

    STEP.9⬆️

    Insert the pistil and stamens through the center of the flower.

    Cutting green crepe paper calyx pieces for a trumpet vine flower

    STEP.10⬆️

    Cut the calyx pieces from green crepe paper.😘

    Attaching green crepe paper calyx pieces to the base of a trumpet vine flower

    STEP.11⬆️

    Glue the calyx around the base of the flower.

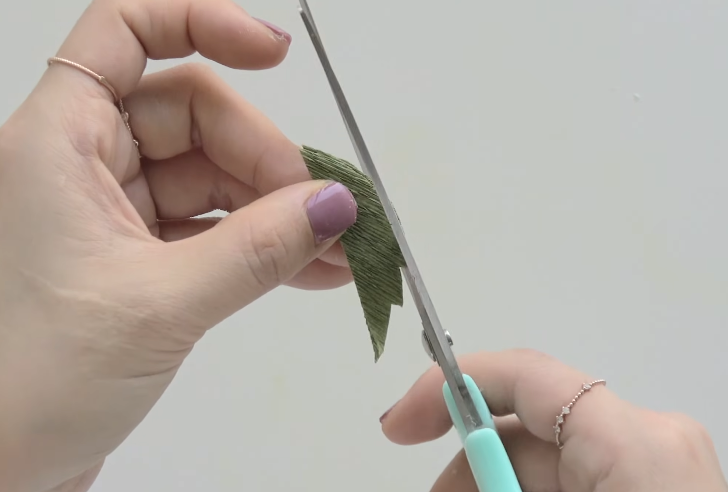
    Cutting serrated edges into green crepe paper trumpet vine leaves

    STEP.12⬆️

    Cut the leaves from green crepe paper using the leaf template, then trim the edges into a soft serrated shape.

    Gluing two crepe paper leaf pieces around floral wire to make a trumpet vine leaf

    STEP.13⬆️

    Place a 23-gauge floral wire down the center and glue two leaf pieces together with the wire sandwiched between them.

    Connecting crepe paper trumpet vine flowers and leaves to complete the floral vine

    FINAL STEP⬆️

    Finally, connect the flowers and leaves along the stems to create the trumpet vine. Your crepe paper trumpet vine is complete! 🌿😍

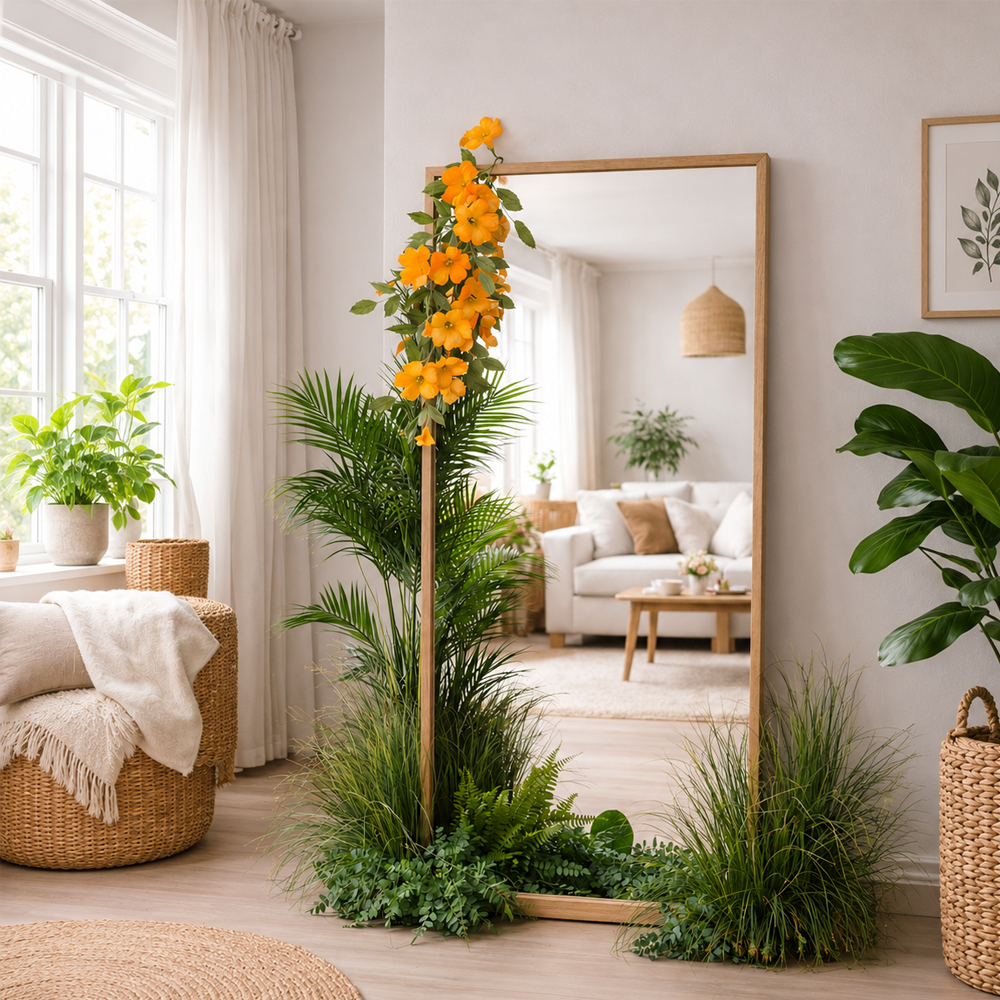
    DIY crepe paper trumpet vine flowers climbing a wooden mirror

    If you’re using spray paint to color the crepe paper, spray from a little farther away. This helps prevent the color from becoming too dark or concentrated in one spot.

    You don’t need to make every petal perfectly even in color. In fact, slight differences between the petals can make the finished flower look softer, more natural, and more realistic.

    When making the leaves, always pay attention to the direction of the crepe paper grain. If the grain lines form a V shape, they will resemble the natural veins of a real leaf and give the finished leaves a much more realistic look. 🌿😘

    If you connect several of the trumpet vine flowers we made today and style them around a mirror, they can become a beautiful floral accent for your home. 😊

    If you’d like to support my work, purchasing the template is a wonderful way to help me keep creating and sharing more paper flower tutorials.

    And if gathering all the materials feels difficult, I also have a kit with enough supplies to make five trumpet vine flowers. So don’t give up—give it a try and enjoy making your own beautiful paper flower vine! 🌿

    I hope that every time you look at your trumpet vine flowers, which will stay beautiful without fading over time, you’ll feel proud of what you created. 😊

    Thanks for stopping by my little paper flower garden, my lovely bloom. 🌼 See you among the petals again!

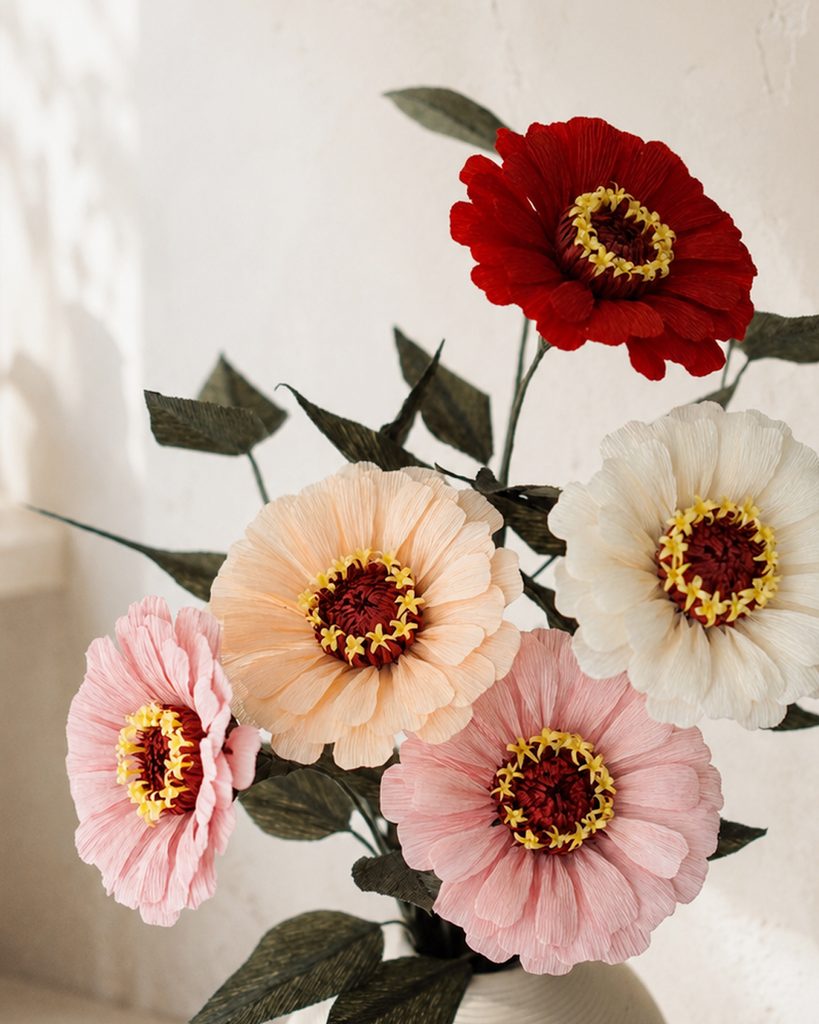
    Handmade crepe paper zinnia flowers in red, pink, peach, and white arranged in a vase with dark green leaves.

    How to Make Realistic Crepe Paper Zinnias

    Make another realistic paper flower with this easy crepe paper zinnia tutorial.

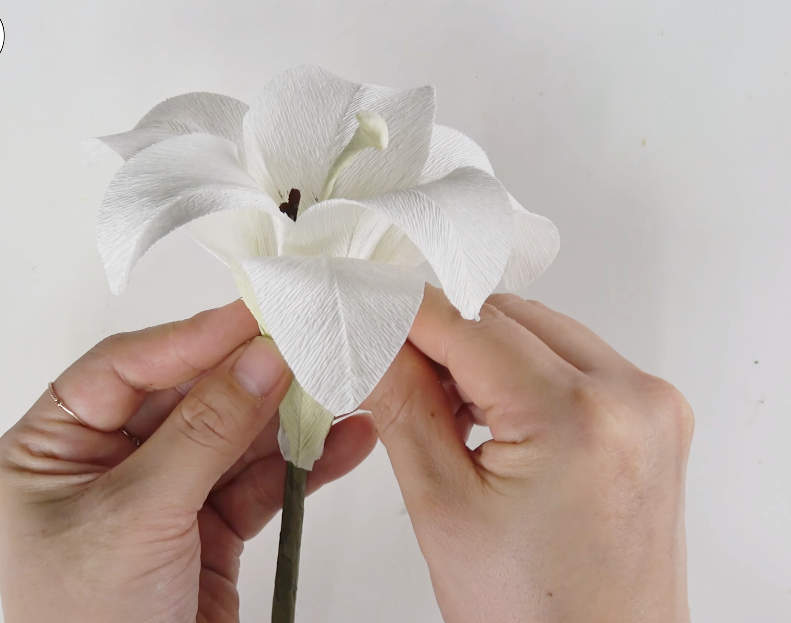
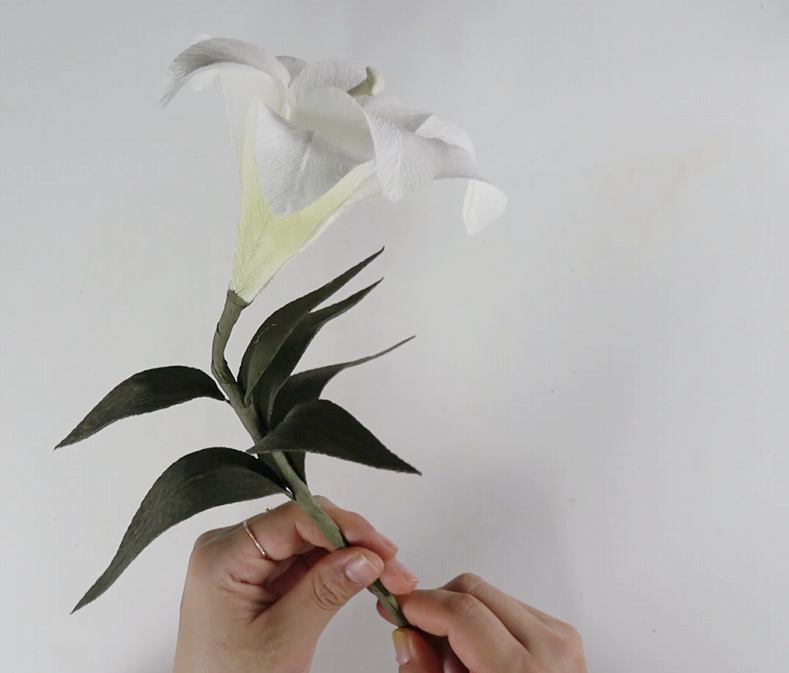
  • How to Make a Lily Paper Flower: Realistic Crepe Paper Lily Tutorial

    How to Make a Lily Paper Flower: Realistic Crepe Paper Lily Tutorial

    Hey, lovely bloom! Thanks for wandering into my little paper flower garden. 🌸

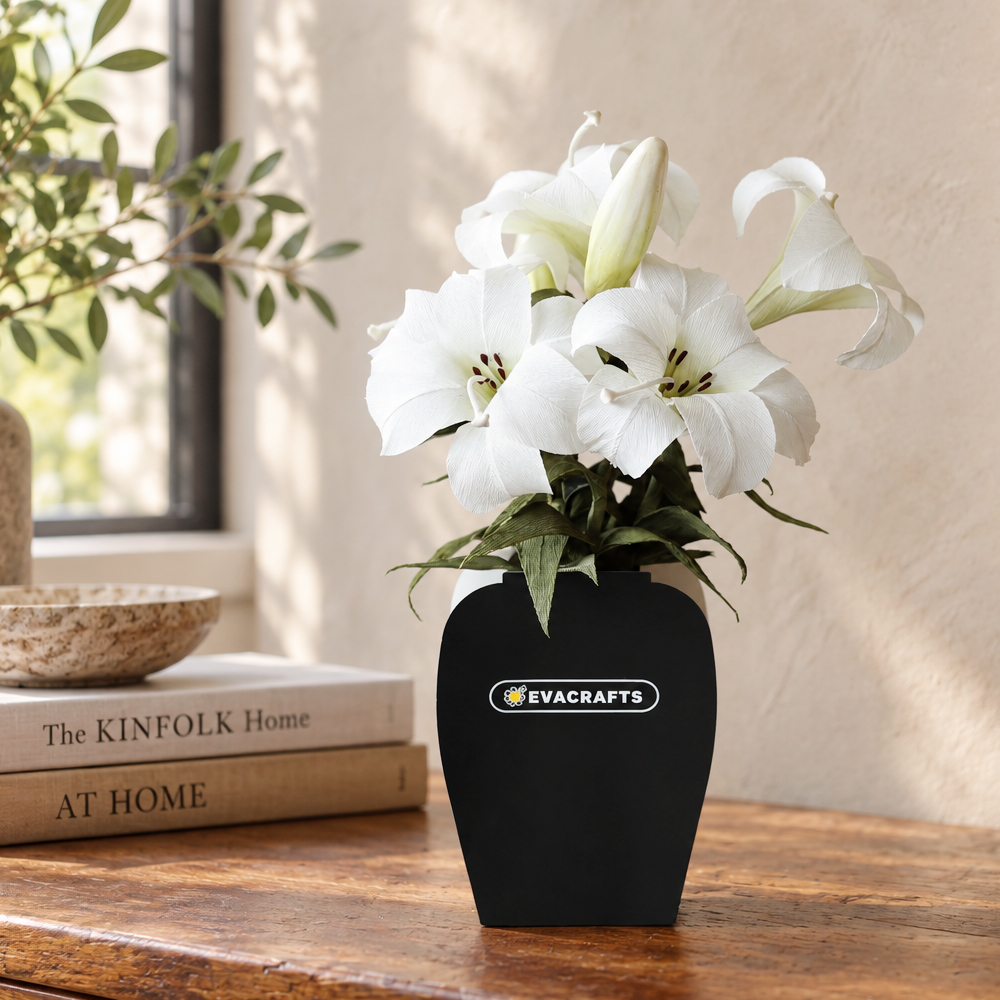
    White crepe paper lily flowers arranged in a black vase for elegant home decor

    Difficulty: ★★★☆☆

    Time Required: About 1 hour for one flower

    For several flowers and lily buds: About 3 hours

    Today, we’re going to make an elegant crepe paper lily. 🤍

    Lilies may look delicate and complicated, but they actually have only a few petals and a fairly simple structure, which makes them a great project for beginners.

    If you follow my detailed YouTube tutorial together with the step-by-step instructions below, you’ll be able to create a beautiful and realistic crepe paper lily of your own.

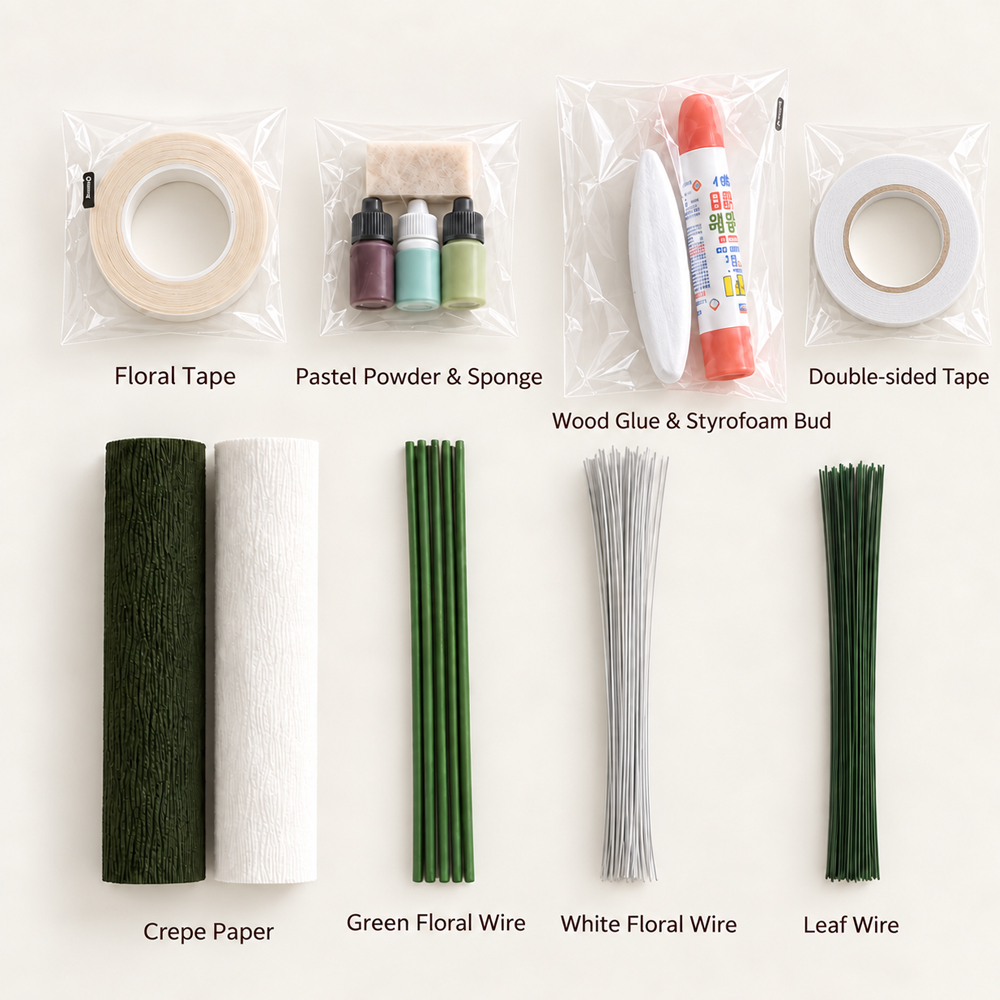
    Materials for making a realistic crepe paper lily, including crepe paper, floral wire, floral tape, pastel powder, glue, double-sided tape, and a styrofoam bud

    Materials

    • Template
    • Scissors
    • Hot glue gun
    • White 27-gauge paper-covered floral wire
    • Green 23-gauge paper-covered floral wire
    • 4 mm green flower stem
    • 90 gsm white crepe paper
    • 90 gsm green crepe paper
    • Lily styrofoam bud
    • White floral tape
    • Double-sided tape
    • Wood glue
    • Wooden skewer
    • Dark green pastel powder
    • Light green pastel powder
    • Brown pastel powder
    • Sponge

    Lilies are relatively simple to make because each flower has only six petals.

    Compared with flowers that require lots of small petals to be attached one by one, a lily paper flower is much easier to assemble. You can attach the petals in two layers of three, which also makes it easier to keep the flower balanced and symmetrical.

    Because floral wire is added to each petal, you can gently bend and shape the petals after assembling the flower. This makes it much easier to create the graceful curves of a real lily.

    Lilies are often associated with lasting love, and white lilies in particular are commonly connected with pure love. That’s one reason I chose to make a white crepe paper lily for this project. I think it would also make a beautiful handmade flower gift for someone special.

    Among the different lily colors, white lilies have such an elegant and graceful look, so I thought they would be perfect for this tutorial.

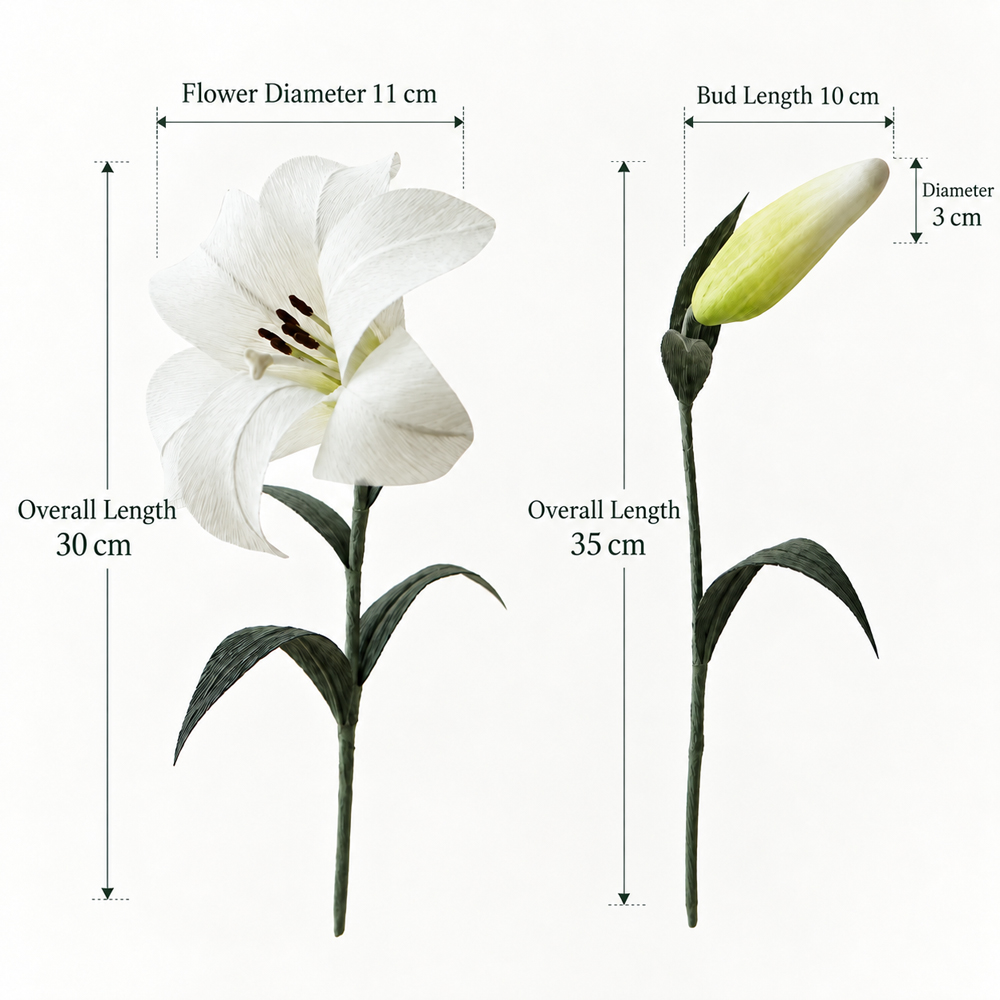
    If you don’t have a styrofoam lily bud, you can make your own using tissue. Roll and shape the tissue until it is about 10 cm long and 3 cm in diameter, then use it as the base for your lily bud.

    For the leaves, I used double-sided tape because I wanted to make them with two layers of crepe paper. If you don’t have double-sided tape, you can use water-based glue instead.

    Below is the size of the crepe paper lily we’ll be making together. I created it while looking at a real lily, so the finished flower is close to the size of a natural lily. ^^😍

    Shall we start making it? 🤍

    STEP.1⬆️

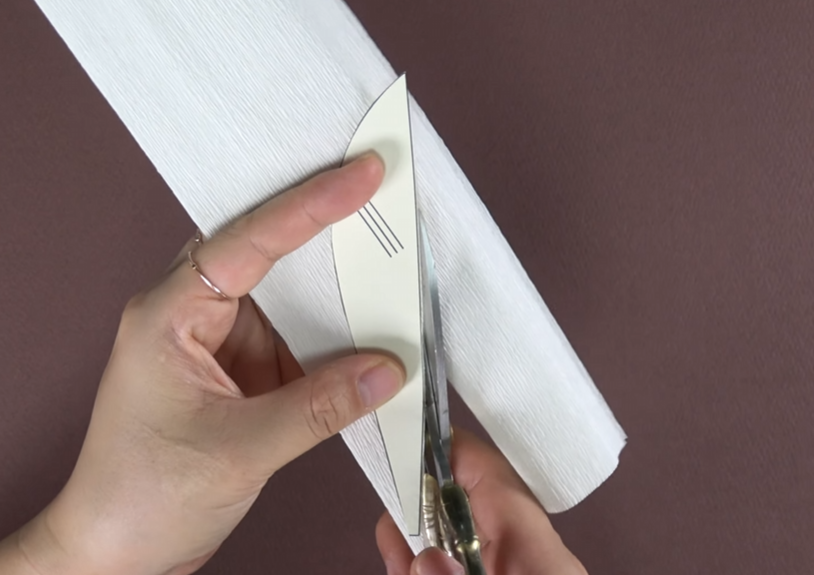
    Cut the white crepe paper according to the lily petal template.

    Attaching floral wire to green crepe paper with hot glue for lily leaves

    STEP.2⬆️

    Cut two pieces of crepe paper and place them so the grain forms a V shape. Insert a piece of 27-gauge wire between the two layers and glue them together.

    Cutting a lily leaf shape from green crepe paper using a paper template

    STEP.3⬆️

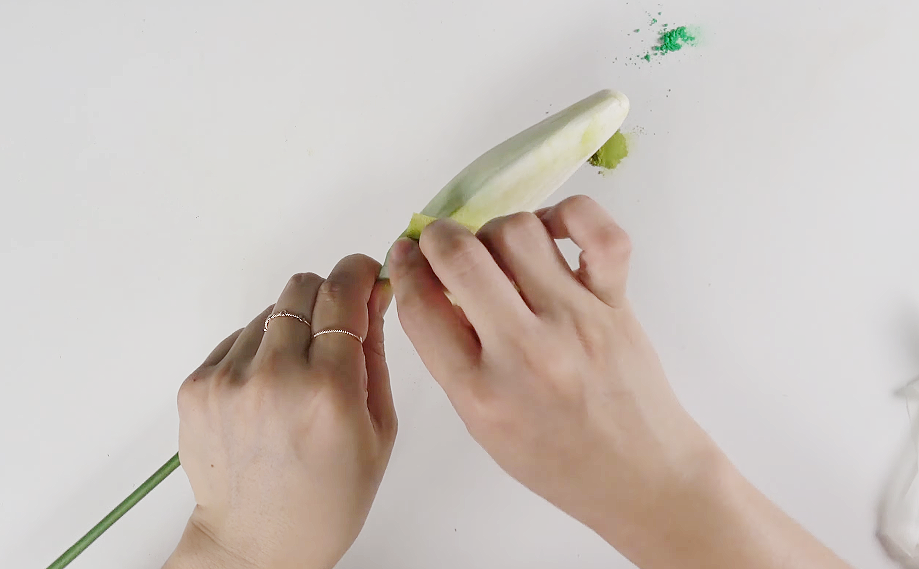
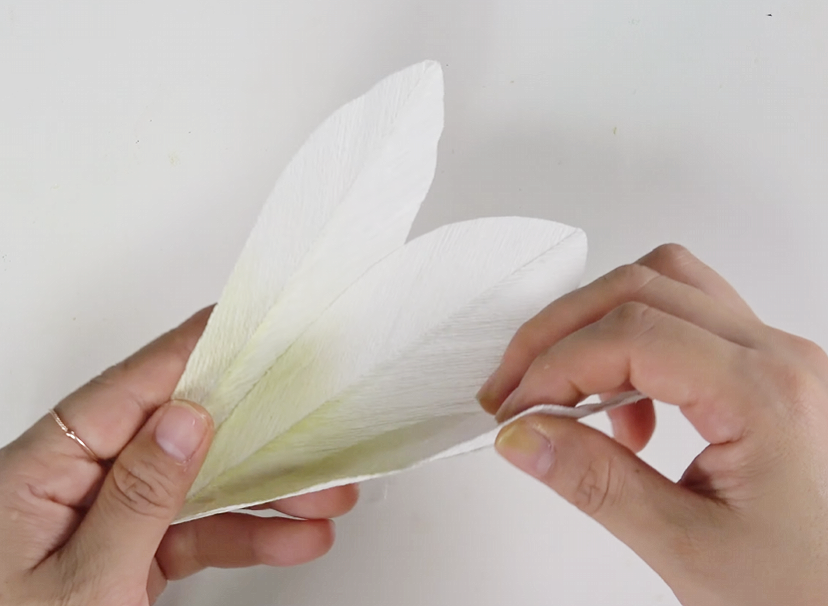
    Apply light green pastel to the lower part of the petal. Make six lily petals in the same way.

    Cutting white crepe paper petals using a lily flower template

    STEP.4⬆️

    Fold a piece of white 27-gauge wire in half. Use a thin wooden skewer to curl the folded end into a small loop, as shown in the photo.

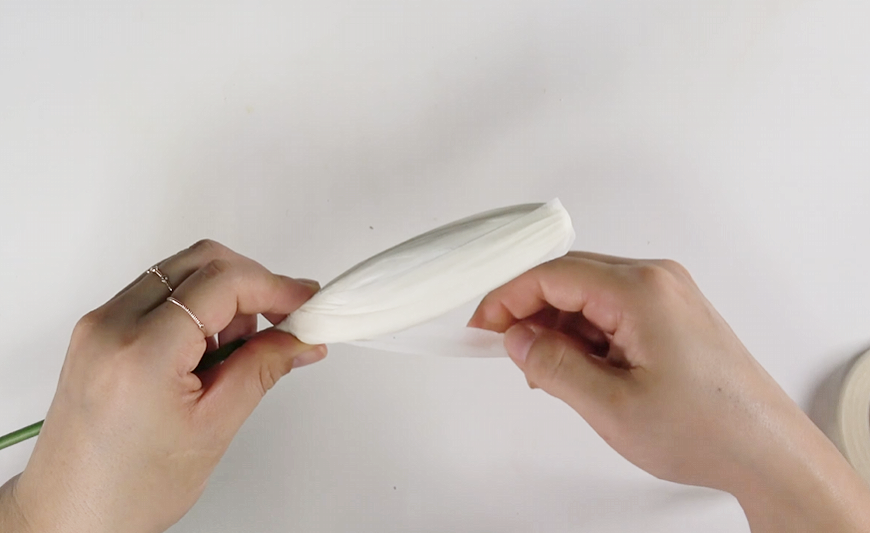
    Gently stretching and shaping white crepe paper petals for a realistic lily

    STEP.5⬆️

    Make three of these and join them together using white floral tape.

    Adding light green pastel powder to the base of a white crepe paper lily petal

    STEP.6⬆️

    Wrap white floral tape around a green 23-gauge paper-covered floral wire. Add light green pastel to the lower part, then apply wood glue to the tip and coat it with brown pastel powder.

    Bending white floral wire to create the center structure of a paper lily

    STEP.7⬆️

    Attach six stamens around the prepared pistil.😘

    Wrapping white floral tape around the lily pistil and stamens

    STEP.8⬆️

    Apply double-sided tape to the green crepe paper. Place a green floral wire so it reaches about halfway up the leaf, add hot glue, then fold the crepe paper in half and press the layers together.😍

    Adding brown pastel powder to the tips of the stamens for a realistic crepe paper lily

    STEP.9⬆️

    Cut the crepe paper to match the lily leaf template.😊

    Attaching white crepe paper lily petals around the handmade pistil and stamens

    STEP.10⬆️

    Wrap white floral tape around the styrofoam lily bud.

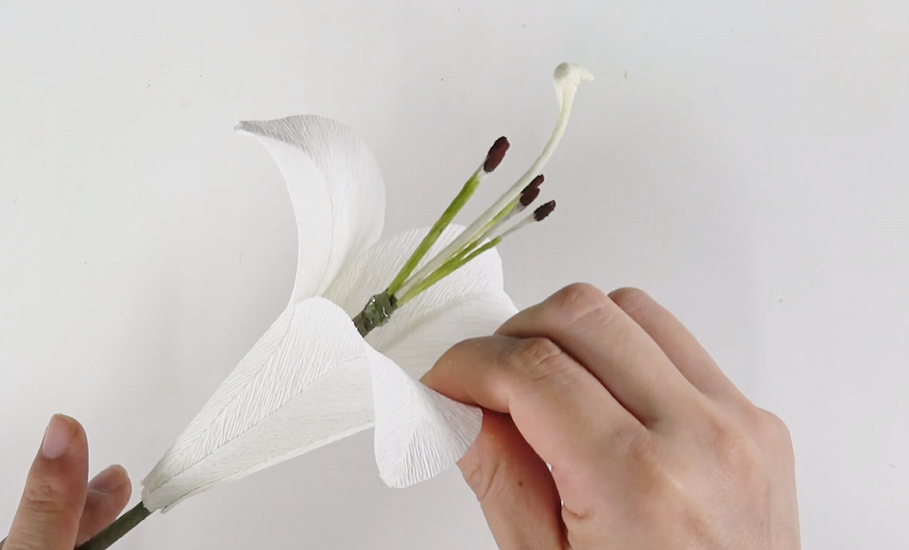
    Shaping and arranging the six white crepe paper petals to complete a realistic lily flower

    STEP.11⬆️

    Apply light green pastel powder to the lower part of the lily bud.😘

    Attaching dark green crepe paper leaves along the stem of a finished paper lily

    STEP.12⬆️

    Apply hot glue along the edges of three prepared petals, connect them together, then roll them into a rounded shape and secure them in place.

    Wrapping a styrofoam lily bud with white crepe paper to create a realistic flower bud

    STEP.13⬆️

    Insert the pistil and stamens into the center of the petals and glue them in place.❤️

    Adding light green pastel color to the base of a white crepe paper lily bud

    STEP.14⬆️

    Attach three more petals between the gaps of the first layer of petals.

    Layering and shaping white crepe paper pieces to form a realistic lily bud

    STEP.15⬆️

    Attach the prepared leaves along the stem to complete your crepe paper lily.😍

    Eva’s Tip

    When applying pastel powder to the petals and lily bud, build up the color gradually with several light layers. This helps prevent the powder from clumping and gives you a softer, more natural finish.

    When making double-layered leaves, press and rub the two layers together firmly so they stay securely bonded and don’t separate later.

    And whenever you cut or shape crepe paper, make sure the grain direction of the paper matches the direction shown on the template. This small detail makes a big difference in how naturally your crepe paper lily turns out. ^^

    Realistic white crepe paper lily flowers and a lily bud arranged in a turquoise vase for elegant home decor

    Today, we made an elegant crepe paper lily that looks almost like a real flower.

    Because this paper lily never wilts and doesn’t need water, it can make a meaningful handmade gift or a beautiful decoration for your room. I hope every time you look at your finished flower, you’ll feel proud of what you created. 🙂

    And if you purchase the template, it really helps support the work I put into creating and sharing these tutorials. If gathering all the materials feels difficult, I’ve also prepared a carefully made lily paper flower kit, so don’t give up. I hope you’ll enjoy the process and experience the satisfaction of creating something beautiful with your own hands.

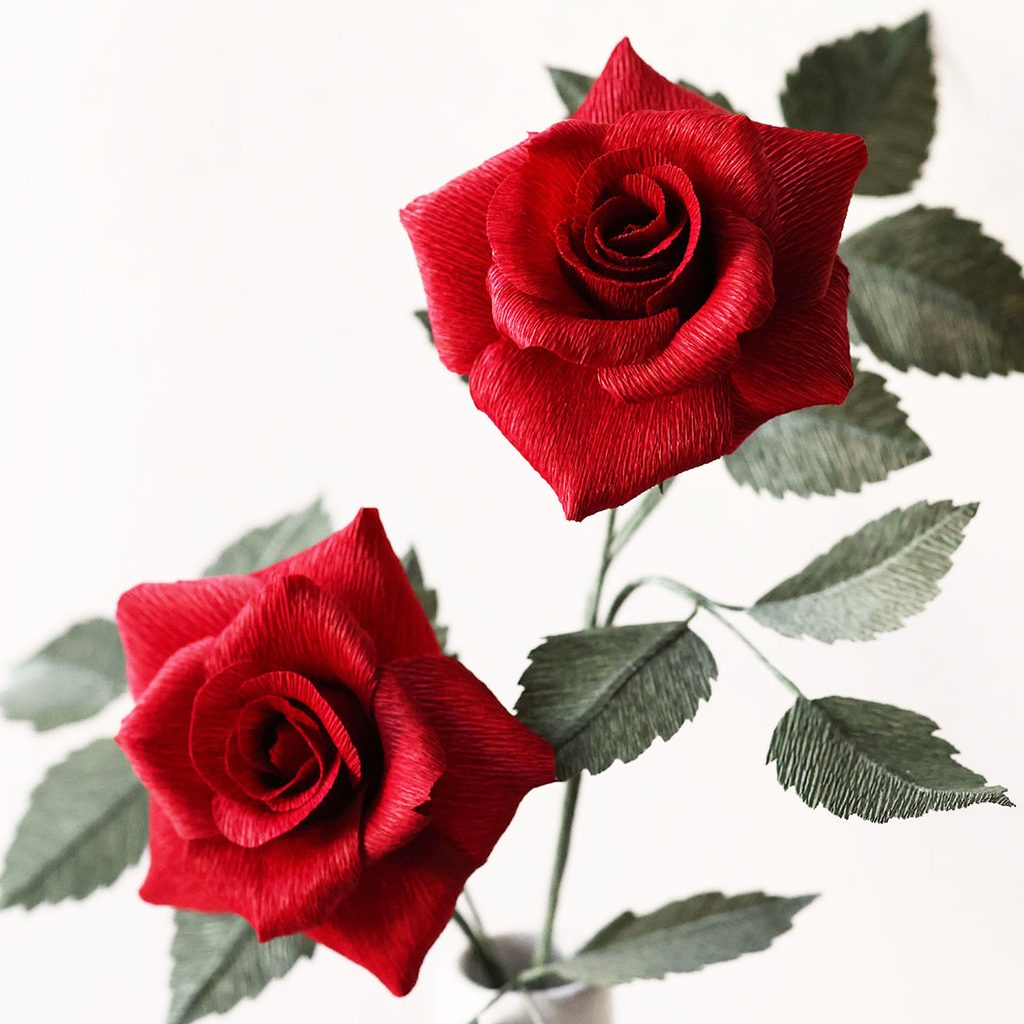
    Handmade red crepe paper roses with realistic layered petals and green leaves

    How to Make a Realistic Crepe Paper Rose 🌹

    Create a beautiful handmade rose with realistic layered petals.

  • How to Make a Daisy Paper Flower Card Bouquet

    How to Make a Daisy Paper Flower Card Bouquet

    Hey, lovely bloom! Thanks for wandering into my little paper flower garden. 🌸

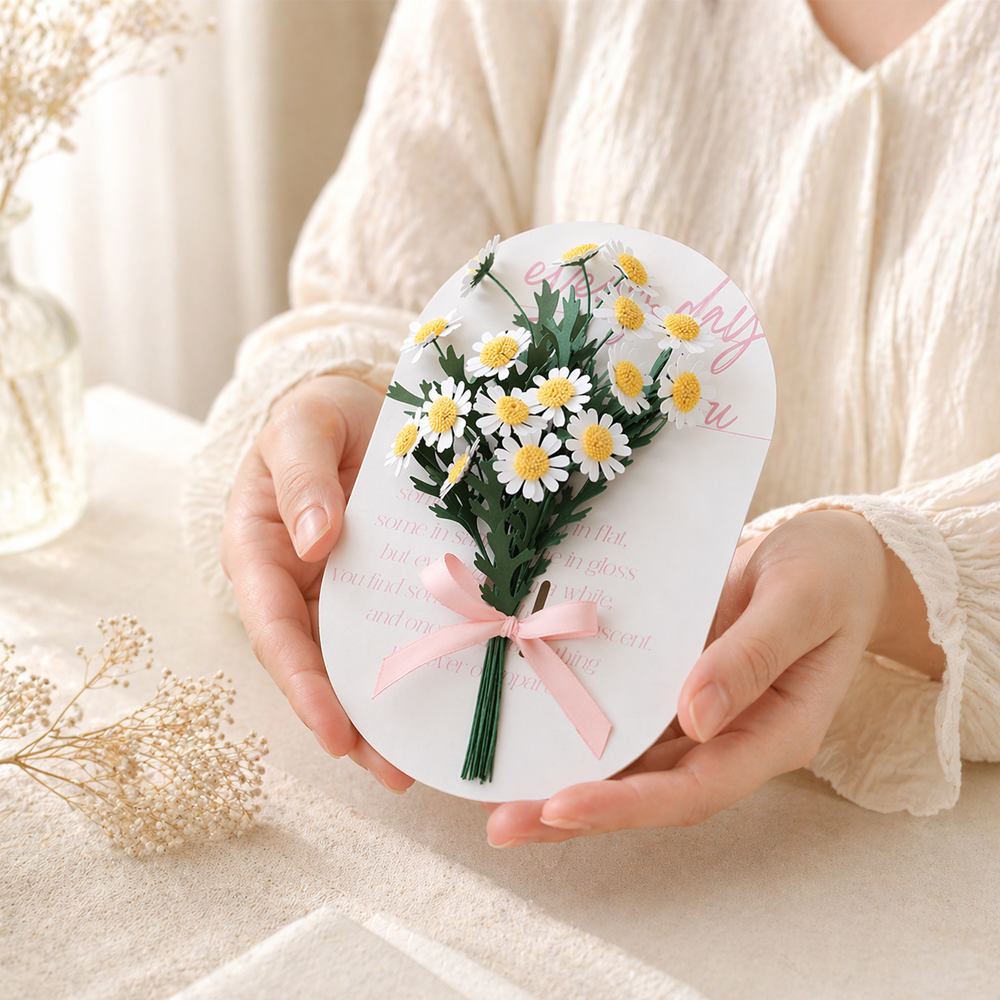
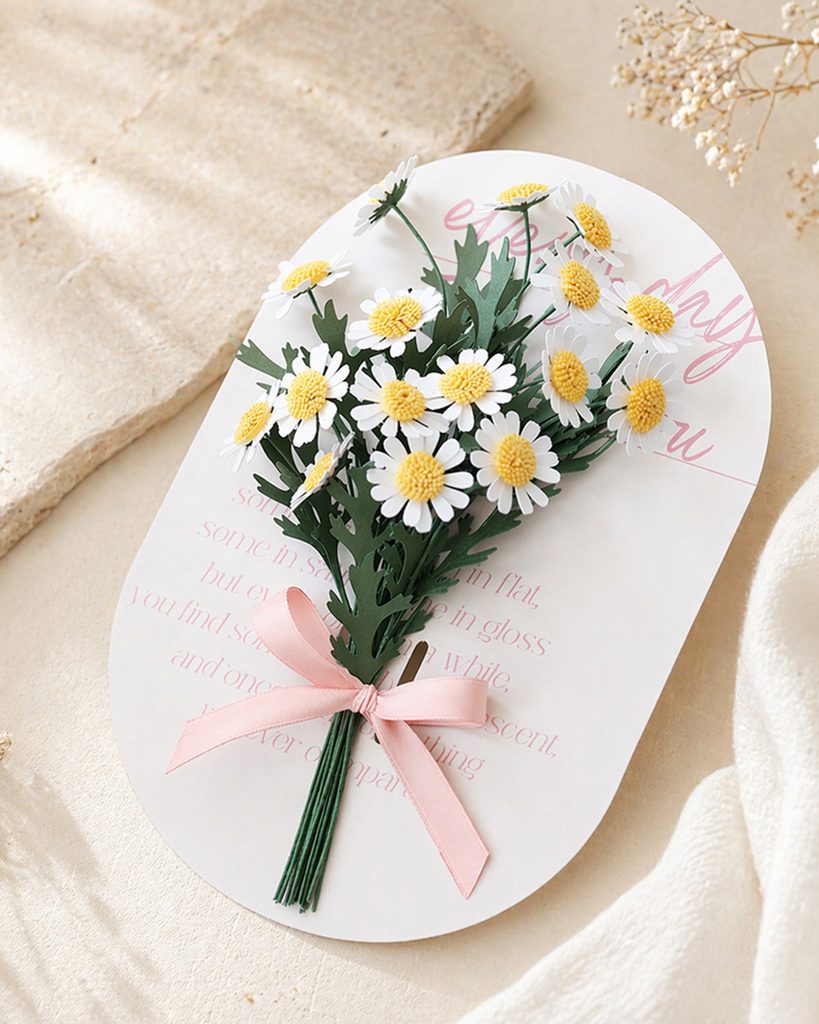
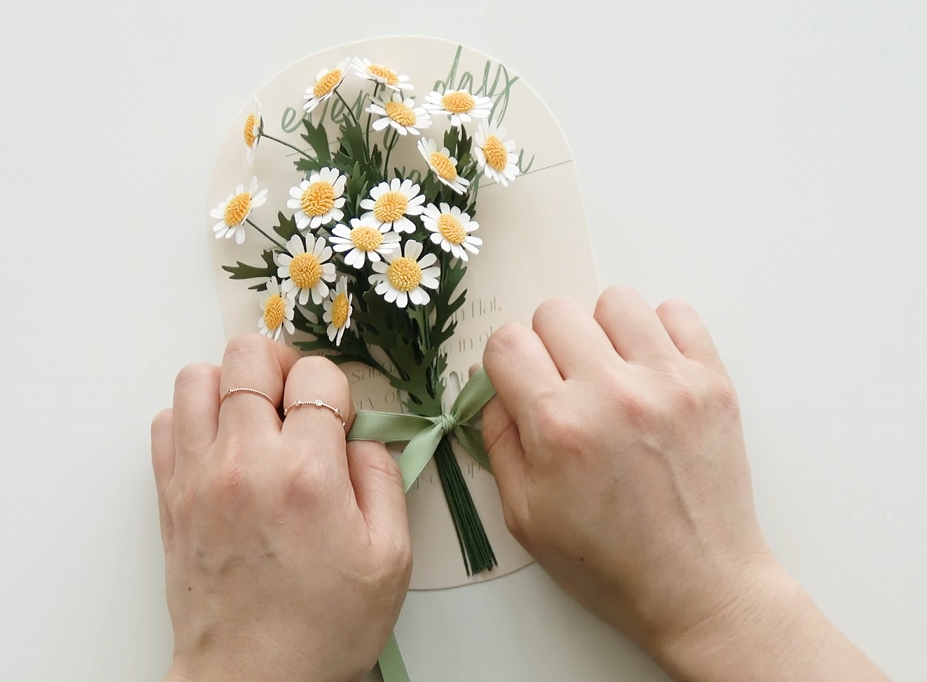
    Handmade daisy paper flower bouquet attached to a white card with a pink ribbon, held in both hands

    Difficulty: ★☆☆☆☆
    Time Required: About 1–2 hours

    Today, we’re going to make a daisy paper flower that’s easy and fun for anyone to try!

    Daisies are a great choice if you’re making paper flowers for the first time because the shape is simple and beginner-friendly.

    You can place your finished daisies in a small vase, or bundle them onto a backing card like I did to create a cute paper flower bouquet gift. 🌼

    I also have a detailed YouTube video showing the full process step by step. If you follow the blog post along with the video, even complete beginners can create a beautiful handmade paper flower project. :)😘

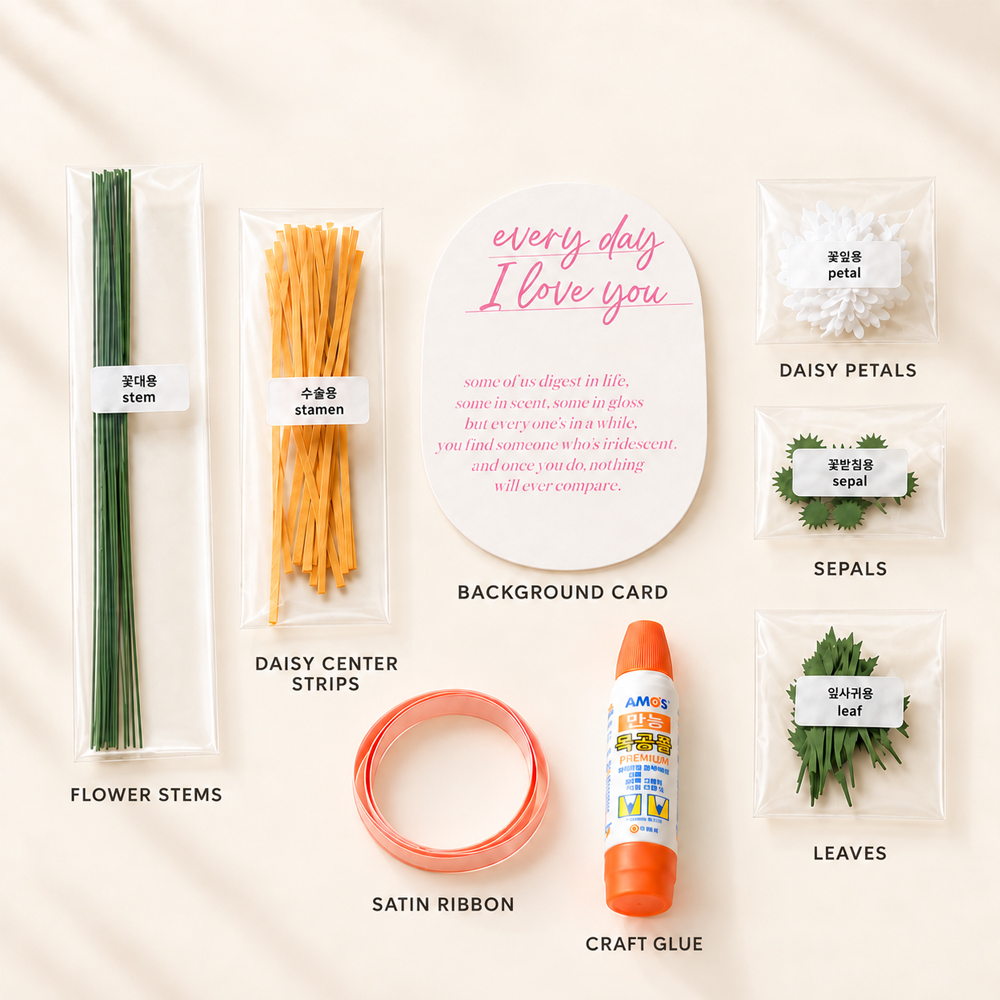
    Daisy paper flower materials including stems, center strips, petals, sepals, leaves, background card, satin ribbon, and craft glue

    [Materials]

    • Green 23-gauge floral wire
    • 150–180 gsm yellow cardstock
    • 150–180 gsm white cardstock
    • 150–180 gsm green cardstock
    • Background card
    • Satin ribbon
    • Wood glue
    • Scissors
    Mini daisy paper flower bouquet tied with a pink satin ribbon on a white message card

    Today, we’re making a daisy paper flower that everyone will recognize. 🌼

    Daisies have a simple flower shape, which makes them one of the easiest paper flowers to make.

    For this project, I made the daisies in a mini size and arranged them into a cute mini paper flower bouquet.

    I tied the bouquet onto a message card with a pink satin ribbon to give it a soft, feminine, and lovely look.

    You can write your own message on the background card, or use a plain kraft paper card and tie the bouquet with twine for a more natural style.

    If you have a cutting machine, you can use it to cut the petals and leaves quickly and easily. But don’t worry if you don’t have one—you can still make this daisy paper flower bouquet by cutting the pieces with scissors.

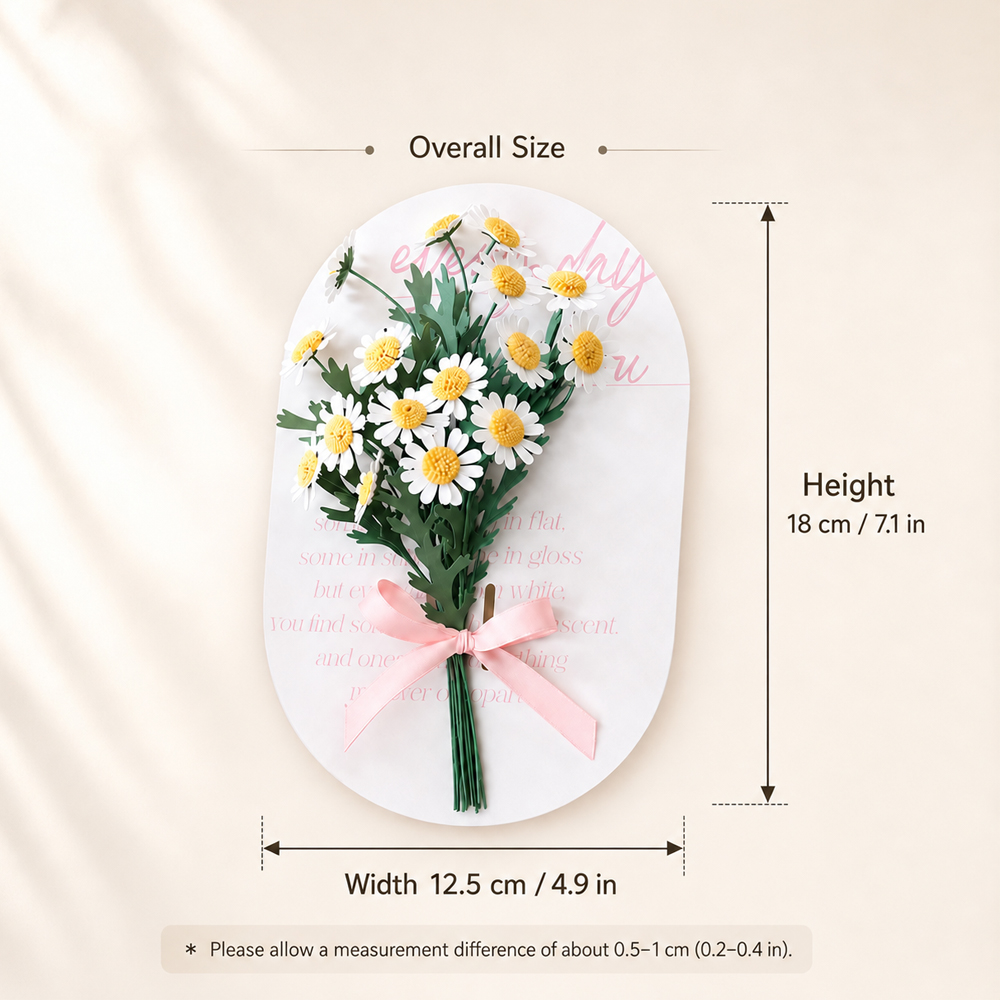
    Daisy paper flower bouquet on a message card with overall size shown as 18 cm high and 12.5 cm wide

    The finished piece measures about 12.5 cm (4.9 in) wide and 18 cm (7.1 in) tall, making it just slightly larger than an average woman’s palm.❤️

    Shall we start making it? 🌼

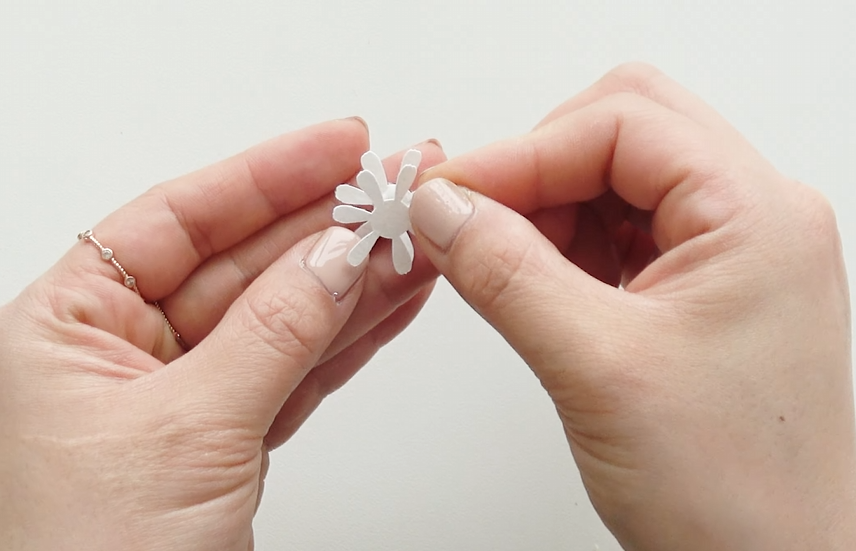
    Cutting and shaping white petals for a handmade daisy paper flower

    STEP.1⬆️

    Cut the white cardstock into a flower shape with seven petals.😊

    Layering white paper petals to create a fuller daisy flower shape

    STEP.2⬆️

    Glue the two flower layers together, offsetting the petals so they overlap between the gaps.

    Rolling a yellow cardstock strip to make the center of a daisy paper flower

    STEP.3⬆️

    Cut the yellow cardstock into thin strips, leaving about 5 mm uncut along the bottom. Apply wood glue to the uncut edge, then roll it tightly into a small circle and secure it in place.

    Finished white and yellow daisy paper flower head made from cardstock

    STEP.4⬆️

    Attach the yellow flower center to the middle of the prepared petals.

    Shaping a green paper sepal for the back of a daisy paper flower

    STEP.5⬆️

    Cut the green cardstock into a pointed sepal shape, then gently pull it along the scissors to create a slight curl.

    Bending the tip of green floral wire to prepare the daisy flower stem

    STEP.6⬆️

    Using long-nose pliers, bend the top of the green 23-gauge floral wire as shown in the photo.

    Attaching green paper sepals to the floral wire stem for a paper daisy

    STEP.7⬆️

    Slide the sepal onto the floral wire.😘

    Attaching the daisy paper flower head to a green floral wire stem

    STEP.8⬆️

    Apply wood glue to the sepal and attach it to the bottom of the flower.

    Adding green paper leaves to the stem of a handmade daisy paper flower

    STEP.9⬆️

    Cut the green cardstock into leaf shapes, then attach two or three leaves to each floral wire stem.

    Tying the finished mini daisy paper flower bouquet onto a message card with ribbon

    FINAL STEP😍⬆️

    Make several daisy paper flowers, gather them together, and tie them with a ribbon to complete your mini paper flower bouquet.

    Eva’s Tip

    Use scissors to gently curl the paper leaves. Try curling them in slightly different directions to create a more natural look.

    For a clean and balanced mini paper flower bouquet, it’s best to coordinate the color of the background card with the ribbon. If you use kraft paper as the background, I recommend tying the bouquet with natural twine.

    After applying wood glue to the sepal and attaching it underneath the flower, hold it in place for at least 30 seconds so it can bond firmly.

    Finally, gently bend some of the daisy paper flower petals slightly upward and downward. This small detail makes the finished flower look softer and more natural.

    If you don’t have a Cricut or find it difficult to gather all the materials, don’t give up! I’ve also prepared a mini daisy paper flower kit with everything you need to make this project more easily. I hope you’ll give it a try and enjoy making your own cute daisy bouquet. ^^😍

    Thanks for stopping by my little paper flower garden, my lovely bloom. 🌼 See you among the petals again!

  • How to Make a Paper Flower Wreath: Elegant Dogwood Wall Decor

    How to Make a Paper Flower Wreath: Elegant Dogwood Wall Decor

    Hey, lovely bloom! Thanks for wandering into my little paper flower garden. 🌸

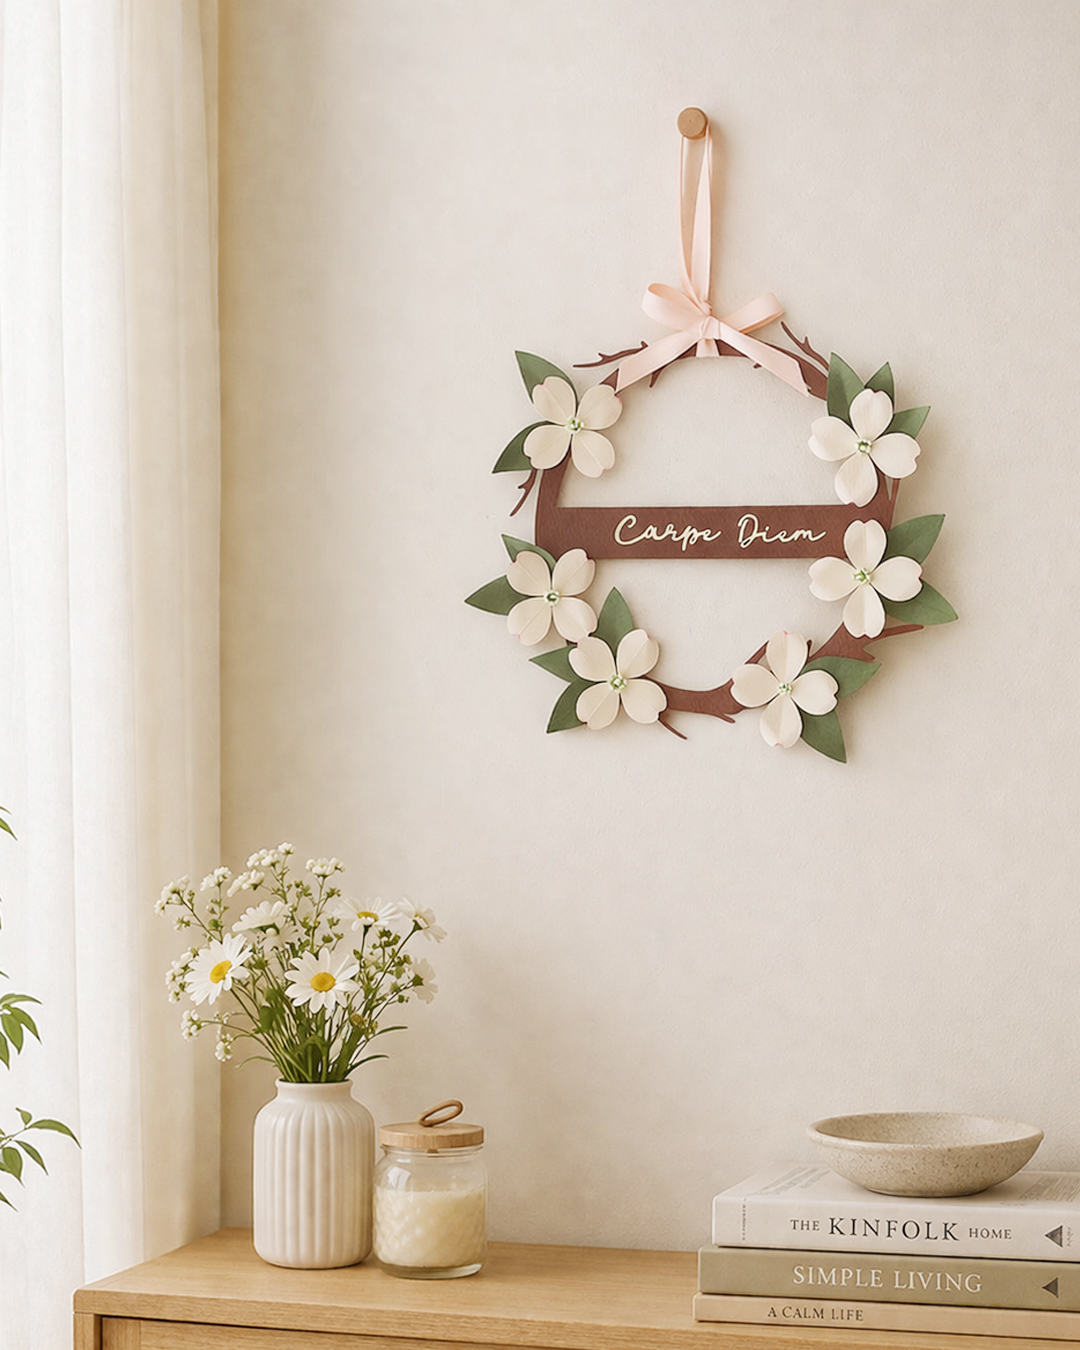
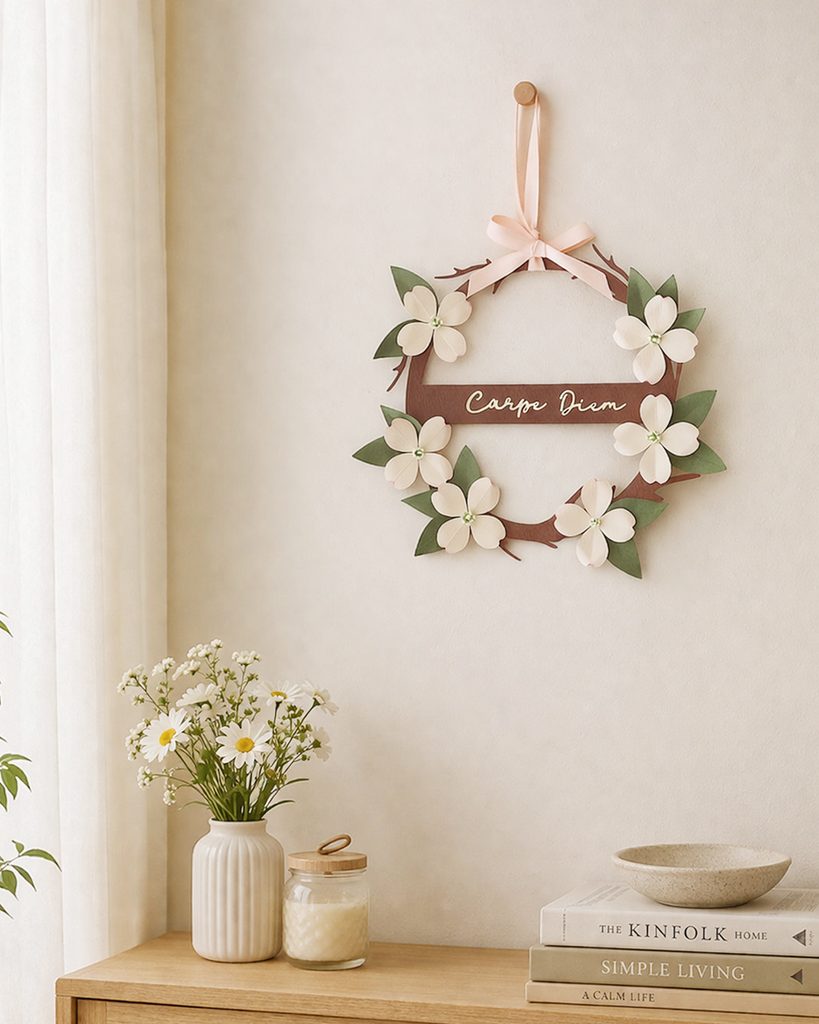
    Paper flower wreath with white dogwood flowers hanging on a neutral wall as elegant home decor

    Today, we’re making a paper flower wreath featuring delicate dogwood blossoms. It’s surprisingly easy to make, and once finished, it becomes a lovely piece of paper flower wall decor for your home.

    This project is simple enough for kids to enjoy too, so it’s a fun craft to make together as a family.

    Even if you’ve never made paper flowers before, don’t worry! With my step-by-step instructions and YouTube video, you’ll be able to follow along and create your own beautiful DIY paper flower wreath. ^^😍

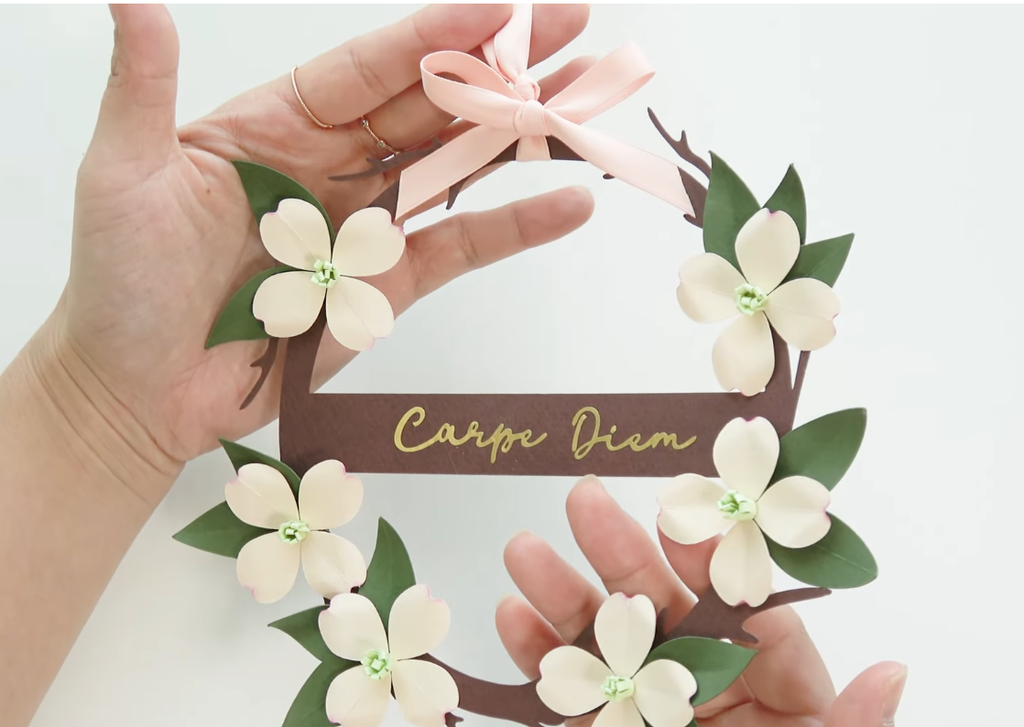
    Handmade paper flower wreath with white dogwood flowers and green leaves for wall decor

    Difficulty: ★☆☆☆☆

    Time Required: About 1 hour

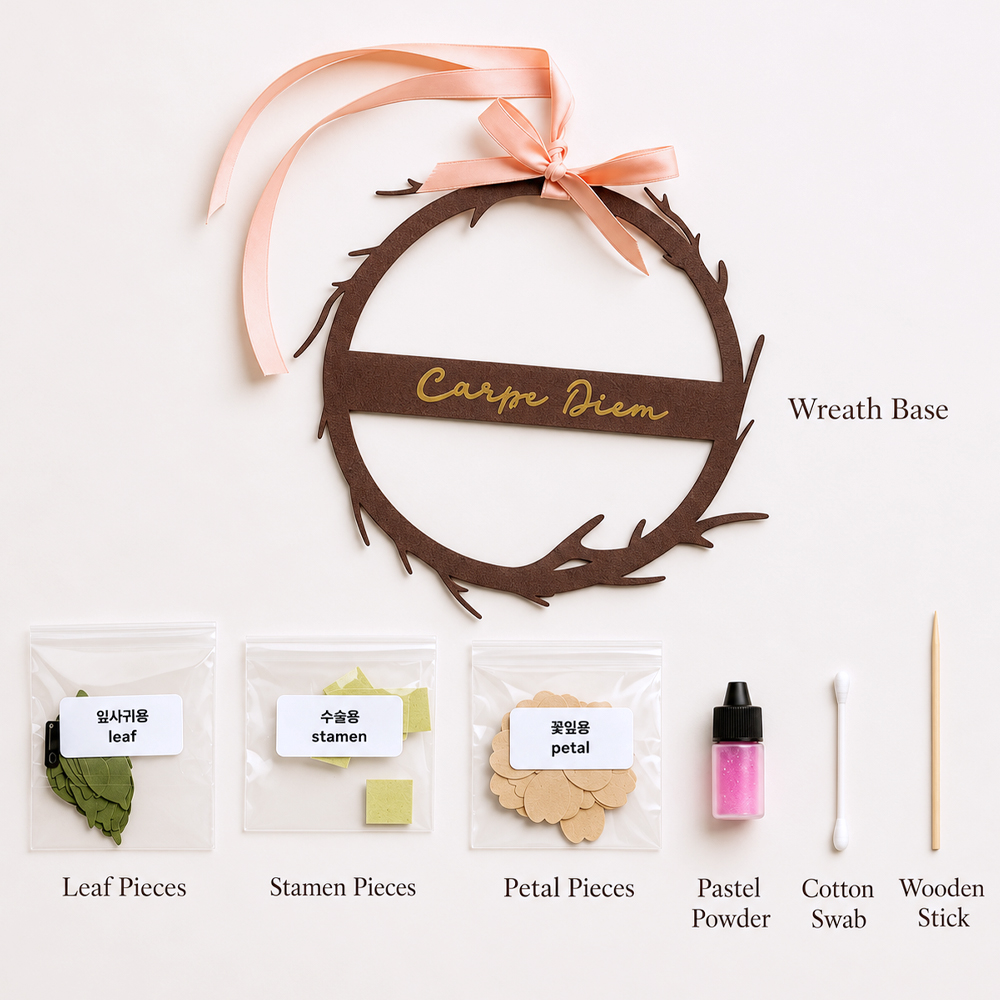
    Materials for making a DIY paper flower wreath with dogwood petals, leaves, stamens, ribbon, cotton swab, pastel powder, and wooden stick

    [ Materials Needed ]

    • 160–180 gsm brown cardstock
    • 160–180 gsm green cardstock
    • 160–180 gsm ivory cardstock
    • 160–180 gsm light green cardstock
    • Wooden skewer
    • Cotton swabs
    • Hot glue gun
    • Scissors
    • Gold adhesive vinyl sheet
    • Pink ribbon
    Finished dogwood paper flower wreath measuring 14 cm (5.5 in) in diameter with white flowers, green leaves, and a pink ribbon

    Today’s dogwood wreath is a really easy project to make. Since it’s designed as a paper flower wreath, it looks beautiful hanging on a bedroom wall or door. ^^

    I added the words “Carpe Diem” in gold adhesive vinyl to the center of the wreath, but you could also personalize it with a child’s name for their room. A short quote or meaningful phrase would look lovely too.

    For the pastel powder, I used hot pink or deep magenta. If you don’t have pastel powder, you can simply scrape a regular pastel stick with a craft knife and use the powder instead.

    The wooden stick is used to shape the paper flower petals. If you don’t have one, you can easily use a cotton swab or even the edge of your scissors as a substitute.

    The finished wreath is about 14 cm (5.5 in) in diameter, making it a perfect size for a child’s room, bedroom wall, or door decoration.😍

    Let’s start making the dogwood paper flower wreath!

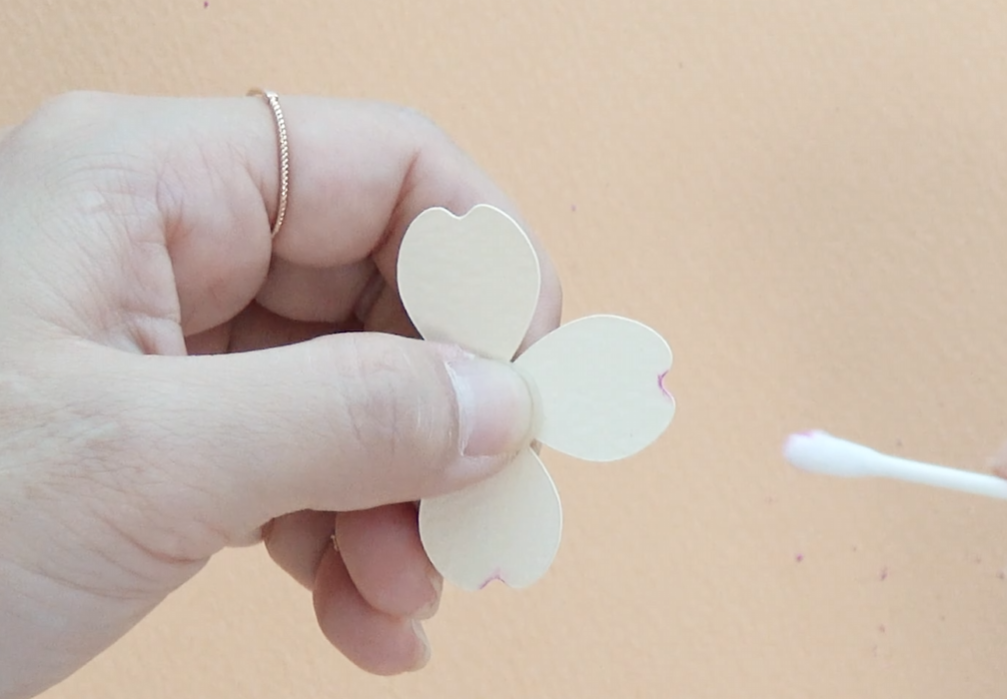
    Applying pink pastel to the edges of ivory paper dogwood petals with a cotton swab

    STEP.1⬆️

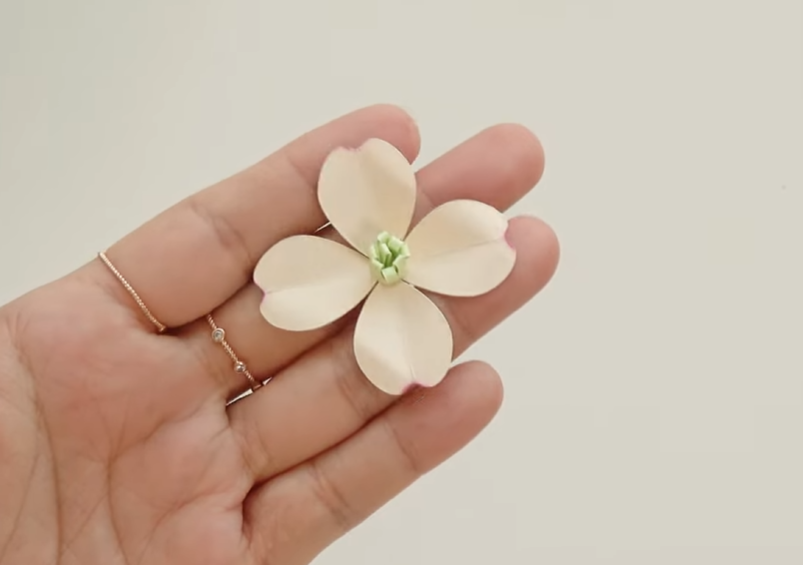
    Cut the ivory cardstock into a four-petal dogwood flower shape, then lightly add deep pink pastel only along the edges of each petal.

    Shaping a four-petal ivory paper dogwood flower by gently folding and curving each petal by hand

    STEP.2⬆️

    Fold each petal in half, then unfold it gently to create a natural crease.

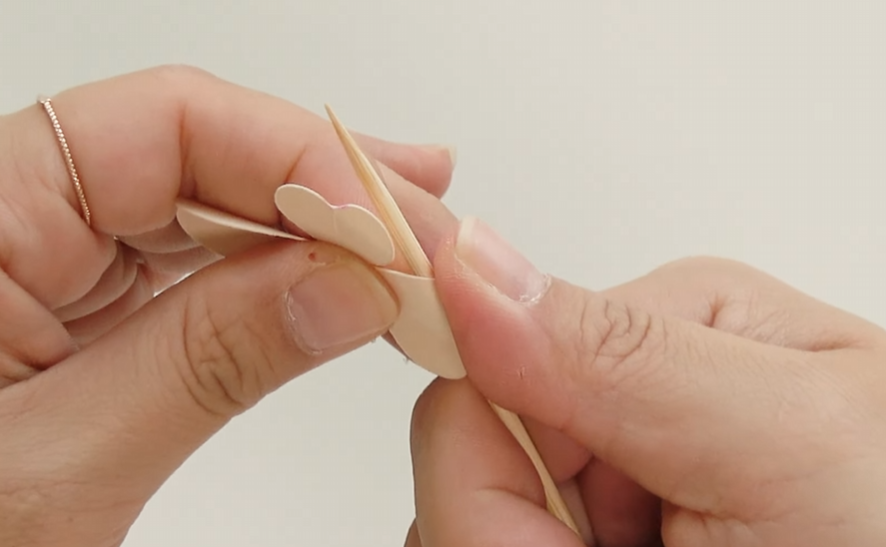
    Shaping the folded ivory paper dogwood petals with a wooden skewer to create a natural curve

    STEP.3⬆️

    Use a wooden skewer, cotton swab, or another thin tool to gently curl the edges of each petal outward.😘

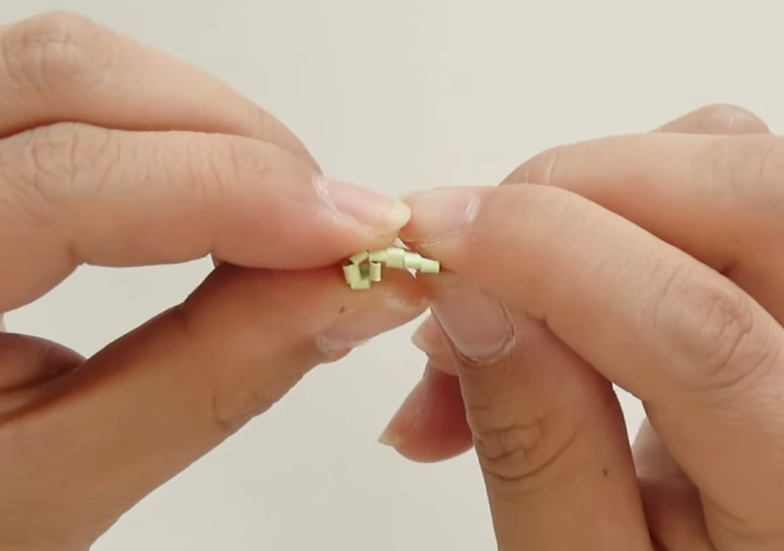
    Rolling a light green paper strip to create the center stamen for a handmade dogwood paper flower

    STEP.4⬆️

    Cut only the center section of the stamen piece into thin strips, then fold it in half.

    Shaping the folded light green paper stamen piece by hand for a dogwood paper flower

    STEP.5⬆️

    Roll it tightly from one end to the other.

    Finished ivory dogwood paper flower with four petals and a light green rolled paper stamen in the center

    STEP.6⬆️

    Attach the finished stamen to the center of the flower using a hot glue gun.

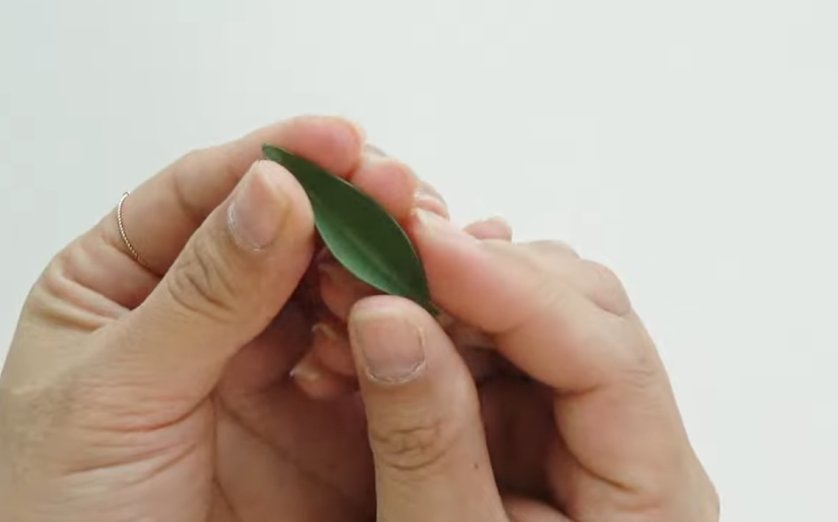
    Shaping a green paper leaf by folding it gently along the center for a dogwood paper flower wreath

    STEP.7⬆️

    Fold each leaf in half, then gently unfold it.😊

    Attaching an ivory dogwood paper flower to the brown wreath base with a hot glue gun

    STEP.8⬆️

    First, attach the paper leaves to the wreath base. Then glue the dogwood flowers on top of the leaves.

    Finished DIY dogwood paper flower wreath with ivory flowers, green leaves, a pink ribbon, and gold Carpe Diem lettering

    FINAL STEP⬆️

    Attach the lettering to the wreath, then finish it off by tying a ribbon at the top. Your dogwood paper flower wreath is complete!❤️

    Eva’s Tip

    If you have a cutting machine, it makes cutting the paper pieces much easier. But if you don’t have one, these shapes are simple enough to cut by hand using scissors or a craft knife.

    The lettering is a little more difficult to cut neatly with scissors or a knife. If you don’t have a cutting machine, you can use ready-made lettering stickers instead and simply choose a size that fits your wreath. 🙂

    I used a hot glue gun because it’s quick and convenient, but wood glue works perfectly well too. If you use wood glue, hold each piece in place for about 30 seconds so it can bond securely.

    Before gluing the leaves and flowers directly onto the wreath base, arrange all the pieces first and check the overall balance. Once you’re happy with the placement, glue them down. This little step makes it much easier to avoid mistakes. ^^😘

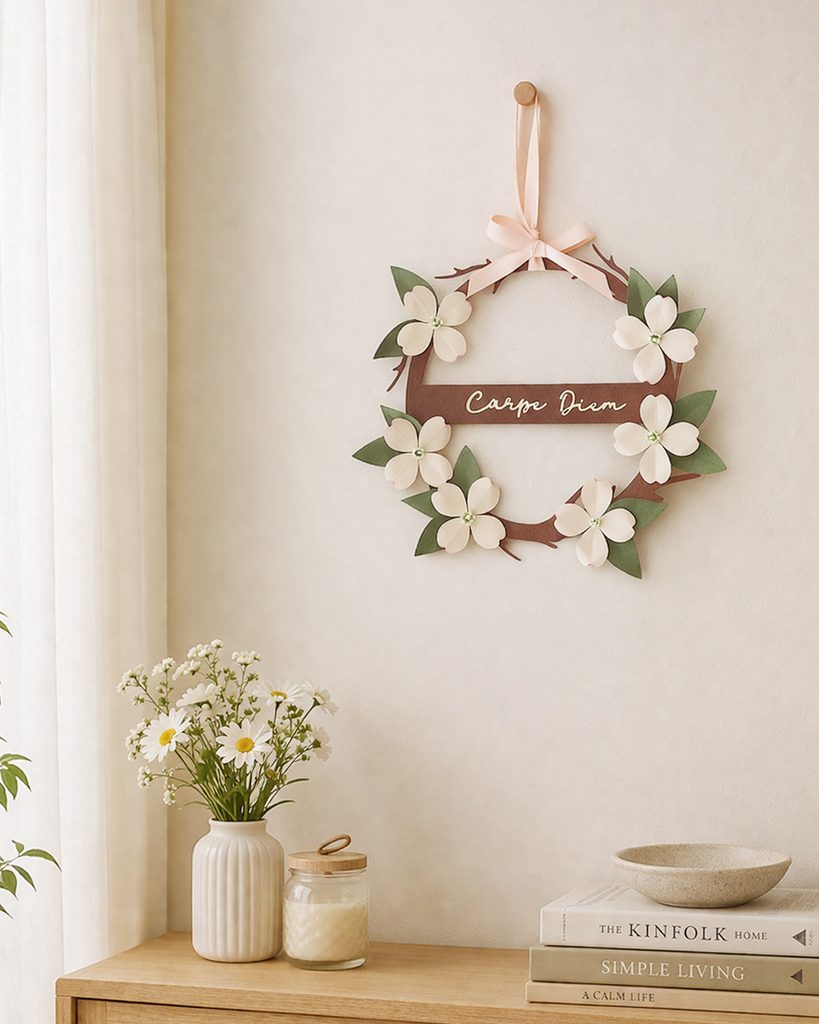
    Finished dogwood paper flower wreath hanging on a neutral wall as elegant handmade home decor

    Isn’t it so pretty? Try hanging your paper flower wreath on a bedroom door or wall for a simple handmade touch. 😘

    If you don’t have a Cricut or find it difficult to prepare all the materials, a DIY paper flower wreath kit is also available, so I hope you’ll give it a try. ^^

  • Custom Paper Flower Wall Art with Cosmos Flowers

    Custom Paper Flower Wall Art with Cosmos Flowers

    Hey, lovely bloom! Thanks for stopping by my little paper flower garden. 🌸

    Framed cosmos paper flower wall art with customizable text hanging on a wall.

    Difficulty: ★☆☆☆☆
    Time: About 1 hour

    Today, we’re going to make a beautiful paper flower wall art piece with three bright and cheerful cosmos flowers.

    You don’t need any complicated paper flower techniques for this project. If you follow the detailed YouTube video and step-by-step instructions I’ve shared here on the blog, anyone can make these cosmos paper flowers.

    This project is especially recommended for beginners who are just getting started with paper crafts. 😘

    Materials for making cosmos paper flower wall art, including cardstock petals, leaves, flower centers, paper frame template, marker, wooden skewer, and quilling tool.

    [ Materials You’ll Need ]

    • A4-size burgundy cardstock, 180–210 gsm
    • Jute twine
    • Ivory adhesive vinyl sheet
    • Cardstock for petals, 150–180 gsm – hot pink, light pink, and
    • yellow
    • Water-based marker pen
    • Thin wooden stick
    • Paper quilling tool
    • Yellow cardstock for the flower centers, 150–180 gsm
    • Green cardstock for the leaves and sepals, 150–180 gsm
    • 18-gauge green paper-covered floral wire
    • Hot glue gun

    Today, we’re going to make cosmos flowers from paper, one of the most iconic flowers of autumn!

    These cosmos paper flowers are surprisingly easy to make, so this is a beginner-friendly project that anyone can enjoy, regardless of age or crafting experience. Even if this is your first time making paper flowers, don’t worry—I’ll guide you through each step in detail. Let’s make them together! ^^

    I turned my cosmos flowers into a framed paper flower wall art piece that can be hung on the wall, but you can also make just the flowers and arrange them in a vase. They would look beautiful that way too. ^^

    For the petals, I used hot pink, light pink, and yellow cardstock, but you can also make many cosmos flowers in just one color for a simple and elegant look. :)😘

    Framed cosmos paper flower wall art measuring 21 x 29.7 cm, featuring yellow, pink, and white cardstock flowers with custom lettering.

    I made the frame in A4 size, which is a great size for hanging on a bedroom wall or door. ^^

    I added the lettering by cutting ivory adhesive vinyl and applying it to the frame. You can customize the text with any word, name, or message you like to make your paper flower wall art more personal and special.😊

    [ How to Make Cosmos Paper Flower Wall Art ]

    Coloring the stems of yellow paper flower centers with a black marker for a cosmos paper flower craft.

    STEP.1⬆️

    Cut a strip of yellow cardstock for the stamens, alternating between longer and shorter pieces as shown in the photo.

    Then, use a black water-based marker to color only the lower part of the longer stamens. This small detail adds more depth and makes the center of your cosmos paper flower look more realistic.

    Rolling the yellow paper stamens with a quilling tool to form the center of a cosmos paper flower.

    STEP.2⬆️

    Use a paper quilling tool to roll the yellow stamen strip tightly.

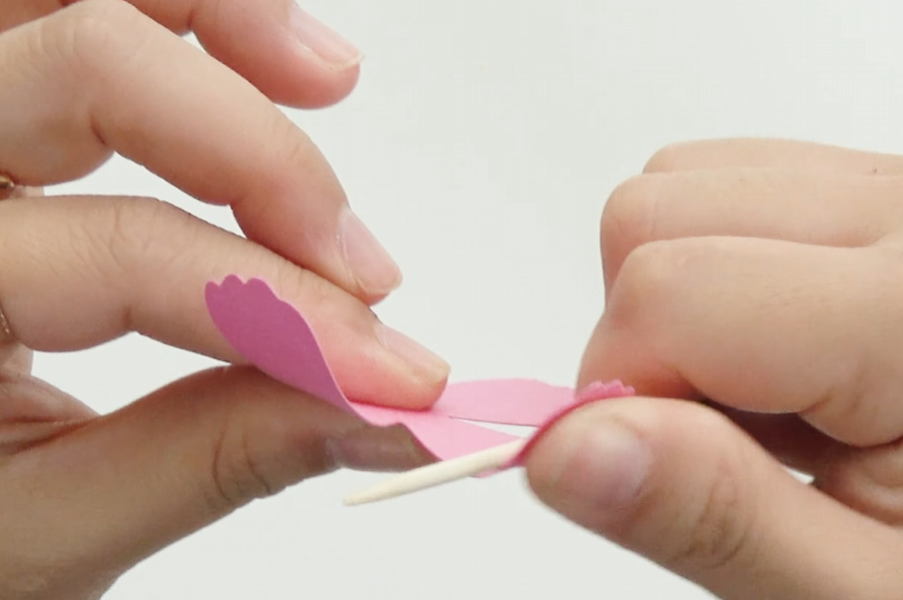
    Shaping pink cardstock petals with a thin wooden stick while making a cosmos paper flower.

    STEP.3⬆️

    Use a thin wooden stick to gently pull and curve each cardstock petal, shaping it into a soft natural bend.

    Inserting green floral wire through the center of pink cardstock petals to assemble a cosmos paper flower.

    STEP.4⬆️

    Insert the center of the cardstock petals onto an 18-gauge green floral wire.😘

    Finished pink cosmos paper flower with layered cardstock petals and a yellow flower center.

    STEP.5⬆️

    Layer the two cardstock petal pieces so they cross each other, then glue the prepared yellow stamen piece into the center.

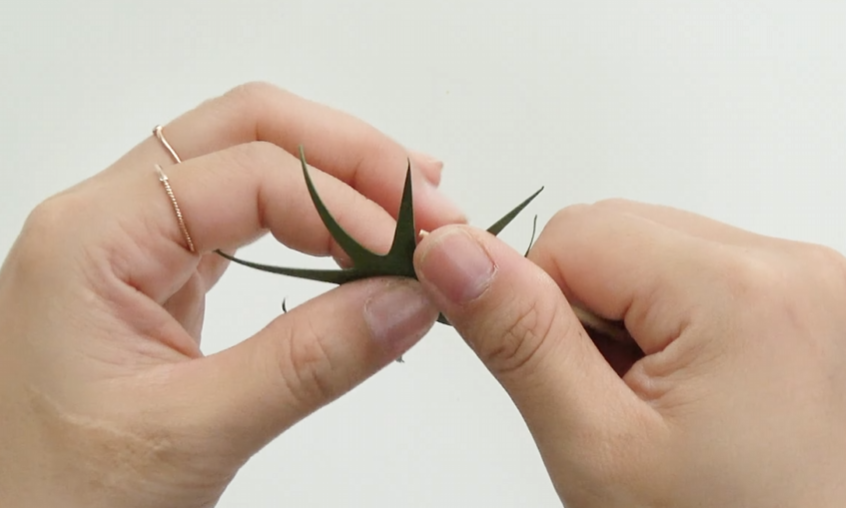
    Shaping a green cardstock sepal by bending the pointed leaves for a cosmos paper flower.

    STEP.6⬆️

    Use a thin wooden stick to gently pull and curve each pointed part of the green sepal.

    Attaching a green cardstock sepal to the back of a pink cosmos paper flower.

    STEP.7⬆️

    Use a hot glue gun to attach the sepal securely to the underside of the flower.

    Attaching a green cardstock cosmos leaf to a thin floral wire while making a paper flower stem.

    STEP.8⬆️

    Cut the green cardstock into many thin, delicate leaf shapes, then gently bend them in different directions to create a natural, airy look.😊

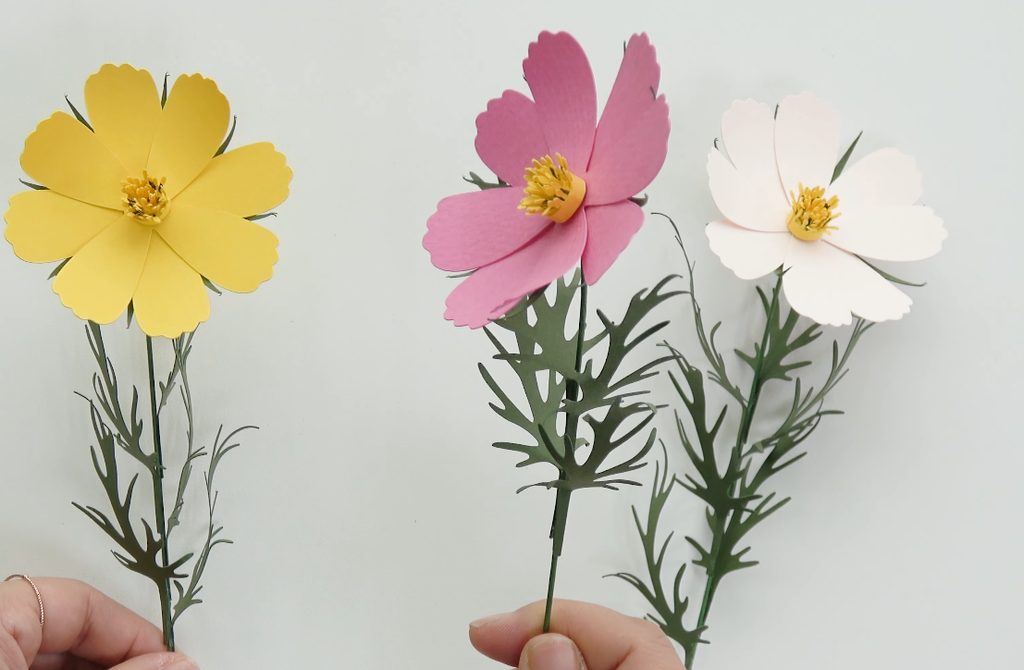
    Finished yellow, pink, and white cosmos paper flowers with detailed green cardstock leaves and stems.

    STEP.9⬆️

    Attach the finished leaves to the flower stem, and your cosmos paper flower is complete!

    Arranging finished yellow, pink, and white cosmos paper flowers inside a brown A4 paper frame to complete the wall art.

    FINAL STEP⬆️

    Make small holes in the bottom part of the A4-sized paper frame, apply hot glue, and insert the finished cosmos flowers into place. Once they are secured, your cosmos paper flower wall art is complete!😍

    Finished cosmos paper flower wall art with three colorful cardstock flowers arranged in an A4 paper frame.

    Here are the cosmos paper flowers we made today! ^^

    The moment you look at them, you can really feel the beauty of autumn. :)😘

    Eva’s Tip🌻

    I used a paper quilling tool to roll the flower centers, but if you don’t have one, you can easily use tweezers instead. ^^

    When shaping the leaves, bend them in several different directions rather than all the same way. This will make your cosmos paper flowers look much more natural. 🙂

    When attaching the pieces, you only need a very small amount of hot glue. Be careful not to use too much, or the glue may squeeze out around the edges.

    If you enjoyed making this paper flower wall art, please consider trying one of Eva’s kits too. Your kit purchase really helps support the tutorials and blog posts I create, and each kit is prepared so that even beginners can make the project easily. I hope you’ll give it a try!

    Thanks for stopping by my little paper flower garden, my lovely bloom. 🌼
    See you among the petals again!

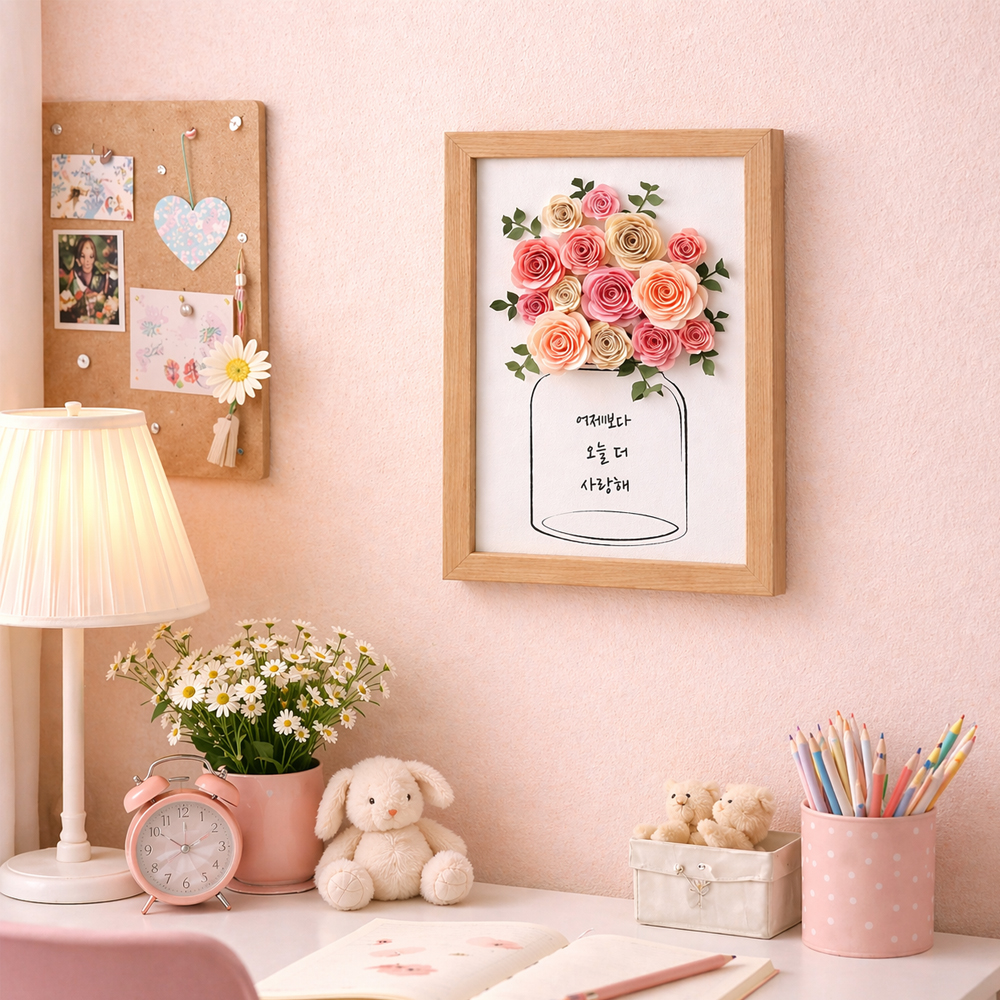
    Pink rolled paper rose wall art frame displayed in a cozy room interior

    3D Paper Flower Wall Art: Romantic Rose Frame Decor

    Create a romantic 3D rose frame with layered paper flowers—perfect for elegant wall decor or a handmade gift.

  • DIY Paper Shamrocks: Make a Lucky Clover Flower Pot with a Cutting Machine

    DIY Paper Shamrocks: Make a Lucky Clover Flower Pot with a Cutting Machine

    Hey, lovely bloom! Thanks for wandering into my little paper flower garden. 🌸

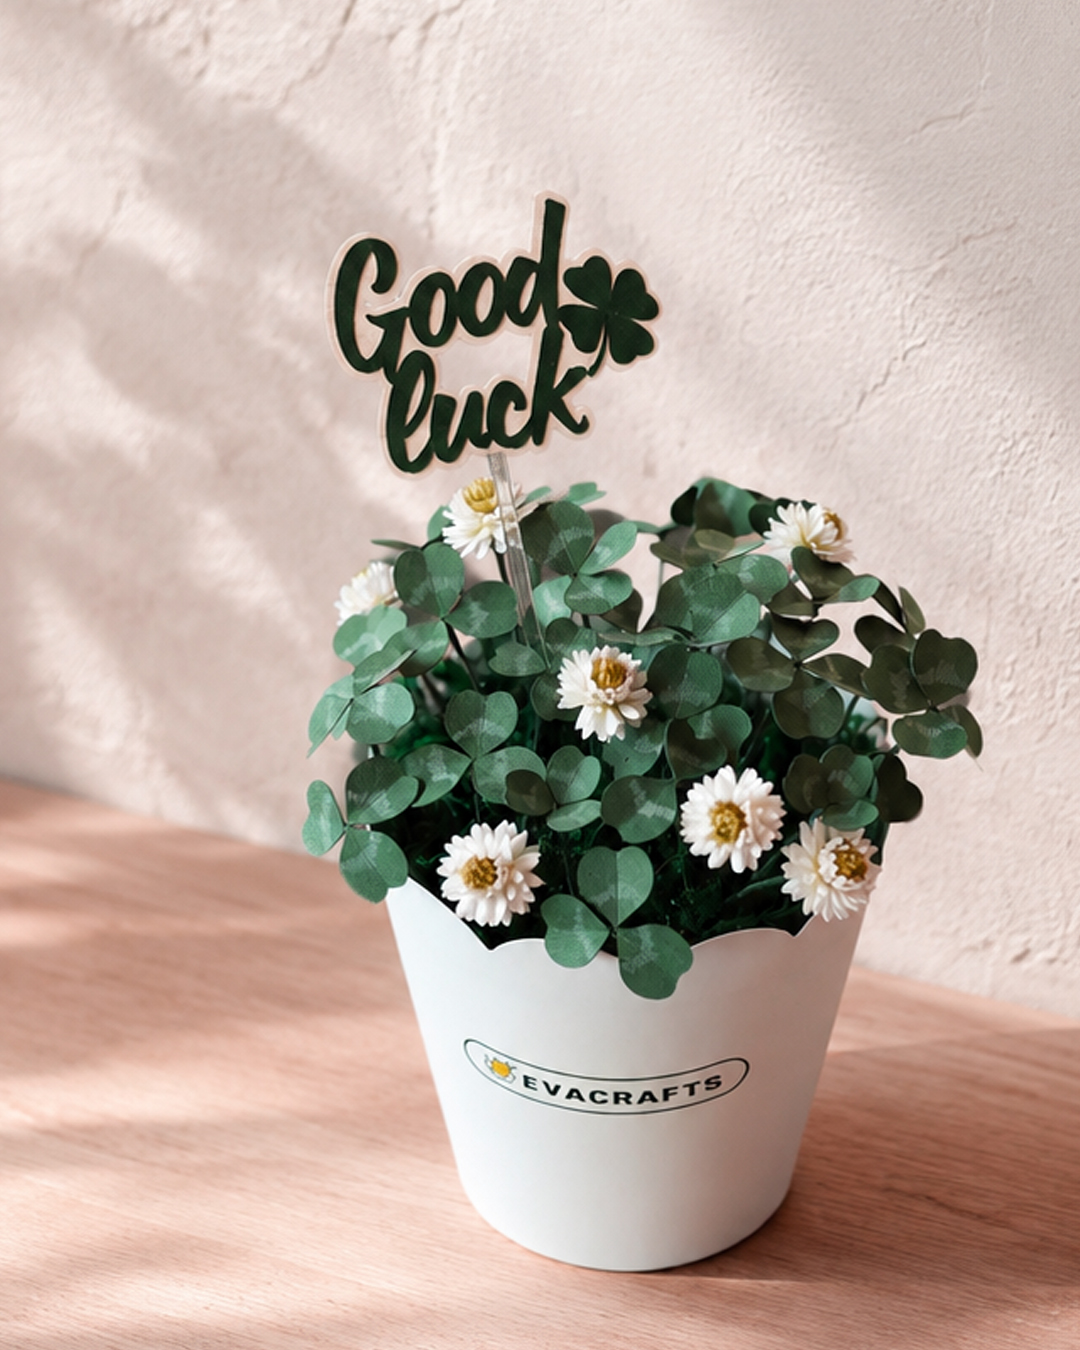
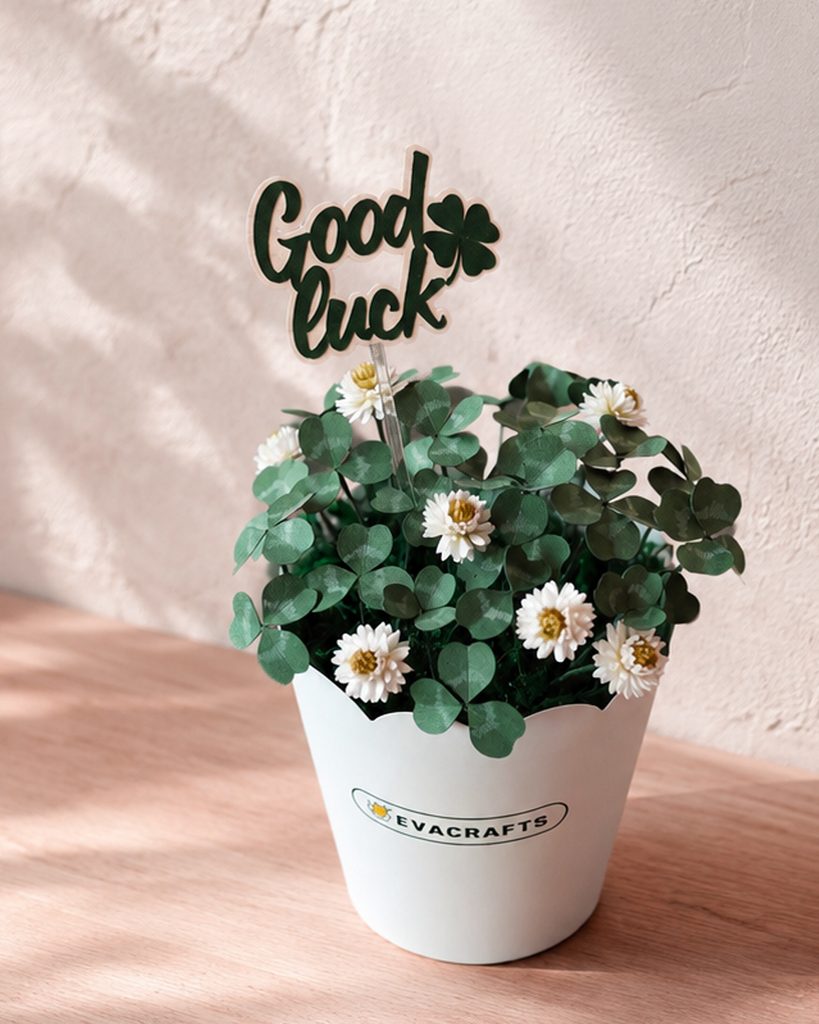
    Paper shamrock flower pot with small white flowers and a Good Luck topper

    Difficulty: ★☆☆☆☆
    Estimated Time: About 3 Hours

    Today, we’re making paper shamrocks, inspired by the clover plants you can often spot along the roadside. 🍀

    Today, we’re making paper shamrocks, inspired by the clover plants you can often spot along the roadside. 🍀

    This shamrock craft is one of the projects I highly recommend for beginners. Even if you’ve never tried paper crafting before or don’t feel very confident with your hands, you can still make a beautiful paper flower pot by following the video tutorial I shared on YouTube and the step-by-step instructions here on the blog. 🙂

    Paper shamrock craft materials including leaves, flowers, stem wires, floral tape, flower pot, foam base, and tools

    Materials Needed

    • Scissors
    • Tweezers
    • Green cardstock, 150–180 gsm
    • White cardstock, 120–160 gsm
    • Light green brush pen
    • White colored pencil
    • Green floral tape
    • 23-gauge green floral wire
    • Wood glue
    • Styrofoam
    • Artificial moss
    • Flower pot

    For a more polished and elegant look, I recommend using a slightly deeper shade of green for your paper shamrocks. Green cardstock around 150–180 gsm works especially well because the leaves stay firm and hold their shape, while still being easy enough to cut and fold. ^^

    I used a brush pen to add color to the small flowers, but you can use watercolor paint, pastels, or any coloring material you prefer. I chose a brush pen simply because it’s easy to use and convenient to store between projects.

    When drawing the patterns on the shamrock leaves with a white colored pencil, feel free to make them however you like. You don’t need to make every leaf look exactly the same. Slight differences actually help the finished paper shamrocks look more natural. ^^😍

    Paper shamrock flower pot with Good Luck topper, approximately 15 cm tall and 13 cm wide

    The finished paper shamrock flower pot measures approximately 13 cm (5.1 in) wide and 15 cm (5.9 in) tall.

    It’s a nice compact size for displaying on a desk, table, shelf, or other small space as a decorative paper plant. 🙂

    How to Make It

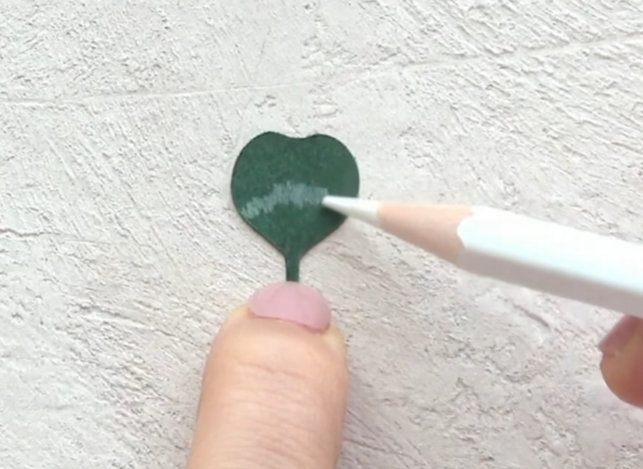
    Drawing a white pencil pattern on a green paper shamrock leaf

    STEP.1⬆️

    Draw a simple pattern on the green paper shamrock leaf with a white colored pencil, following the photo as a guide.

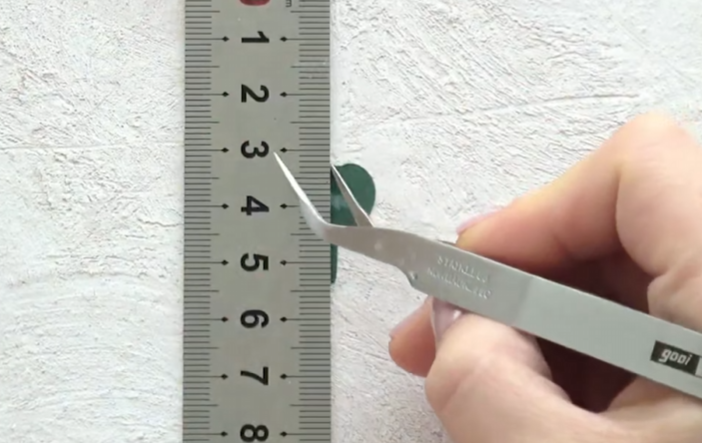
    Measuring a green paper shamrock leaf with a ruler and tweezers

    STEP.2⬆️

    Place a ruler along the leaf, then use the pointed tip of the tweezers to lightly score a line down the center.

    Attaching green paper shamrock leaves to a floral wire stem

    STEP.3⬆️

    Using wood glue, attach 3–4 paper shamrock leaves to each 23-gauge floral wire stem.😘

    Wrapping floral tape around a paper shamrock leaf stem

    STEP.4⬆️

    Wrap the floral wire with green floral tape.

    Coloring the center of small white paper flowers with a light green brush pen

    STEP.5⬆️

    Cut two flower shapes from white cardstock as shown in the photo, then color the centers with a light green brush pen.

    STEP.6⬆️

    Cut three more flower shapes slightly larger than the first ones, then color only the centers.

    Next, cut four more flower shapes slightly larger than the second set, and again color only the centers.

    Shaping the petals of a small paper flower with tweezers

    STEP.7⬆️

    Use tweezers to fold the edges of all the petals on the smallest flower.

    Using tweezers to shape the petals of a medium white paper flower

    STEP.8⬆️

    Starting with the second flower size, use tweezers to pinch only the base of each petal so the petals gather slightly inward.

    Attaching a small paper flower to a floral wire stem with tweezers

    STEP.9⬆️

    Insert the smallest paper flower onto the floral wire stem.

    STEP.10⬆️

    Attach all the flower layers to the wire in order, starting from the smallest and ending with the largest.

    Then wrap the wire stem with floral tape.

    Arranging paper shamrock leaves and small white paper flowers in a flower pot

    FINAL STEP⬆️

    Once all the paper shamrock leaves and flowers are arranged in the pot, your paper shamrock flower pot is complete. :)😍

    Finished paper shamrock flower pot with small white paper flowers viewed from above

    This is the paper shamrock flower pot we made today. 🍀

    With just a few simple steps, you can create a paper flower project that looks surprisingly natural and lifelike. ^^

    Eva’s Tip

    One part that beginners often find surprisingly tricky is wrapping the stem with floral tape.

    The key is to keep a little tension on the tape with your fingers and wrap it around the stem at a slight diagonal angle. This helps the tape lie smoothly without bunching up. After practicing just a few times, it should become much easier. ^^

    When coloring the flower petals, it’s better to build up the color gradually with several light layers.

    Beginners sometimes try to get the final color in one pass and end up making the petals too dark. A softer, lighter finish usually looks more natural and delicate. ^^❤️

    I hope you had another fun and relaxing time making paper flowers with Eva today. 🙂

    Purchasing my cutting machine flower template is a big help in supporting the work I put into creating and sharing these tutorials—haha!

    And one more thing! If you don’t have a Cricut or another cutting machine, I also have a DIY kit prepared so you can still try making this paper shamrock project yourself. I hope you’ll give it a try. ^^

    Pink rolled paper rose wall art frame displayed in a cozy room interior

    3D Paper Flower Wall Art: Romantic Rose Frame Decor

    Try this romantic 3D paper rose frame next—it’s a beautiful paper flower wall art project for home decor.

  • How to Make Realistic Crepe Paper Zinnias

    How to Make Realistic Crepe Paper Zinnias

    Hey, lovely bloom! Thanks for wandering into my little paper flower garden. 🌸

    Today, we’re going to make beautiful crepe paper zinnias that anyone can create! 🌸

    At first glance, they may look very detailed and realistic, so you might think they’re difficult to make. But with Eva’s YouTube video and step-by-step instructions, even beginners can follow along with confidence.

    So don’t worry if it looks a little complicated at first. Just take your time and enjoy making it one step at a time. 🙂

    Once you attach the very last petal and look at your finished zinnia, you may be surprised by how rewarding it feels to say, “I made this beautiful flower with my own hands!”

    That little sense of accomplishment is one of the best parts of making paper flowers. 🌷

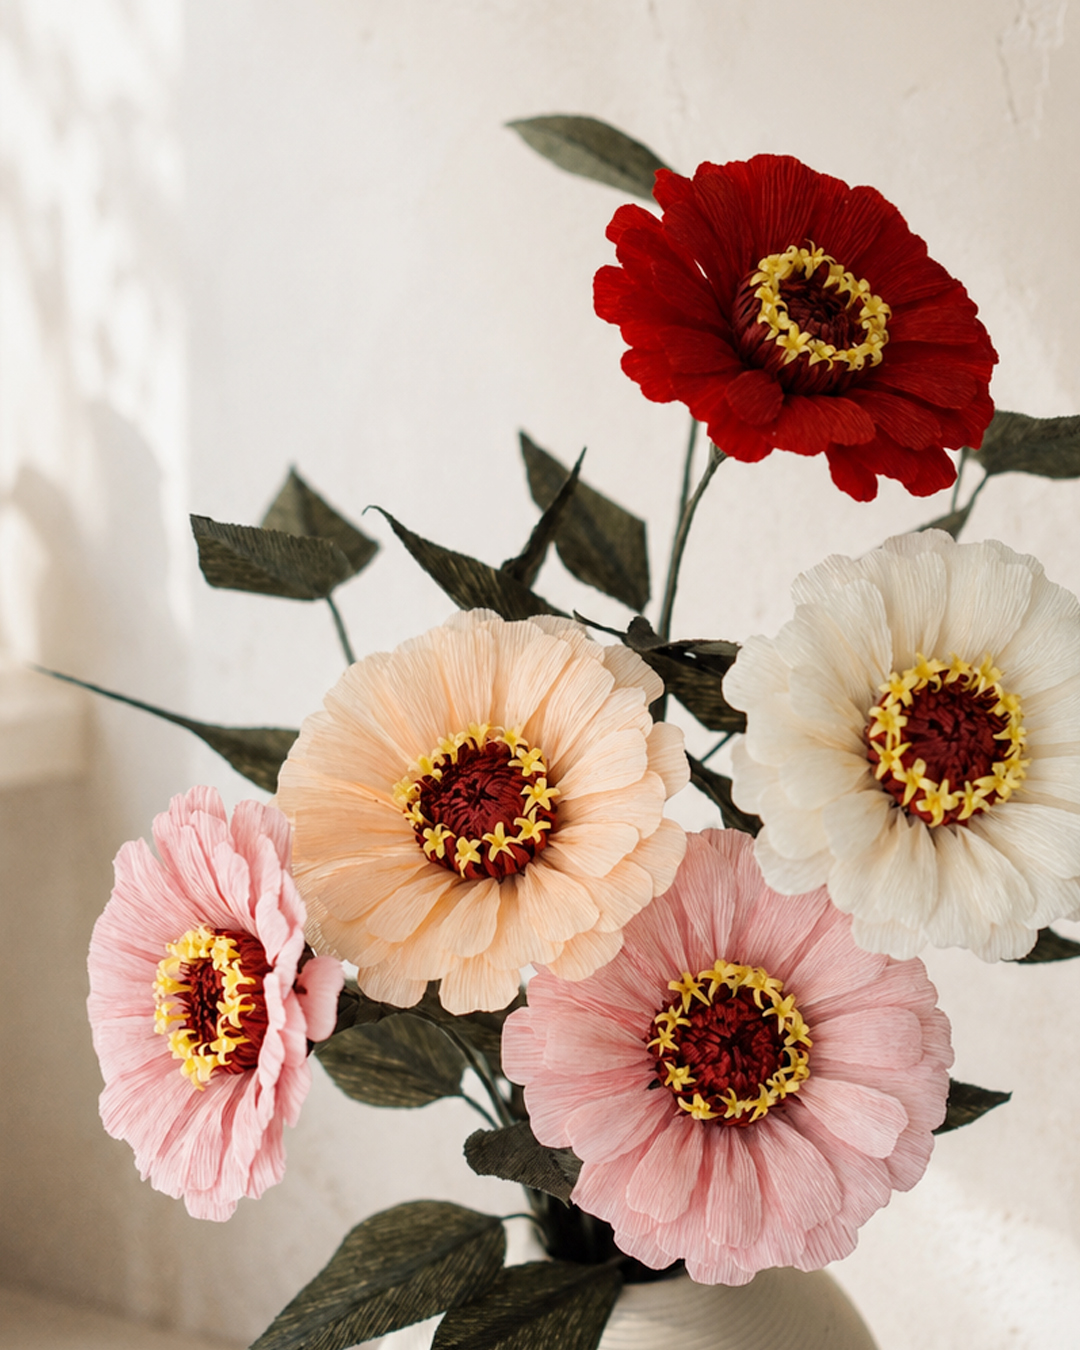
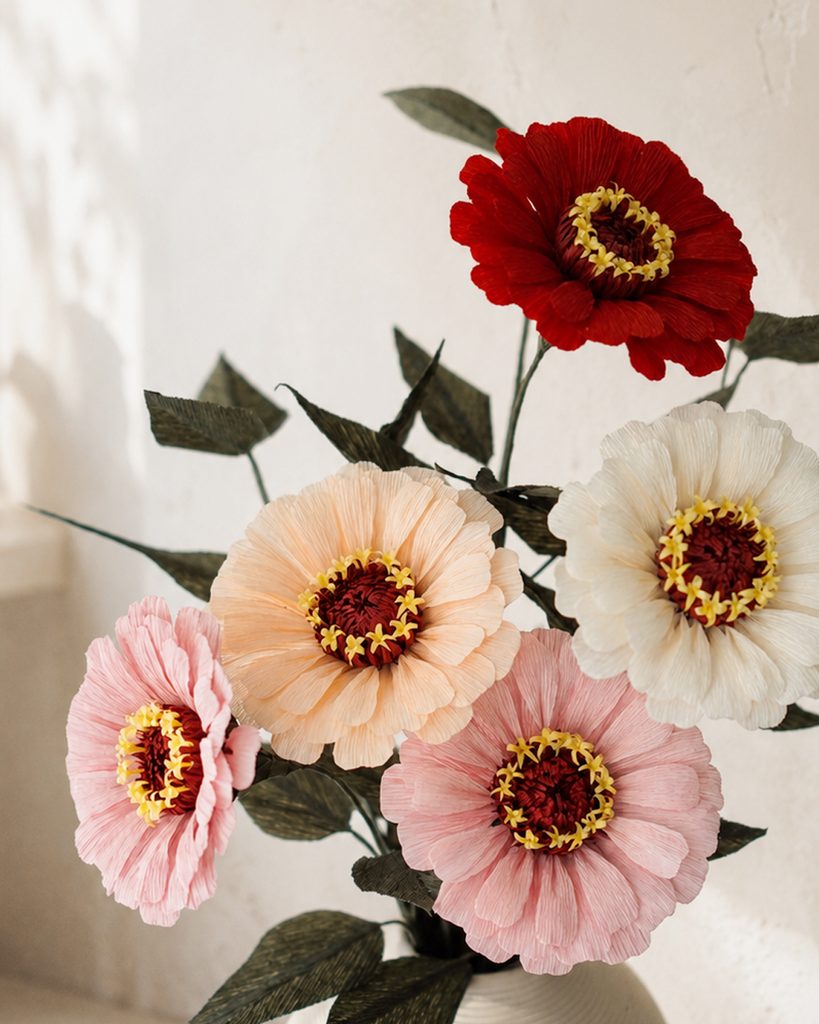
    Handmade crepe paper zinnia flowers in red, pink, peach, and white arranged in a vase with green leaves.

    Difficulty: ★★★☆☆
    Time Required: About 1–2 hours

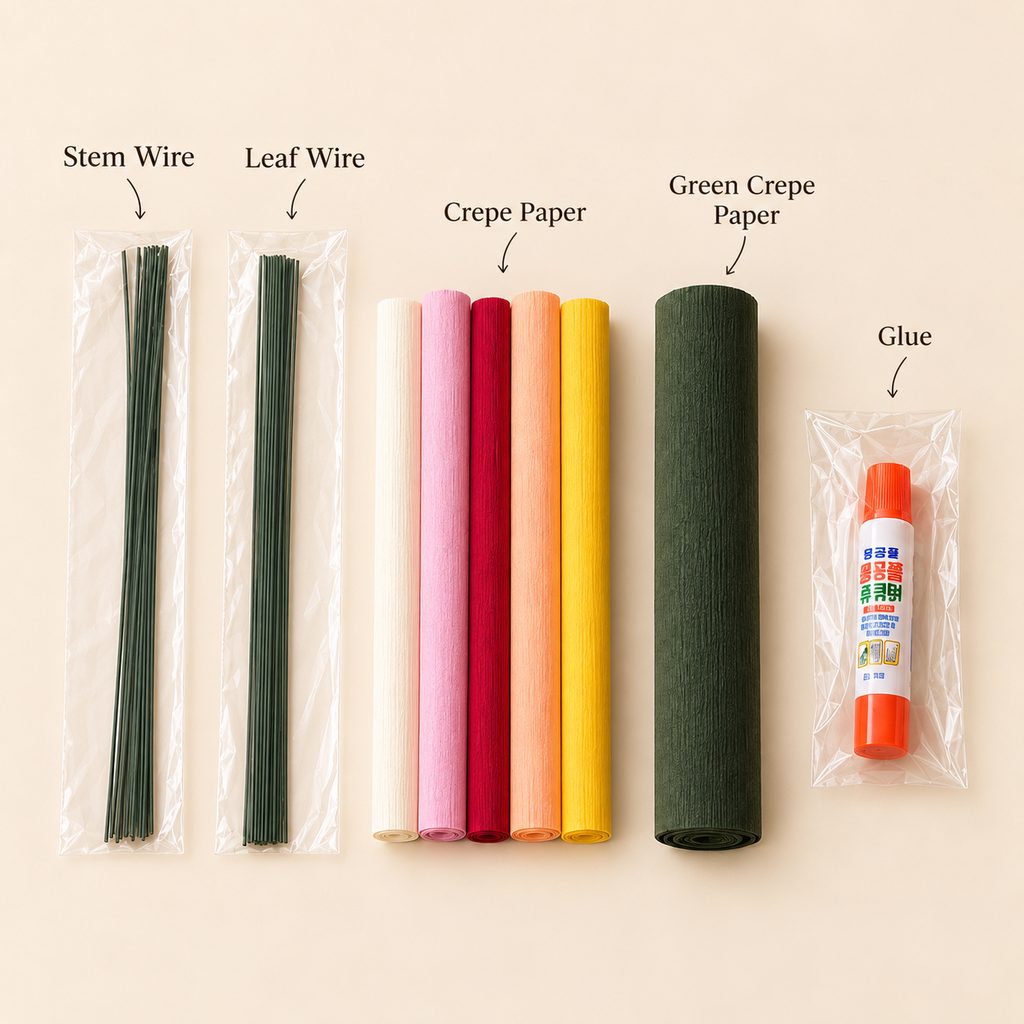
    Materials for making crepe paper zinnia flowers, including stem wire, leaf wire, colorful crepe paper, green crepe paper, and glue.

    Materials

    • Template
    • No. 18 green floral wire
    • No. 23 green floral wire
    • 90 gsm burgundy crepe paper
    • 90 gsm yellow crepe paper
    • 90 gsm dark green crepe paper
    • 90 gsm red crepe paper
    • 90 gsm ivory crepe paper
    • 90 gsm dusty pink crepe paper
    • 90 gsm peach crepe paper
    • PVA craft glue
    • Wooden skewer
    • Scissors
    • Hot glue gun
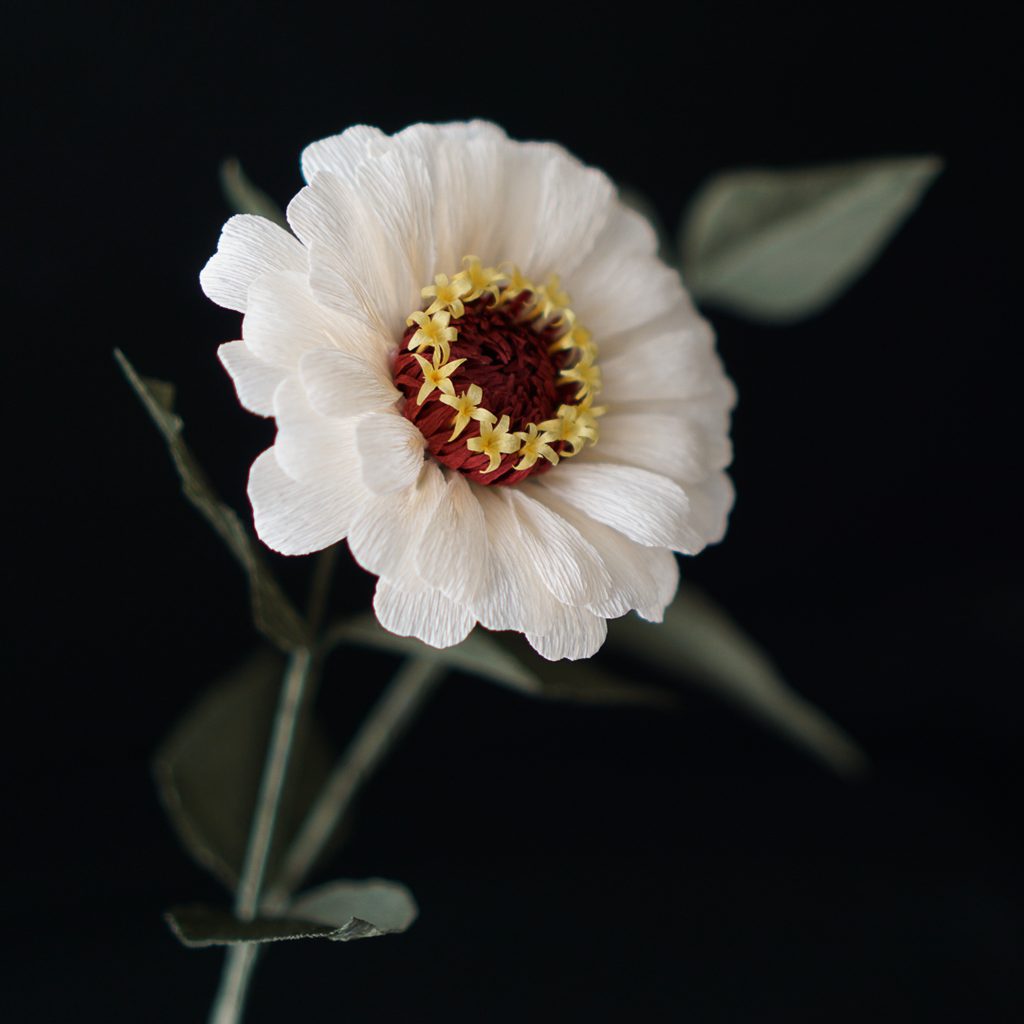
    Realistic handmade white crepe paper zinnia flower with a burgundy center and green leaves.

    How to Make Crepe Paper Zinnias 🌸 | Realistic DIY Paper Flowers | A Beautiful Paper Craft Hobby

    Zinnias may look a little difficult to make because of their unique flower centers, but they don’t actually require any special techniques. 🌸

    As you repeat the process of cutting petals in the same shape, trimming the flower center pieces, and attaching them one by one, you’ll gradually see a realistic zinnia come to life.

    And don’t worry if every petal doesn’t look exactly the same. Slight variations between the petals can actually make the finished flower look even more natural. 🙂

    For the petals, I used 90 gsm Italian crepe paper in several different colors.

    Real zinnias come in a wide variety of colors, so feel free to choose any colors you love. You can also make several flowers in different shades like I did. Even when you use the exact same pattern, changing the color can give each zinnia a completely different look.

    For the leaves, I personally think dark green works better than light green with zinnias.

    When it comes to PVA craft glue, I haven’t noticed a big difference between brands. The important thing is to use only a small amount. A little glue is usually enough to hold the paper securely, and using too much can cause the crepe paper to stretch, sag, or become discolored.

    Pink crepe paper zinnia flower showing the finished size, about 3 inches (8 cm) in diameter and 12 inches (30 cm) long.

    I based the size on real zinnia flowers, so it’s close to the size of the zinnias you’ll commonly see growing outdoors. :)😍

    How to Make Crepe Paper Zinnias

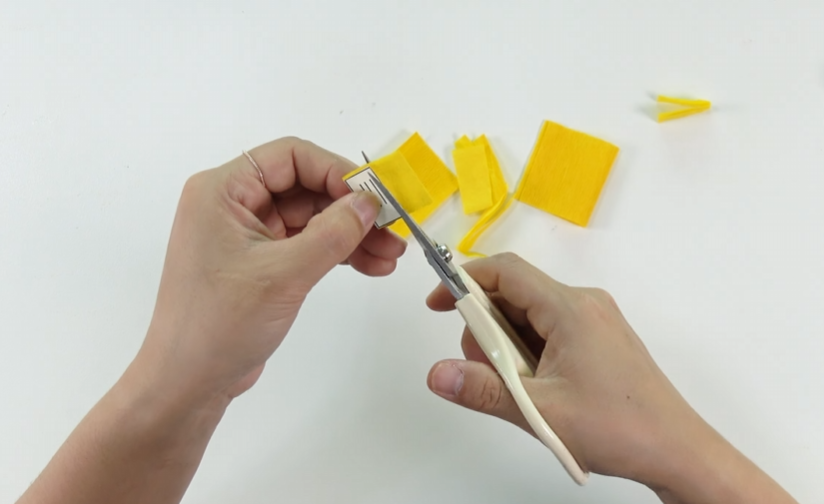
    Cutting yellow crepe paper pieces to make the center of a handmade crepe paper zinnia flower.

    STEP.1⬆️

    Stretch the yellow crepe paper, then cut it to match the small stamen template.

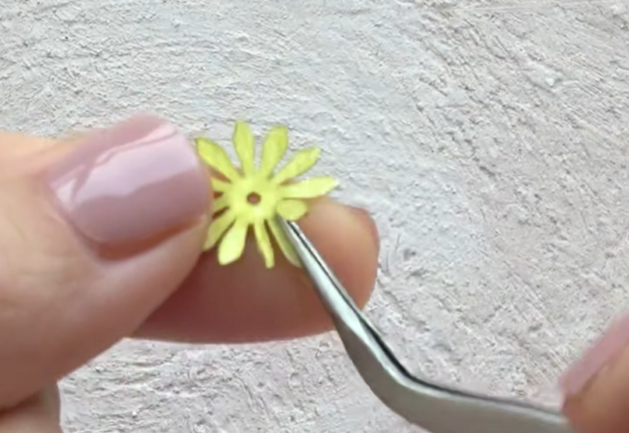
    Shaping a small yellow crepe paper flower center with a wooden skewer for a DIY zinnia.

    STEP.2⬆️

    Cut the tip into five small pointed sections, then use a thin wooden skewer to gently curl and shape them.

    Make about 10 pieces in the same way.😘

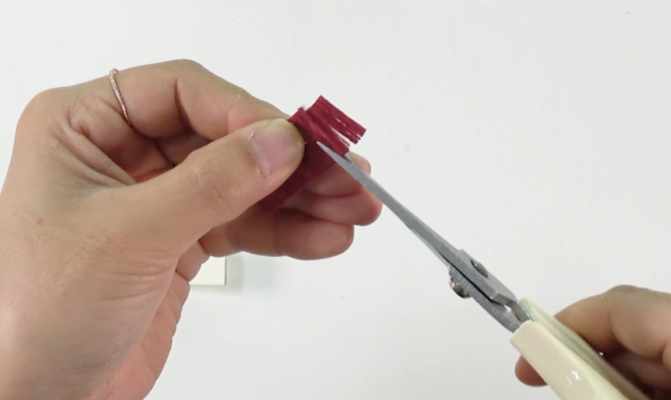
    Cutting burgundy crepe paper into fine fringes to make the center stamens of a handmade crepe paper zinnia.

    STEP.3⬆️

    Cut the burgundy crepe paper to match the long stamen template, then make thin fringe cuts, leaving about 5 mm uncut at the bottom.

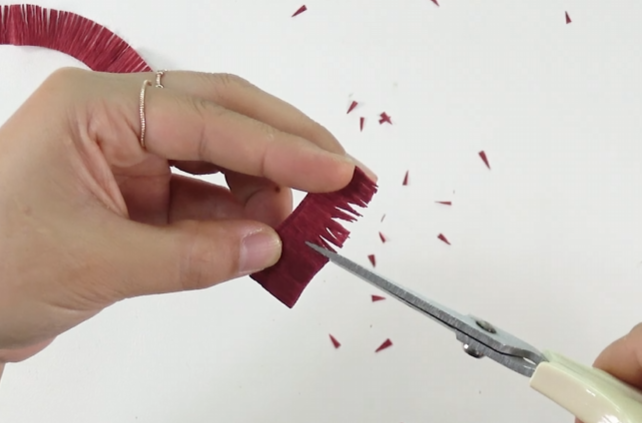
    Trimming burgundy crepe paper fringes into pointed tips for the center of a handmade crepe paper zinnia.

    STEP.4⬆️

    Cut the burgundy crepe paper to match the long stamen template, then leave about 5 mm uncut at the bottom and cut the upper part into thin, pointed fringes.

    Make 3 pieces in the same way.

    Wrapping burgundy fringed crepe paper around green floral wire with hot glue to form the center of a handmade crepe paper zinnia.

    STEP.5⬆️

    Wrap the finely cut stamen strip around No. 18 floral wire and glue it in place. Then attach 2 more pointed stamen pieces around it.

    Attaching small yellow crepe paper stamens around the burgundy center of a handmade crepe paper zinnia.

    STEP.6⬆️

    Attach the yellow stamens you prepared evenly around the edge of the burgundy center, using about 8 to 10 pieces.

    Completed burgundy and yellow crepe paper zinnia flower center attached to green floral wire.

    STEP.7⬆️

    Wrap and attach the last remaining burgundy pointed stamen piece around the center.😍

    Shaping a light pink crepe paper zinnia petal by gently stretching the center with both hands

    STEP.8⬆️

    Cut the crepe paper for the petals using the template. Gather the bottom part together with a small amount of PVA craft glue, then gently stretch the top part slightly with your fingers.

    Attaching light pink crepe paper petals around the center of a handmade zinnia flower.

    STEP.9⬆️

    Attach all 12 petals around the flower center you made earlier.

    Attaching additional light pink crepe paper petals around the center to build the layers of a handmade zinnia flower.

    STEP.10⬆️

    Make 24 Petal B pieces, cutting them slightly larger than the first petals, then attach them around the flower.

    Cutting dark green crepe paper into pointed leaf shapes for a handmade crepe paper zinnia.

    STEP.11⬆️

    Cut 2 pieces of green crepe paper using the sepal template, then gently round off the top edges.😊

    Attaching dark green crepe paper sepals to the base of a handmade pink crepe paper zinnia with hot glue.

    STEP.12⬆️

    Wrap and attach the 2 sepal pieces around the base of the flower you made.

    Gluing dark green crepe paper around floral wire to make the stem and leaves of a handmade crepe paper zinnia.

    STEP.13⬆️

    Cut 2 pieces of green crepe paper using the leaf template. Flip one piece over and place them so the grain of the crepe paper forms a V shape.

    Glue a piece of No. 23 floral wire along the edge of one half, then cover it with the other half of the leaf and glue them together.

    Finished handmade pink crepe paper zinnia flower with dark green leaves and a realistic floral stem.

    STEP.14⬆️

    Combine the stem, leaves, and flower together, and your crepe paper zinnia is complete! 🌸

    Eva’s Tip 🌸

    When attaching the petals, try not to place them one by one in the same direction. To keep the flower balanced, attach the first few petals at four evenly spaced points around the center. This gives you a good guide and makes the rest of the petals much easier to place.

    For the second layer, simply attach each petal between the petals from the first layer. This helps create a fuller and more natural shape. 🙂

    When gluing the leaves with PVA craft glue, be careful not to use too much. Too much glue can soak into the paper and cause discoloration. Apply only a small amount and press the pieces together firmly for a clean finish.

    After attaching all the petals, you may notice that one or two petals stick out a little too far. Don’t try to remove them. Instead, carefully trim the edges little by little to match the surrounding petals and balance the overall shape.

    Handmade crepe paper zinnia flowers in red, pink, peach, and white arranged in a vase with dark green leaves.

    Here is the crepe paper zinnia we finished today! 🌸

    Once your flowers are complete, try taking photos of them and sharing them regularly on social media. Over time, you’ll build your own little collection of creative memories, and looking back at your finished flowers can give you a wonderful sense of accomplishment and happiness. 🙂

    If you download the template, it really helps support my work and allows me to keep sharing more paper flower tutorials with you!

    And if gathering all the materials feels like too much work, I also have a Crepe Paper Zinnia Kit prepared for you. I’d be so happy if you checked it out. ^^

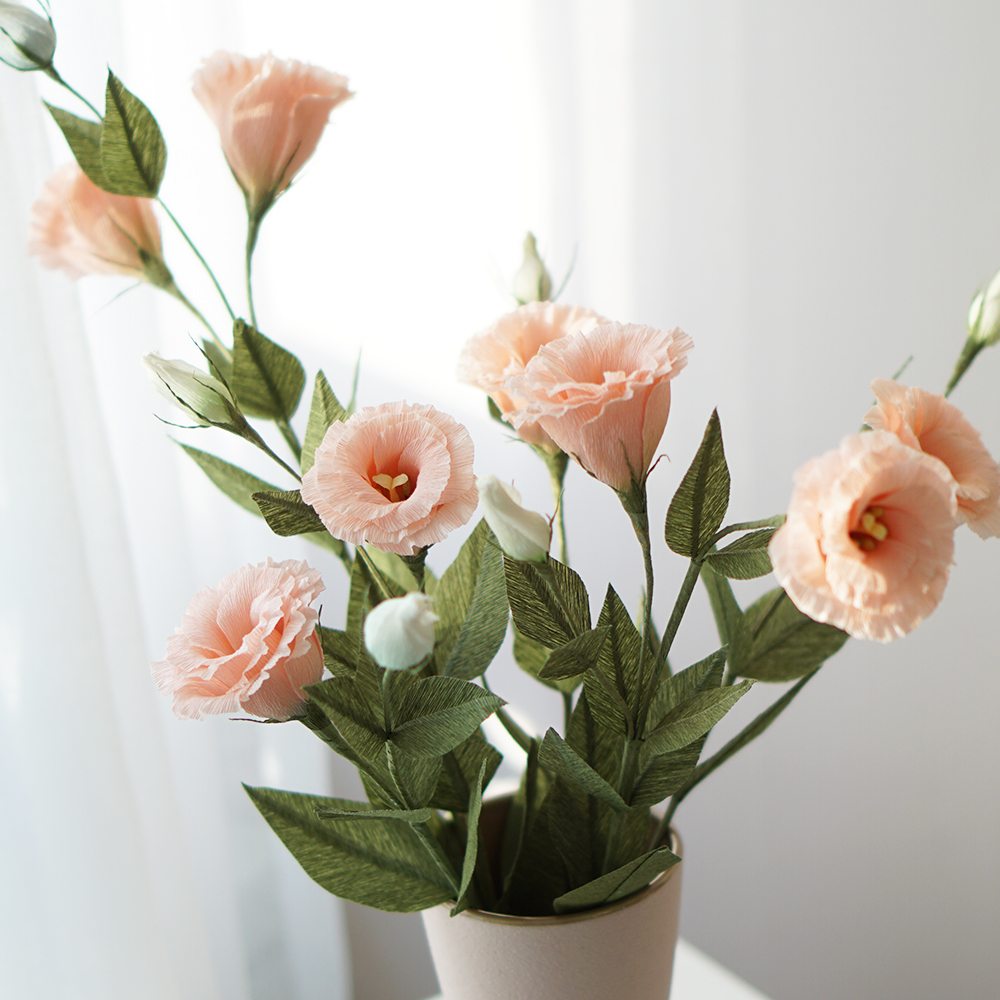
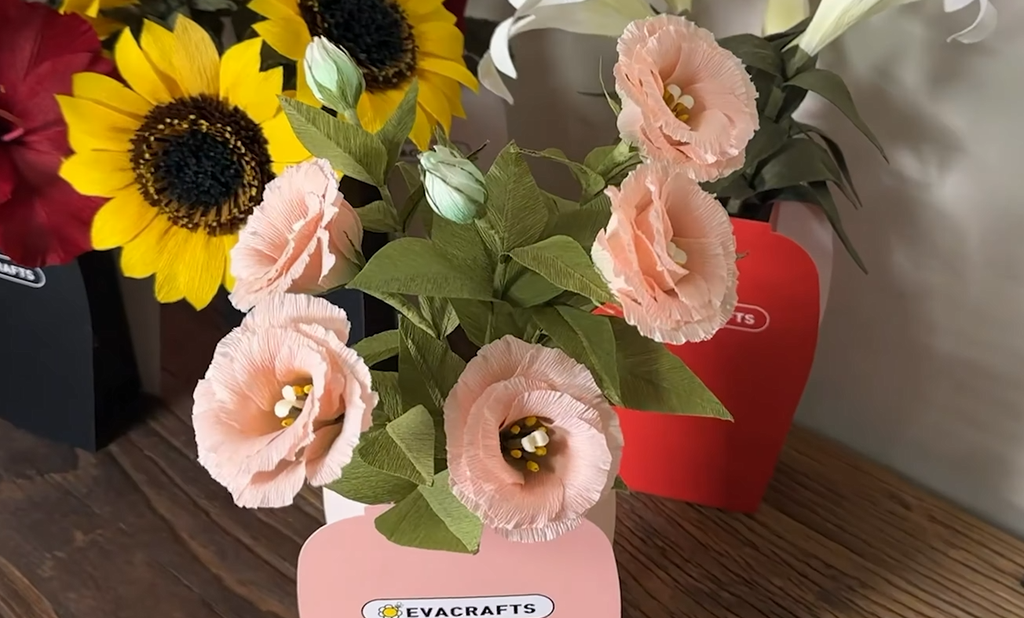
    Handmade peach pink crepe paper lisianthus flowers arranged in a vase

    Can You Believe These Lisianthus Flowers Are Made of Paper?

    Make realistic lisianthus flowers with crepe paper.

  • Easy Birthday Bouquet Tutorial – Just Roll and Make It! 🌸

    Easy Birthday Bouquet Tutorial – Just Roll and Make It! 🌸

    Hey, lovely bloom! Thanks for wandering into my little paper flower garden. 🌸

    Today, I’m going to show you how to make a beautiful rolled rose bouquet using a super simple technique—just roll the paper, and it turns into a rose!

    It may look a little difficult because the finished flowers look so detailed and beautiful, but don’t worry. From my experience teaching this project in real classes, I can confidently say that it’s easy enough for everyone—from children to older adults—to enjoy. 😊

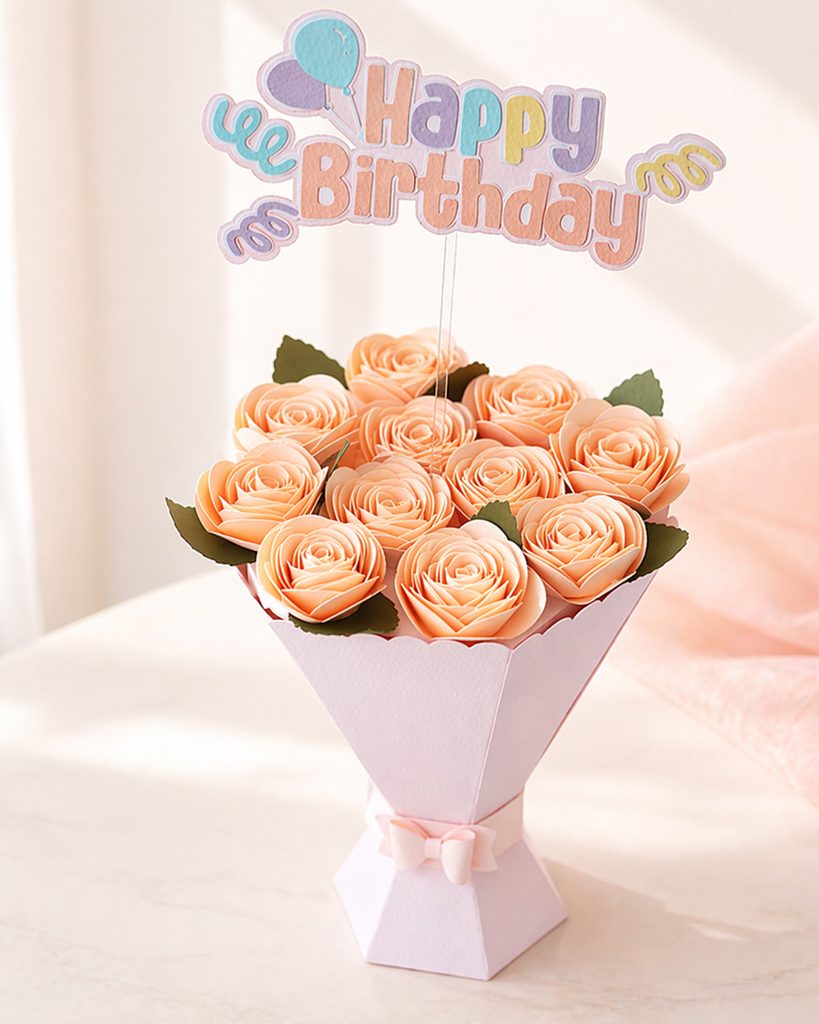
    Handmade peach paper rose birthday bouquet with Happy Birthday topper

    Difficulty: ★★☆☆☆
    Time Required: About 1–2 hours

    Here’s the birthday paper flower bouquet we’ll be making today using a simple rolled-paper technique. 🌸

    You can use any colors you like, but I recommend choosing different colors for the bouquet wrap and the flowers. That little contrast makes the whole arrangement stand out and look much prettier.

    I added a “Happy Birthday” topper to turn mine into a birthday gift, but you can customize it with any message you want.

    You can also leave out the topper completely and use the bouquet as a cute decorative piece for your desk or shelf.

    Materials and tools for making a rolled paper rose birthday bouquet, including spiral rose cutouts, bouquet base, leaves, topper, glue, and quilling tool

    Materials

    • 150–180 gsm peach-colored cardstock for the rose petals
    • 150–180 gsm pink cardstock for the bouquet base
    • 150–180 gsm green cardstock for the leaves
    • 150–180 gsm assorted colored cardstock for the lettering
    • Craft glue
    • Hot glue gun
    • Scissors
    • Clear acrylic topper stick
    • Thin wooden skewer
    • Paper quilling tool
    Rolled paper rose birthday bouquet measuring 13 cm wide and 17 cm tall with Happy Birthday topper

    Once finished, the bouquet is about 13 cm wide and 17 cm tall, so you can use these measurements as a size reference.

    It’s a cute, compact bouquet—not too big—so it makes a lovely gift for kids and is also the perfect size to display on a desk or shelf. 😊

    How to Make a Paper Flower Bouquet

    Rolling the end of a spiral paper rose cutout with a quilling tool to make a paper flower

    ⬆️STEP.1

    Start at one end of the wavy-cut paper strip and roll it up tightly.

    Hands shaping a pink paper flower petal during a DIY paper flower bouquet tutorial.

    ⬆️STEP.2

    Once you’re about halfway through, remove the paper-rolling tool and continue rolling it by hand.

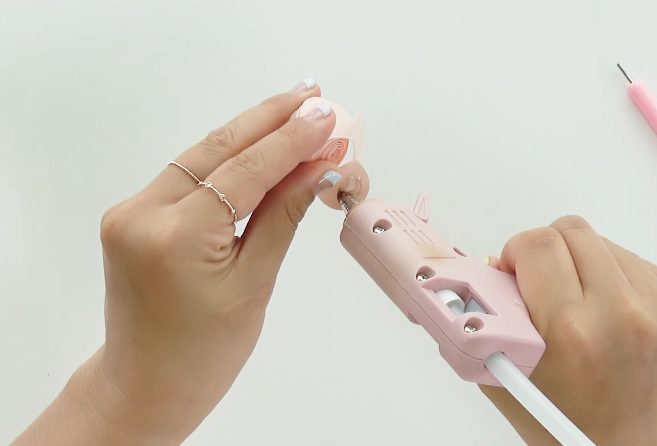
    Applying hot glue to the rolled center of a pink paper flower during a DIY paper flower bouquet tutorial.

    ⬆️STEP.3

    Apply hot glue or wood glue to the final circle and secure it in place.

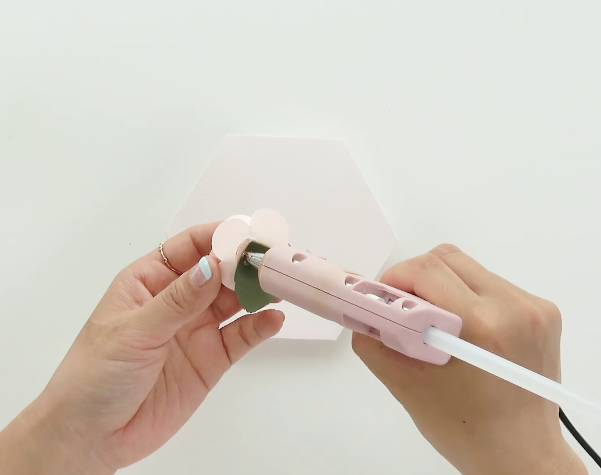
    Hands attaching green paper leaves to a flower stem while making a DIY paper flower bouquet.

    ⬆️STEP.4

    Hold each leaf with scissors and gently pull it through to shape it.

    Applying glue to the green paper leaf before attaching it to the flower bouquet base.

    ⬆️STEP.5

    Attach the flowers and leaves to the large hexagonal base.

    Using a hot glue gun to assemble the pink paper bouquet wrapper for a DIY flower bouquet.

    ⬆️STEP.6

    Cut six long pieces for the bouquet wrapper, then glue them together one by one.

    Securing the folded pink paper bouquet wrapper with hot glue during assembly.

    ⬆️STEP.7

    Attach the last piece to the first one to complete the bouquet wrapper.

    Attaching a small pink paper bow to the front of the bouquet wrapper.

    ⬆️STEP.8

    Attach the paper bow to the front.

    Gluing the finished pink paper flowers into the bouquet wrapper to complete the arrangement.

    ⬆️STEP.9

    Attach the hexagonal base with the flowers to the bouquet wrapper.

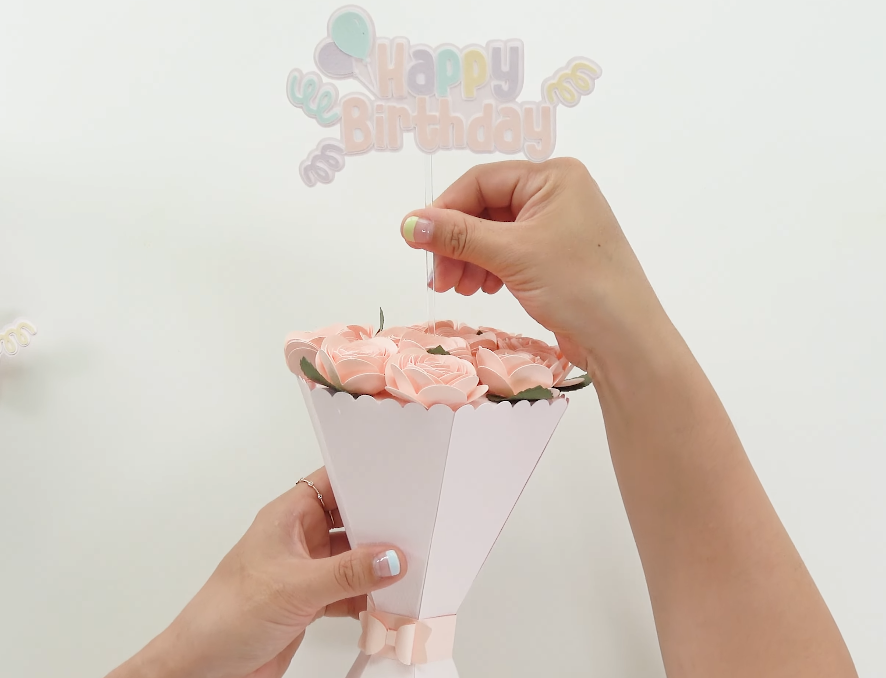
    Placing a colorful “Happy Birthday” topper into the finished pink paper flower bouquet.

    ⬆️STEP.10

    Insert the “Happy Birthday” topper to finish your bouquet.

    Finished pink paper flower bouquet with a pastel “Happy Birthday” topper on display.

    And you’re all done—congratulations! ^^😘

    Eva’s Tip

    Before securing the rolled paper rose with hot glue, relax your grip slightly and adjust the shape of the flower.

    If you roll it too tightly, the flower will look smaller and less natural. Keep your hands relaxed and let the petals open up a little as you shape it. ^^

    It’s also easier to attach the green leaves to the flowers first, and then place the finished flowers into the bouquet.

    If you notice any empty spaces after finishing the bouquet, gently spread out the outer petals of the roses with tweezers or a similar tool. This will make the flowers look fuller and more naturally bloomed. ^^

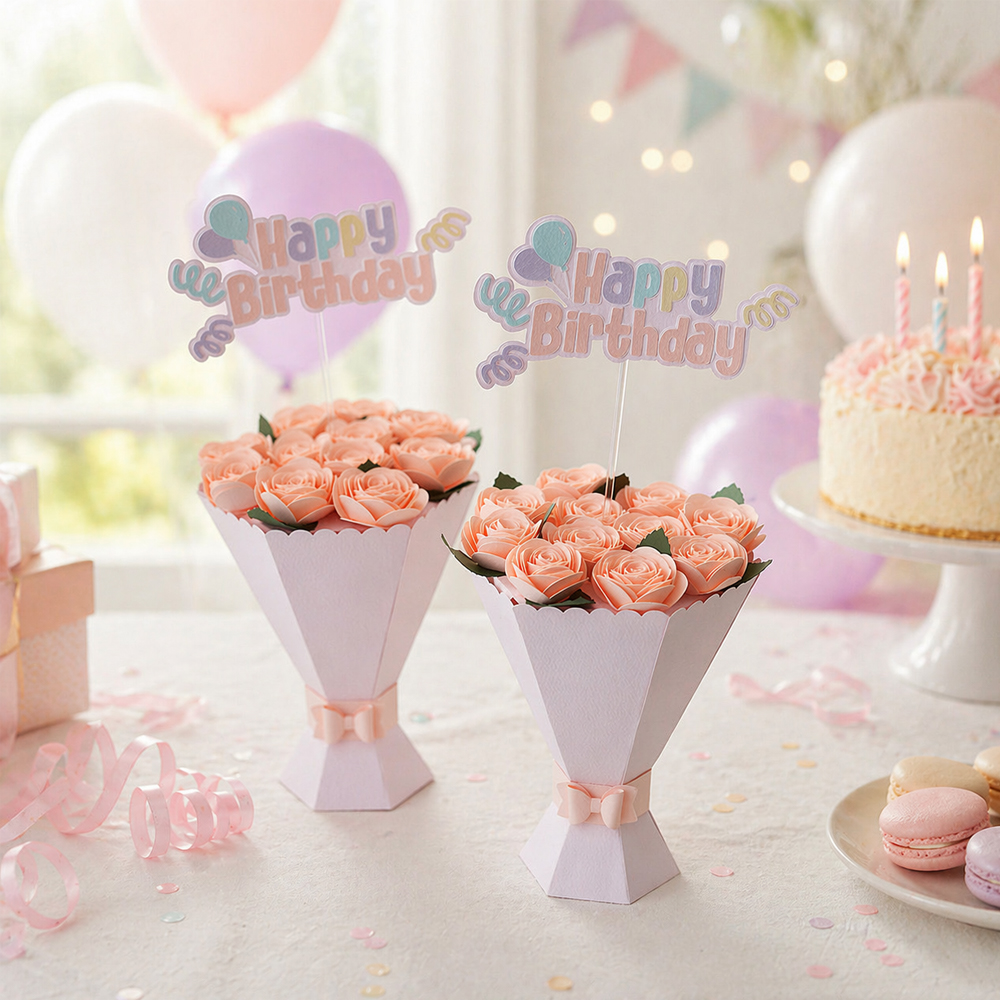
    Two finished pink paper flower bouquets with birthday toppers displayed on a decorated party table.

    Today, we made a rolled paper rose birthday bouquet that’s easy to create but looks colorful and special once it’s finished. ^^

    By changing the flower colors and the message on the topper, you can use this bouquet for many different occasions—not just birthdays, but also graduations, school entrance celebrations, anniversaries, Parents’ Day, and more.

    I hope you’ll try making your own version, too! ^^

    And if gathering all the materials feels like a hassle, there’s also a DIY kit that includes everything you need to make it all at once. ^^

    Pink rolled paper rose wall art frame displayed in a cozy room interior

    3D Paper Flower Wall Art: Romantic Rose Frame Decor

    Create a romantic 3D paper rose frame that adds a beautiful handmade touch to any space.

  • Can You Believe These Lisianthus Flowers Are Made of Paper?

    Can You Believe These Lisianthus Flowers Are Made of Paper?

    Hey, lovely bloom! Thanks for wandering into my little paper flower garden. 🌸

    Today, we’re going to make a soft and elegant lisianthus flower using crepe paper.

    These delicate flowers look so realistic and beautiful that they may seem a little difficult to make at first.

    But don’t worry! If you follow the EVA Crafts video tutorial and detailed step-by-step instructions, even beginners can create beautiful, realistic crepe paper lisianthus flowers with a polished finish.

    Handmade peach and white paper lisianthus flowers arranged in a vase
    • Template
    • Scissors
    • Hot glue gun
    • 18-gauge green floral wire
    • 23-gauge green floral wire
    • 90g peach pink crepe paper
    • 90g yellow crepe paper
    • 90g white crepe paper
    • 90g light green crepe paper
    • 2 cm styrofoam ball for flower buds
    • Green floral tape
    • Wood glue
    • Wooden skewer
    • Yellow pastel powder
    • Green pastel powder
    • Sponge

    Today’s flower is a bright and lovely peach-pink lisianthus. 🌸

    Lisianthus carries the beautiful meaning of “unchanging love.”
    When you make it as a paper flower that stays beautiful without wilting, the meaning feels even more special.

    That’s why handmade paper lisianthus can also make a thoughtful and meaningful gift. ^^

    For this project, I used 90g crepe paper to create the soft and delicate look of real lisianthus petals.

    I chose a peach-pink color, but white or purple would also look beautiful.
    Whichever color you choose, you can create a lovely and elegant crepe paper lisianthus flower with its own unique charm.

    To add detail to the bottom of the flower buds and the stamens, you’ll need a little pastel powder.

    If you don’t have pastel powder, don’t worry!
    You can simply scrape a regular soft pastel with a craft knife and use the powder instead. 🙂

    Cut 11 pieces of crepe paper for the petals using the template.
    Then, trim the top edge of each petal into a soft wavy shape.

    Apply green pastel to the bottom part of each petal.
    Then, use a thin wooden skewer to gently curl the top edge of the petal and shape it.

    Gently stretch the center of each petal by pressing it with your thumbs.
    Cut the pale yellow crepe paper using the pistil template, then cut only the top part in half.

    Round off only the top part with scissors.
    Then, use a hot glue gun to attach it to the floral stem wire.

    Curl the pistil by gently pulling it against the edge of the scissors.
    Then, bend the top of the 23-gauge floral wire into a small loop.

    Wrap the wire with green floral tape, then apply yellow pastel powder to the tips to create a pollen effect.
    Next, attach six stamens around one pistil and secure them together.

    Cut the green crepe paper using the calyx template, then twist the pointed sections to shape them.

    Next Cut two pieces of green crepe paper using the leaf template. Place them so that the grain forms a V shape, position a piece of 23-gauge floral wire along the edge, and glue the two pieces together.

    Insert an 18-gauge floral wire into the styrofoam ball for the flower bud.
    Then, apply green pastel to the bottom part of each bud petal.😘

    Attach 4 to 5 bud petals around the styrofoam ball, then twist both the top and bottom parts to shape the bud.
    After that, attach the calyx underneath.

    Attach five of the prepared petals.
    Then, arrange and glue the petals around the stamens.

    Attach six more petals in the same way.
    Then, combine the flower, bud, and leaves together to complete the stem.

    When adding green pastel to the petals and bud petals, apply it very lightly at first. If you need more color, build it up little by little.

    If you apply too much color from the beginning, you may have to remake the petals. ^^;;;

    Using too much wood glue can sometimes cause discoloration, so I recommend using a hot glue gun for most of the assembly.

    If you do use wood glue, use only a very small amount.

    Your beautiful lisianthus is now complete! 🌸

    It looks just like a fresh flower, but because it never wilts, you can enjoy it for a long time.

    Place it in your living room or bedroom, and every time you see it, you’ll feel proud of what you created. 🙂

    Even if this is your first time making paper flowers, take your time and follow the video and step-by-step instructions. You can do it! ✨

    Handmade peach pink crepe paper lisianthus flowers with green leaves arranged in a vase

    If you purchase the template, I’d be very grateful if you think of it as a small way of supporting my work. 💕

    And if it’s difficult to find all the materials, or you simply want to try making lisianthus just once, I also have a Lisianthus DIY Kit available.

    I really hope you’ll give it a try and enjoy making your own beautiful paper lisianthus. ^^ 🌸

    Thanks for stopping by my little paper flower garden, my lovely bloom. 🌼
    See you among the petals again!


    Handmade red crepe paper roses with realistic layered petals and green leaves

    How to Make a Realistic Crepe Paper Rose 🌹

    Create a beautiful handmade rose with realistic layered petals.

  • EVA CRAFTS Paper Flower Store at Hyundai Department Store: A Wonderful Customer Response

    EVA CRAFTS Paper Flower Store at Hyundai Department Store: A Wonderful Customer Response

    Hey, lovely bloom! Thanks for wandering into my little paper flower garden. 🌸

    This time, I’d like to share a very special moment for EVA CRAFTS.

    We opened an EVA CRAFTS paper flower store at Hyundai Department Store, filled with handmade paper flowers, giant floral decorations, DIY projects, and colorful displays.

    And thankfully, the response was even warmer than we expected. 🌼

    Many visitors stopped to look at the flowers, take a closer look at the handmade details, and join our paper flower DIY experience.

    Seeing children and adults sitting together and enjoying the process of making something with their own hands was especially meaningful to me.

    Customers enjoying a paper flower DIY workshop at the EVA CRAFTS store in Hyundai Department Store

    Giant Paper Flowers That Changed the Space 🌼

    One of the biggest attractions was our giant paper daisy display.

    Large white daisies with bright yellow centers completely changed the atmosphere of the space and could be seen from a distance.

    That’s one of the things I love most about giant paper flowers.

    You don’t need dozens of decorations to create an impact. Just a few oversized flowers can turn an ordinary retail space, event booth, photo zone, or exhibition area into something people want to stop and look at.

    For anyone planning a store display or event, giant paper flowers can be especially useful because they create a strong visual point without taking over the entire space.

    A Paper Flower DIY Experience for Everyone ✂️

    EVA CRAFTS paper flower store display with colorful handmade flowers at Hyundai Department Store

    We also prepared a space where visitors could experience making paper flowers themselves.

    What made me happiest was seeing people of different ages enjoying the activity together.

    Paper flower crafts don’t always have to be complicated.

    With the right materials and an easy design, even beginners can finish something beautiful and experience the satisfaction of making it themselves.

    For children, it can be a fun creative activity.

    For adults, it can be a relaxing break from everyday life.

    And for families, it becomes a small memory they can take home with them

    Seeing EVA CRAFTS in a Real Space 💛

    Giant white paper daisies decorating the EVA CRAFTS store at Hyundai Department Store

    I usually design and make paper flowers in my studio, so seeing EVA CRAFTS displayed in such a large physical space felt completely different.

    The yellow EVA CRAFTS wall, colorful flower arrangements, handmade products, and giant daisies all came together to create a bright and cheerful atmosphere.

    But the best part wasn’t the display itself.

    It was watching people stop, smile, touch the materials, ask questions, and become curious about paper flowers.

    That reaction reminded me why I started making flowers in the first place.

    A simple piece of paper can become something that changes the mood of a space and sometimes even gives someone the desire to make something with their own hands.

    The wonderful response at Hyundai Department Store gave me even more confidence to keep creating new flowers, DIY projects, and ideas for decorating spaces with paper.

    I hope EVA CRAFTS can continue to show just how beautiful and versatile paper flowers can be. 🌸

    Thanks for stopping by my little paper flower garden, my lovely bloom. 🌼 See you among the petals again!

    Large handmade paper flower display installed inside a Gucci store

    A Paper Flower Display We Created for Gucci

    Gucci x EVA Crafts Collaboration Display

  • 3D Paper Flower Wall Art: Romantic Rose Frame Decor

    3D Paper Flower Wall Art: Romantic Rose Frame Decor

    Hey, lovely bloom! Thanks for wandering into my little paper flower garden. 🌸

    Today, we’re going to make a beautiful 3D paper rose frame using simple strips of colored paper rolled into roses.

    This project is incredibly easy, so almost anyone can enjoy making it—even if you’ve never tried paper flowers before.

    The best part is that although the technique is simple, the finished piece looks surprisingly polished and decorative. If you’re just starting to become interested in paper flowers, I really recommend beginning with this project.

    You’ll be able to finish something beautiful without complicated techniques, and that little success might give you the confidence to try even more paper flower projects. 🌹

    Difficulty: ★☆☆☆☆
    Time: About 40 minutes
    Finished Size: Approximately A4 size

    Materials You’ll Need

    • 150–180 gsm colored cardstock in 4 colors — for the roses
    • 150–180 gsm green cardstock — for the leaves
    • Wood glue or a hot glue gun
    • Paper quilling tool
    • A4 cardstock — for the background
    • A4-size frame
    Wooden frame with pink, coral and cream 3D paper roses and a Korean love message

    Today’s Project: Rolled Paper Rose Frame 🌹

    This is the rolled paper rose frame we’re making today.

    I used several slightly different shades of pink to create a soft and romantic look.

    You can easily change the mood by choosing your own color family, such as blue, green, purple, or yellow.

    Using several shades of the same color gives the finished piece more depth and makes it look much more interesting than using just one color.

    For the roses, I recommend using 150–180 gsm colored cardstock.

    This weight is easy enough to roll by hand, but still firm enough to hold the shape of the flowers nicely.

    If you don’t have a paper quilling tool, don’t worry.

    You can simply hold the end of the paper with tweezers and roll it by hand.

    A hot glue gun will make the project much faster because the flowers stay in place almost immediately.

    If children are making this project, wood glue is a safer option and works well too.

    For the background, you can print a message like I did, or write your own message by hand.

    A handwritten note can make the frame feel much more personal, especially if you’re making it as a gift for someone special.

    I cut the flower and leaf shapes using a cutting machine such as Silhouette or Cricut.

    If you don’t have a cutting machine, you can still make this project by hand.

    Simply draw a circle about one-quarter the size of an A4 sheet, cut it into a loose spiral with slightly wavy edges, and roll it into a rose shape.

    The background paper and frame are both A4 size, approximately 21 × 29.7 cm (8.27 × 11.69 inches).

    It’s a practical size that’s easy to hang on a bedroom wall, door, or small decorating corner without taking up too much space.

    Because the flowers are made from paper, you can enjoy the floral look for a long time without watering, wilting, or replacing fresh flowers. 🌸

    STEP.1

    1. Prepare the paper flower piece and your rolling tool. Then, start rolling the paper from the outermost edge toward the center.

    STEP.2

    Keep rolling the paper. Once you’ve rolled about halfway, remove the rolling tool and continue rolling the rest by hand.

    STEP.3

    Once you’ve rolled the paper all the way to the end, gently loosen your grip and let the rose open up into shape.

    Then, apply hot glue to the final round tab and press it onto the bottom of the flower to secure it.

    STEP.4

    Gently open the outer petals and adjust them until you get the flower shape you like. For the leaves, hold the paper with scissors and gently pull it through to create a natural curl.

    STEP.5

    Attach the paper flowers to the background sheet. Then, place and glue the leaves in between the flowers to fill the gaps and create a fuller arrangement.

    Final Touches

    Your Rolled Paper Rose Frame Is Complete 🌹

    Eva’s Tip 🌹

    Try not to roll the paper too tightly.

    Leaving a little space between the layers helps the rose look softer and more natural.

    A hot glue gun is the fastest and easiest option because the flower stays in place almost immediately.

    If children are making this project and you’re using wood glue instead, hold each piece in place for about 30 seconds before letting go so it has enough time to stick securely.

    Before gluing all the flowers onto the background, arrange them first and check the overall balance.

    This simple step can help you avoid mistakes and makes it much easier to adjust the composition before everything is permanently attached.

    As you slowly roll the paper, an ordinary sheet of cardstock begins to turn into a rose with layer after layer of petals.

    That little transformation is one of the most satisfying parts of this project.

    And don’t worry if every flower comes out a little different.

    You don’t need to make all the roses exactly the same.

    In fact, mixing slightly different sizes and shapes often makes the finished arrangement look more natural, dimensional, and unique.

    That’s how your own special paper flower frame begins to come to life. 🌸

    Finished A4 paper flower frame with pink, coral and cream rolled paper roses and green leaves

    If making the full project feels a little difficult, or if you only need the template, I’ve also uploaded the design to my Etsy shop.

    And if you just want to try making it once without preparing all the materials yourself, there’s also a one-time DIY kit available.

    So don’t give up before you start. You can choose the option that feels easiest for you and still enjoy making your own paper flower frame. 🌸

    Thanks for stopping by my little paper flower garden, my lovely bloom. 🌼 See you among the petals again!

    Paper shamrock flower pot with small white flowers and a Good Luck topper

    How to Make a Realistic Crepe Paper Rose 🌹

    Create a charming paper shamrock flower pot with a cutting machine. This beginner-friendly project is perfect for home decor, gifts, or a little touch of good luck. 🍀

  • What Are These Giant Daisy Flowers? A Closer Look at Oversized Paper Flowers

    What Are These Giant Daisy Flowers? A Closer Look at Oversized Paper Flowers

    Hey, lovely bloom! Thanks for wandering into my little paper flower garden. 🌸

    Today, I’m going to show you how to make a giant paper daisy that can completely transform a space with just one flower.

    As you can see in the photos, the largest daisy measures about 60–65 cm (24–26 inches) across, and the overall height can be adjusted up to about 190 cm (75 inches).

    Because of its size, you might think a giant flower like this would be difficult or complicated to make.

    But don’t worry. 🌼
    With my free step-by-step video tutorial and instructions, even complete beginners can make one.

    You don’t need to be an experienced paper flower artist — just follow along, one step at a time.

    Woman arranging giant white paper daisy flowers with yellow centers indoo

    Giant Daisy Project Details

    Difficulty: ★★★☆☆
    Time Required: About 4–5 hours
    Finished Quantity: 3 Giant Daisy Flowers

    For beginners, it’s much easier to work on each part separately rather than trying to complete the flower and stem all at once.

    I recommend dividing the process into four parts: the flower heads, leaves, stems, and bases.
    This makes the project much easier to manage and helps the whole process feel less overwhelming, especially if it’s your first time making giant paper flowers

    Giant white paper daisy flowers displayed in a bright yellow retail space

    Here is the giant daisy arrangement we’re making today. 🌼

    This piece features three daisies in different sizes, arranged at different heights to create a more dimensional and natural look.

    The combination of white petals and bright yellow centers gives the flowers a fresh, cheerful atmosphere, making them perfect for a wide variety of spaces.

    You can use them for cafés, studios, shops, event venues, exhibitions, weddings, photo zones, and many other decorative settings.

    Materials and Structure

    For the giant daisy petals, I use two sheets of 90 gsm Italian crepe paper, bonded together with double-sided tape.

    This technique helps preserve the soft and delicate look of daisy petals while giving them extra strength and stability.

    For the leaves, I use a slightly heavier 140–180 gsm crepe paper, so they can hold their shape more firmly than the petals.

    For the stems, I use flexible tubing.

    Because the stems can be bent and shaped, you can easily adjust the height and angle of each flower. I then wrap the tubing with crepe paper to give the stems a more natural finish.

    Finished Flower Sizes

    The finished flower diameters are approximately:

    • Large Daisy: 60–65 cm (24–26 in)
    • Medium Daisy: 55–60 cm (22–24 in)
    • Small Daisy: 45–50 cm (18–20 in)

    Since the stems are made with flexible tubing, the flowers can be displayed lower or taller depending on how you bend them.

    This makes the arrangement especially useful when you want to customize the height and overall composition to suit different spaces.

    Materials for making giant paper daisies including crepe paper, floral wire, wooden dowels, flexible pipes, gravel, and a wooden base

    Materials

    -Petal and leaf templates
    -90 gsm white crepe paper
    -140 gsm green crepe paper
    -90 gsm yellow crepe paper
    -Double-sided tape
    -Hot glue gun
    -Scissors
    -Binder clips
    -23-gauge white floral wire
    -18-gauge green floral wire
    -8 mm wooden dowel
    -Flexible pipe
    -Gravel
    -Base

    How to Make the Center of a Giant Daisy

    Step 1

    Attach double-sided tape to the yellow crepe paper for the daisy center, then fold the paper over and press it firmly together.

    Next, cut the folded paper into thin fringes about 2–3 mm wide.
    Be careful not to cut all the way through—leave the bottom edge connected.

    Step 2

    Twist each of the thin fringe strands gently with your fingers.

    Next, wrap the prepared fringe around a wooden stick, securing it in place little by little with a hot glue gun.

    Step 3

    Once all the fringe has been attached, gently spread and fluff it out with your palms to shape the daisy center.

    Then apply a generous amount of hot glue to the bottom of the center to secure everything firmly in place.

    How to Make Giant Daisy Petals

    Step 4

    Apply double-sided tape to one half of the white crepe paper for Petal A.

    Next, place three strands of white 23-gauge floral wire on top of the double-sided tape, then secure them firmly with hot glue.

    Step 5

    Fold the remaining half of the white crepe paper over and press it firmly into place.

    Next, align the grain direction of the crepe paper with the petal template, then cut out the petal shape.

    Step 6

    Apply hot glue only to the bottom of the petal, then pinch and gather the base together to secure the shape.

    Repeat the same process until you have 12 petals in total.

    Twelve white crepe paper petals prepared for a giant daisy flower

    Step 7

    For Petal B, make 12 petals in the same way, but do not gather or pinch the bottom of the petals.

    Step 8

    Attach Petal A to the daisy center first, spacing the petals evenly for a balanced shape.

    After all 12 Petal A petals are attached, gently spread them out, then attach the Petal B petals in between them.

    Step 9

    Cut a strip of white crepe paper, then wrap it around the flower stem/base and secure it in place.

    Step 10

    Wrap and attach the sepal around the bottom of the flower.

    Step 11

    cut the crepe paper for the leaves diagonally in half. Flip one half over, then place the two pieces together so the crepe paper grain forms a V shape.

    Place a piece of floral wire between the two layers and glue them together securely.

    Next, place the leaf template on the prepared crepe paper and cut along the shape

    Step 12

    Stretch the green crepe paper slightly, then wrap it around the pipe.

    Step 13

    Cut the green crepe paper for the grass into pointed shapes.

    Then hold each piece at the base and gently pull it with scissors to create a natural curl.

    Next, wrap and attach the grass pieces around the lower part of the stem.

    Woman assembling three finished giant white paper daisy flowers with yellow centers

    Final Step

    Insert the flower head and leaves into the stem, and your giant daisy is complete! 🌼

    Tips for a More Balanced Giant Daisy

    When bonding two layers of crepe paper together for the petals, press and rub the surface carefully so the two layers stick together evenly.

    When attaching all 12 petals, try not to glue them one by one in the same direction. This can easily make the flower look uneven or heavier on one side.

    Instead, attach the first four petals at the top, bottom, left, and right to create guide points. Then fill in the spaces between them with the remaining petals.

    This simple method makes it much easier to keep the flower balanced and evenly shaped. 🌼

    If you finish attaching the petals and notice that the flower is leaning too much to one side, don’t worry.

    Gently place the tip of the hot glue gun against the glued area for a few seconds. The hardened glue will soften again, allowing you to remove and reposition the petal without tearing the paper.

    A Giant Flower That Brightens the Whole Space

    Our giant daisy flowers were also displayed at the EVACRAFTS pop-up store at Hyundai Department Store, where many visitors stopped to take photos with them. 🌼

    The arrangement combines three different flower sizes — large, medium, and small — at different heights and angles, creating a full and lively look from every direction.

    The white petals instantly brighten a space while blending naturally with many different interior colors and styles.

    They work beautifully at café or shop entrances, event venues, photo zones, and photography studios.

    You can also use them as oversized decorations for special occasions such as birthday parties, first-birthday celebrations, weddings, exhibitions, and other events.

    If gathering all the materials separately feels like too much work, you can also use a complete DIY kit that includes the materials you need. 😊

    Thanks for stopping by my little paper flower garden, my lovely bloom. 🌼 See you among the petals again!

  • How to Make a Crepe Paper Rose That Actually Looks Real — Even for Beginners

    How to Make a Crepe Paper Rose That Actually Looks Real — Even for Beginners

    Hey, lovely bloom! Thanks for wandering into my little paper flower garden. 🌸

    Today, I’m sharing a detailed step-by-step guide on how to make a realistic crepe paper rose using Italian crepe paper.

    Roses are one of the most familiar and loved flowers, which makes them a perfect project for learning the basics of crepe paper flower making.

    If you’re completely new to making paper flowers, a rose may look difficult at first. But with the free video tutorial and the detailed tips in this post, you’ll be able to follow the process at your own pace and create a beautiful rose — even as a beginner.

    And here’s one thing that makes this project much easier: your petals do not need to be perfect or identical.

    So don’t worry if every petal comes out a little differently. In fact, those small differences in shape and curve are what can make your finished crepe paper rose look softer, more natural, and more like a real flower. 🌹

    Realistic handmade crepe paper rose made with Italian crepe paper

    Crepe Paper Rose DIY

    Difficulty: ★★☆☆☆
    Time Required: About 60 minutes

    .

    Materials You’ll Need

    Here are the exact materials I used to make this crepe paper rose, so you can prepare everything before you start.

    • Rose petal template
    • 23-gauge green floral wire
    • 18-gauge green floral wire
    • Red 90 gsm crepe paper
    • Green 90 gsm crepe paper
    • Styrofoam form for the rosebud
    • Wood glue
    • Thin wooden skewer
    • Scissors
    • Hot glue gun

    Having all your materials ready before you begin will make the process much easier and help you follow the tutorial without stopping along the way.

    Crepe paper rose materials including Italian crepe paper, floral wire, Styrofoam buds, wood glue, and a wooden stick

    This is the realistic crepe paper rose we’ll be making today. 🌹

    Why Crepe Paper Makes a More Realistic Rose

    One of the biggest advantages of crepe paper flower making is that the paper can be stretched, curved, and shaped by hand. This makes it much easier to create the soft, natural curves of real rose petals than with regular colored paper.

    The fine grain and texture of crepe paper also resemble the delicate veins you see on real flower petals, helping your finished crepe paper rose look more realistic and lifelike.

    For this rose, I used 90 gsm Italian crepe paper.

    The weight of crepe paper can make a big difference in how a flower looks and feels. Choosing the right paper weight for each type of flower helps the petals hold their shape while still looking soft and natural, which can significantly improve the overall finish of your paper flower.

    If possible, I recommend using Italian crepe paper. I’ve tested many different types of crepe paper, and I personally find Italian paper works best for realistic flowers because of its rich colors, fine texture, stretch, and balanced thickness.

    For the main flower stem, I recommend using 18-gauge floral wire. It provides enough strength to support the rose while still looking well balanced with the size of the flower.

    For the leaves, 23-gauge green floral wire works better because it is thinner and helps the leaves look more delicate and natural instead of stiff or bulky.

    The finished rose size may vary slightly depending on how you shape your petals, but the rose shown in this tutorial is approximately:

    Flower diameter: 9 cm / 3.5 in
    Overall length: 30 cm / 11.8 in

    Inserting 18-gauge floral wire into a rosebud foam for a crepe paper rose

    1. Insert the 18-gauge floral wire into the rosebud foam.

    Wrapping a Styrofoam rosebud with crepe paper for a realistic paper rose

    2. Cut a small piece of crepe paper and wrap it around the Styrofoam to cover it completely.

    Cutting crepe paper petals using a rose template

    3. Cut the crepe paper following the template.

    Wrapping the entire rosebud foam with crepe paper for a realistic crepe paper rose

    4. Wrap the entire rosebud foam with crepe paper.

    Shaping the top edge of a crepe paper rose petal with a wooden skewer

    5. Use a thin wooden skewer to gently curl and shape the top edge of each petal.

    Stretching the center of a crepe paper rose petal with thumbs to create a natural curved shape

    6. Gently press and stretch the center of each petal with your thumbs to create a natural curved shape.

    Layering and gluing crepe paper rose petals to build a realistic flower

    7. Layer and glue the petals one by one to gradually build the rose.

    Cutting green crepe paper using a rose sepal template

    8. Cut the green crepe paper using the sepal template.

    Attaching the green crepe paper sepal around the base of a crepe paper rose with hot glue

    9. Use a hot glue gun to attach the sepal around the base of the flower.

    Gluing two green crepe paper leaf pieces around floral wire with the grain aligned in a V shape

    10. Cut the green crepe paper using the leaf template. Place two leaf pieces facing each other, insert the floral wire between them, and glue them together so the crepe paper grain forms a V shape.

    Cutting the edges of a green crepe paper rose leaf into a serrated shape

    11. Trim the edges of each leaf into a fine serrated shape.

    Attaching green crepe paper leaves to the stem of a handmade crepe paper rose

    12. Attach the leaves to the flower stem to complete the rose.

    Eva’s Tip

    The height and spacing of the petals are very important when shaping your rose. Try not to attach the petals at dramatically different heights. Keeping them relatively even will help your finished crepe paper rose look fuller and more balanced.

    When cutting the crepe paper, make sure the direction of the paper grain matches the direction shown on the template. This is important because the grain controls how the paper stretches and curves when you shape each petal.

    If it’s difficult to hold the template and crepe paper firmly while cutting, try securing them together with a small clip. This can make cutting easier and help you get cleaner, more consistent petal shapes.

    And don’t worry if you accidentally leave too much space between the petals!

    You can gently stretch the petals on both sides to make them slightly wider. This helps fill the gap and usually looks much more natural than leaving a large empty space between the petals. 🌹

    Finished handmade crepe paper rose with realistic petals and green leaves

    Your Crepe Paper Rose Is Complete 🌹

    Your crepe paper rose is now complete!

    Don’t worry if every petal looks a little different. Once the petals are layered together, those small differences actually help create a fuller, softer, and more natural-looking rose.

    A single rose can be wrapped simply and given as a thoughtful handmade gift, while two or three roses look beautiful arranged together in a vase as long-lasting home decor.

    Unlike fresh flowers, crepe paper roses won’t wilt, so you can enjoy them for a long time. And because you made them yourself, they carry a personal touch that makes them even more meaningful.

    If you remember just two things — the direction of the crepe paper grain and the order in which you attach the petals — even a beginner can successfully make a beautiful paper rose.

    If you’d like to try making just one rose without gathering all the materials separately, I also have a ready-to-make crepe paper rose kit with the materials prepared for you. ^^

    Thanks for stopping by my little paper flower garden, my lovely bloom. 🌼 See you among the petals again!